Sinterit Lisa printer SHORTENED USER GUIDE | 7
IMPORTANT!
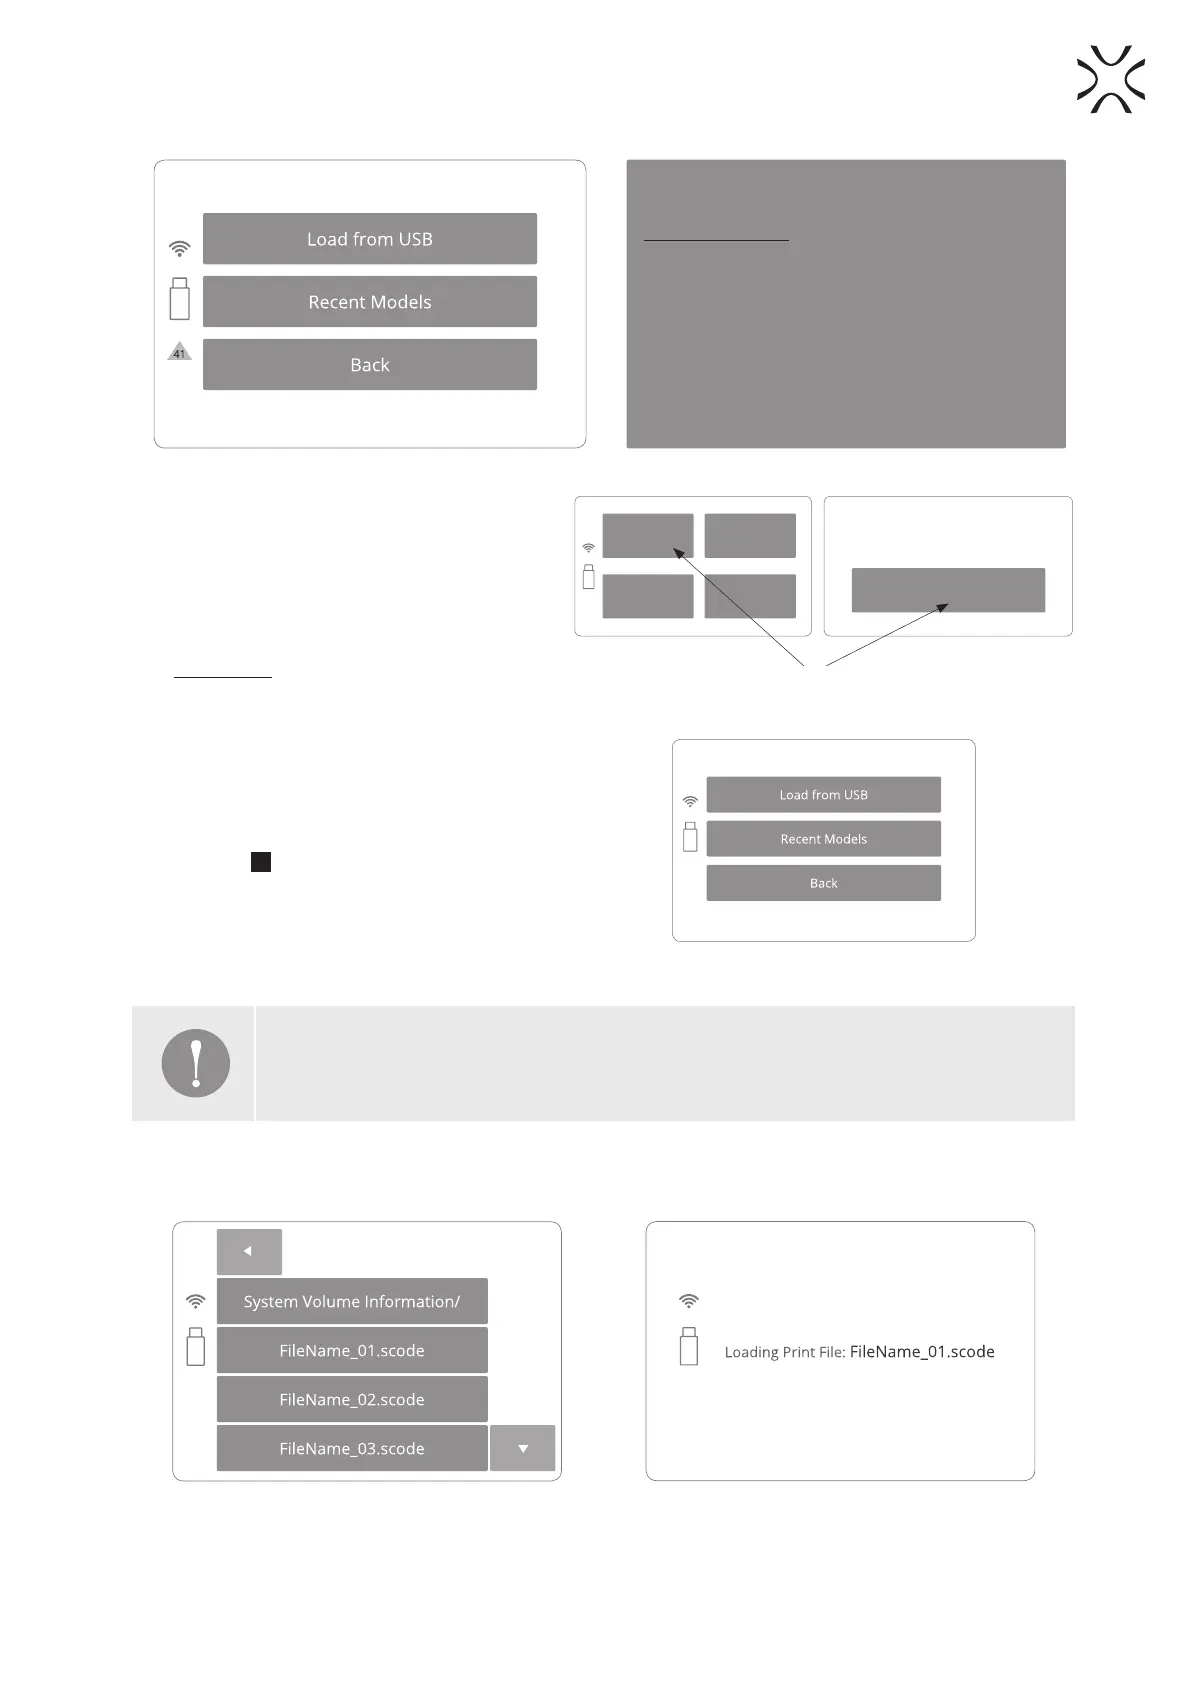
A yellow triangle displayed on the side of the
screen informs about a malfunction.
Please contact the Support Team (section 7, page
15) by referring to the code displayed inside the
warning triangle and providing the serial number
of the device.
3. Printing – STANDARD MODE
1. To start, click the “START NEW PRINT” button
on the LCD screen.
2. Press “UNLOCK LID” button to open the printer
Lid (Image 13).
Remember: The Lid’s electrolock deactivates
for 10 seconds. After this time, it will re-
activate).
3. Softly press the Lid and then lift it.
4. Load the le to print:
a. save the le (*.scode) prepared using the
Sinterit STUDIO to a USB Flash Drive.
b. Connect the storage to the printer’s USB
port
10
, with its power turned on.
5. After connecting the Flash Drive into a USB
port, “LOAD FROM USB” section will be
displayed and a Flash Drive icon will appear on
the left side of sections (Image 14).
Advanced mode
Start new print
About
Clean print
UNLOCK LID
Printer lid has to be opened to operate the printer.
Unlock and open the lid.
0.0°C
CLICK
Image 13. Open Printer Lid.
Image 14. A screen showing a USB connection to the printer.
IMPORTANT!
After uploading the model to the printer’s internal storage, printed projects can be chosen
from “RECENT MODELS”.
6. Titles of project les will be displayed. Arrows will help to navigate through folders and les (Image 15).
7. After choosing a le, it will be loaded into the device’s memory.
Image 15. Loading the print le screens.