16
ASSEMBLY INSTRUCTIONS….cont
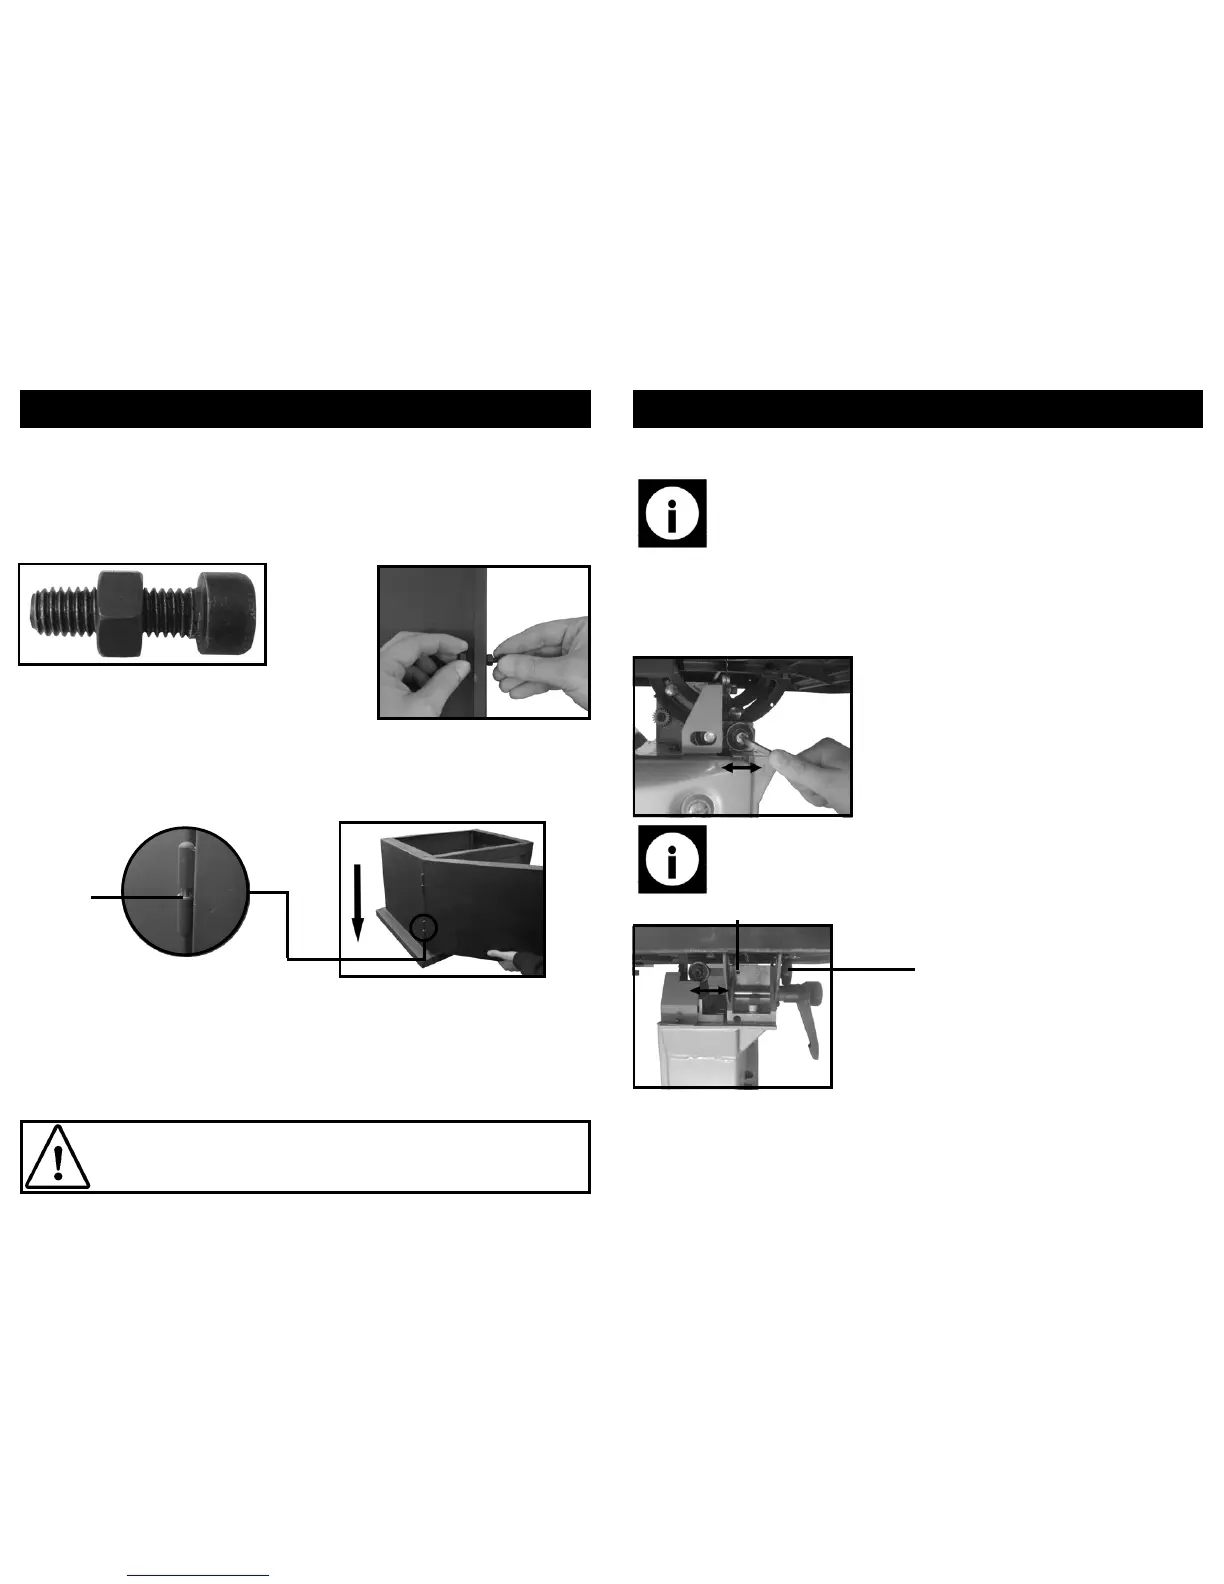
Fitting the locking bolt to the door:
• Screw 1 x M6 nut approximately half way up the M6 x 20 Allen bolt.
• Fit it into the hole on the right hand edge of the door, ensuring that the head of
the bolt faces outward.
• Turn a second M6 nut onto the bolt to hold it in place.
• Fully secure by tightening the nuts against each other.
Fitting the door:
• Line up the female section of the hinges (on the door) with the male section (on
the left hand panel), ensuring that the bushes are fitted between.
• Allow the door to fully slide down on to the hinges, gravity will keep it in place.
Caution: Due to the weight of the main saw and other factors, this opera-
tion would ideally be carried out by at least 2 persons to reduce the risk of
personal injury and / or damage to the machine.
Bush
Fitting the saw onto the cabinet stand:
• Sit the saw on top of the cabinet stand, ensuring that the 4 holes on the corners
of the saw and stand line up.
• Fit 4 x M8 x 50 bolts through the holes and secure with 4 x 8 mm nuts and
washers.
• Fully tighten the nuts / bolts.
25
OPERATING INSTRUCTIONS….cont
• With the power supply still disconnected rotate the blade wheel by hand ensur-
ing that the blade does not catch on the guides, re-set as necessary.
Note: When using narrow blades, the rear blade support bearings need to
be in contact with the blade.
Lower guide:
• Loosen (don’t remove) the bearing support screw (B).
• Slide the bearing left / right until it is in the correct position.
• Re-tighten the bearing support screws.
Note: The red bearing cover has been removed for photographic pur-
poses, it does not need to be removed to adjust the bearing.
• Loosen the locking grub screw.
• Turn the rear bearing adjustment knob until the rear bearing is in position.
• Tighten the grub screw to secure the bearing in-place.
• rotate the blade wheel by hand ensuring that the blade does not catch on the
guides, re-set as necessary.
Grub screw
Rear bearing adjustment knob