11
6. Maintenance
Recognizing Worn Plastic Slides
After extended use, the Plastic Slides on the Side Rails may show signs of wear.
All four Plastic Slides should be replaced at the same time to ensure even wear in
the future.
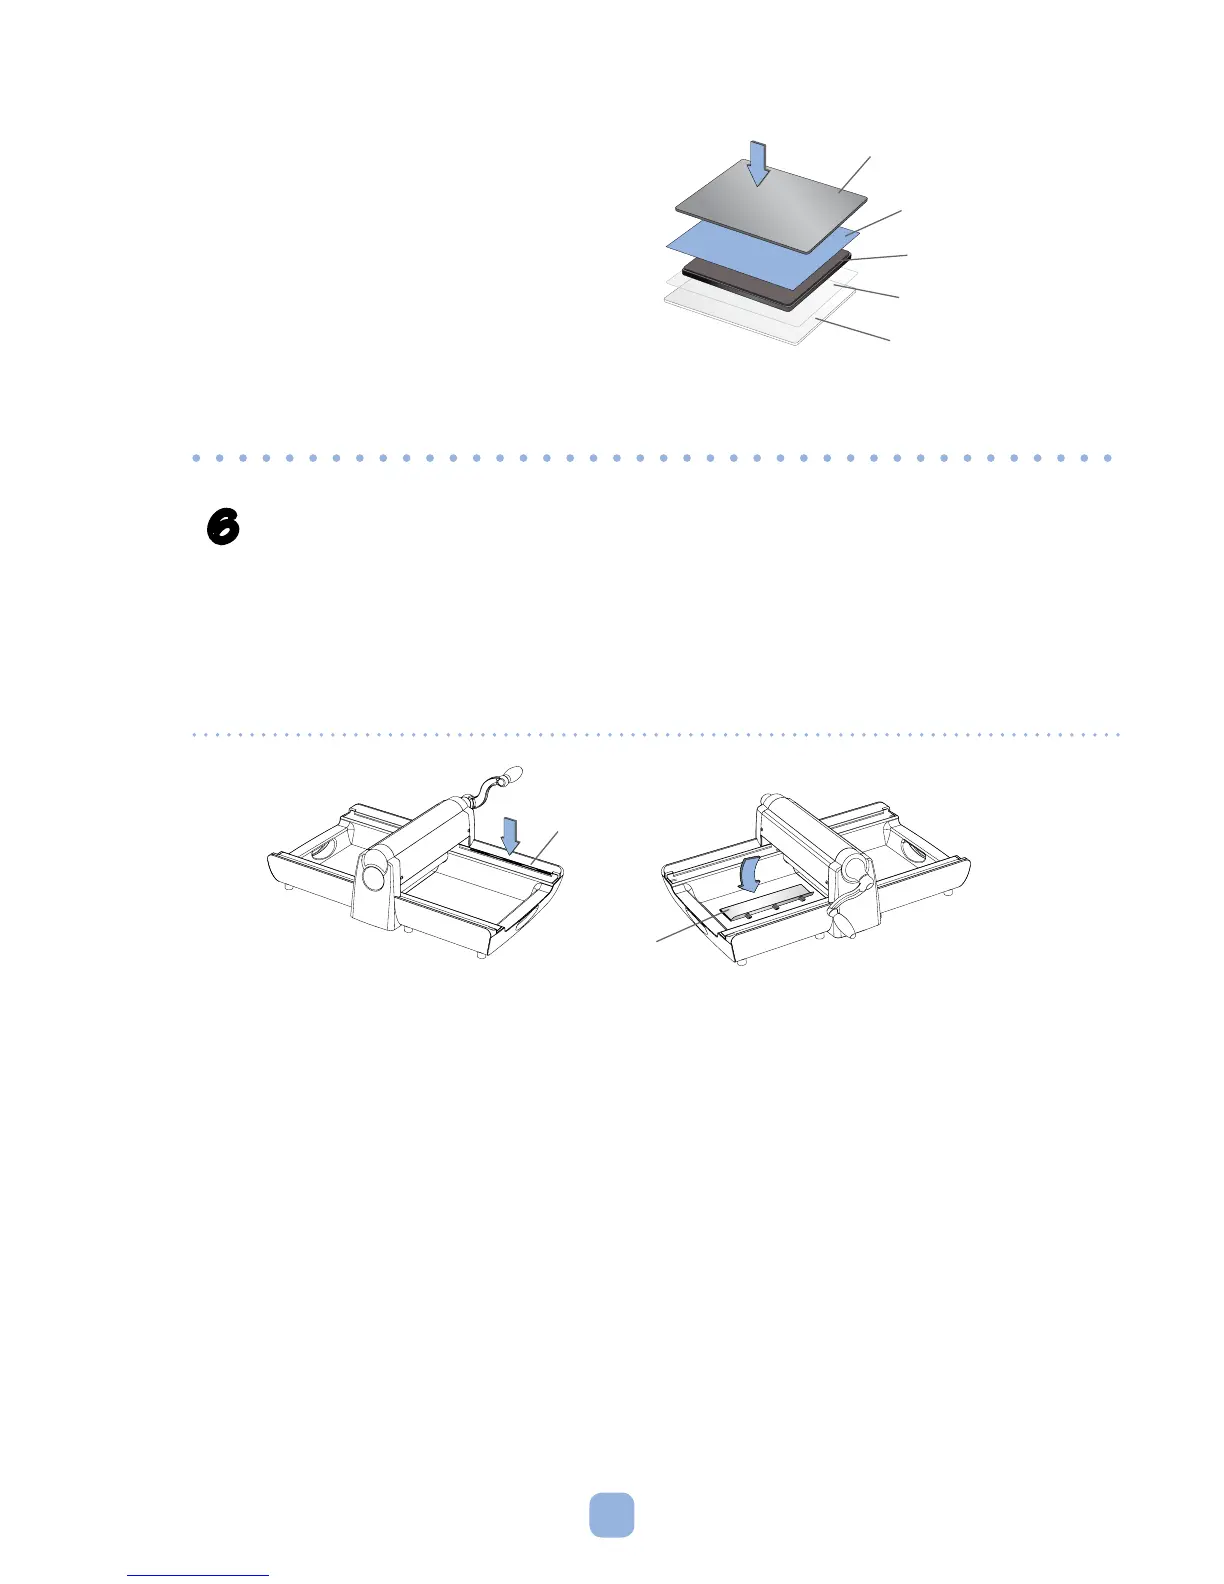
Figure K Figure L
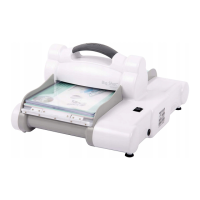
• Ifdiedoesnotcompletelycutthrough
material, add a Mylar Shim directly
below die (see Figure J) to increase
cutting pressure on material. Two Mylar
Shims are provided with the Machine.
Add one Shim to the sandwich first,
and if die still does not cut through
material, use another Shim.
Figure J
Paper
Die
Cutting Pad
Premium Crease Pad
Mylar Shim
Side Rail
Plastic Slide
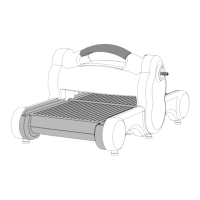
Replacing Plastic Slides
• RemovethewornPlasticSlidewithathinputtyknifeorartist'sspatula.Gently
pry the Slide away from the Side Rail, popping the Slide out of the three holes
in the Side Rail.
• Use a damp cloth moistened with rubbing alcohol to wipe the rails where the
new Slides will be inserted (Figure K). The surface beneath the Slide must be
completely free of debris or residue that would prevent the Slide from lying flat
on the Side Rail.
• Remove adhesive paper backing from Slide. Line up the three pegs on the Slide
with the three holes in the Side Rail and gently press the pegs into the holes
(Figure L). Once the pegs are nearly all the way into position in the holes, press
down and in on the flat upper surface of the Plastic Slide. The Slide should snap
into its final position. Follow the same steps for each of the remaining Plastic Slides.
 Loading...