17
Live Streaming
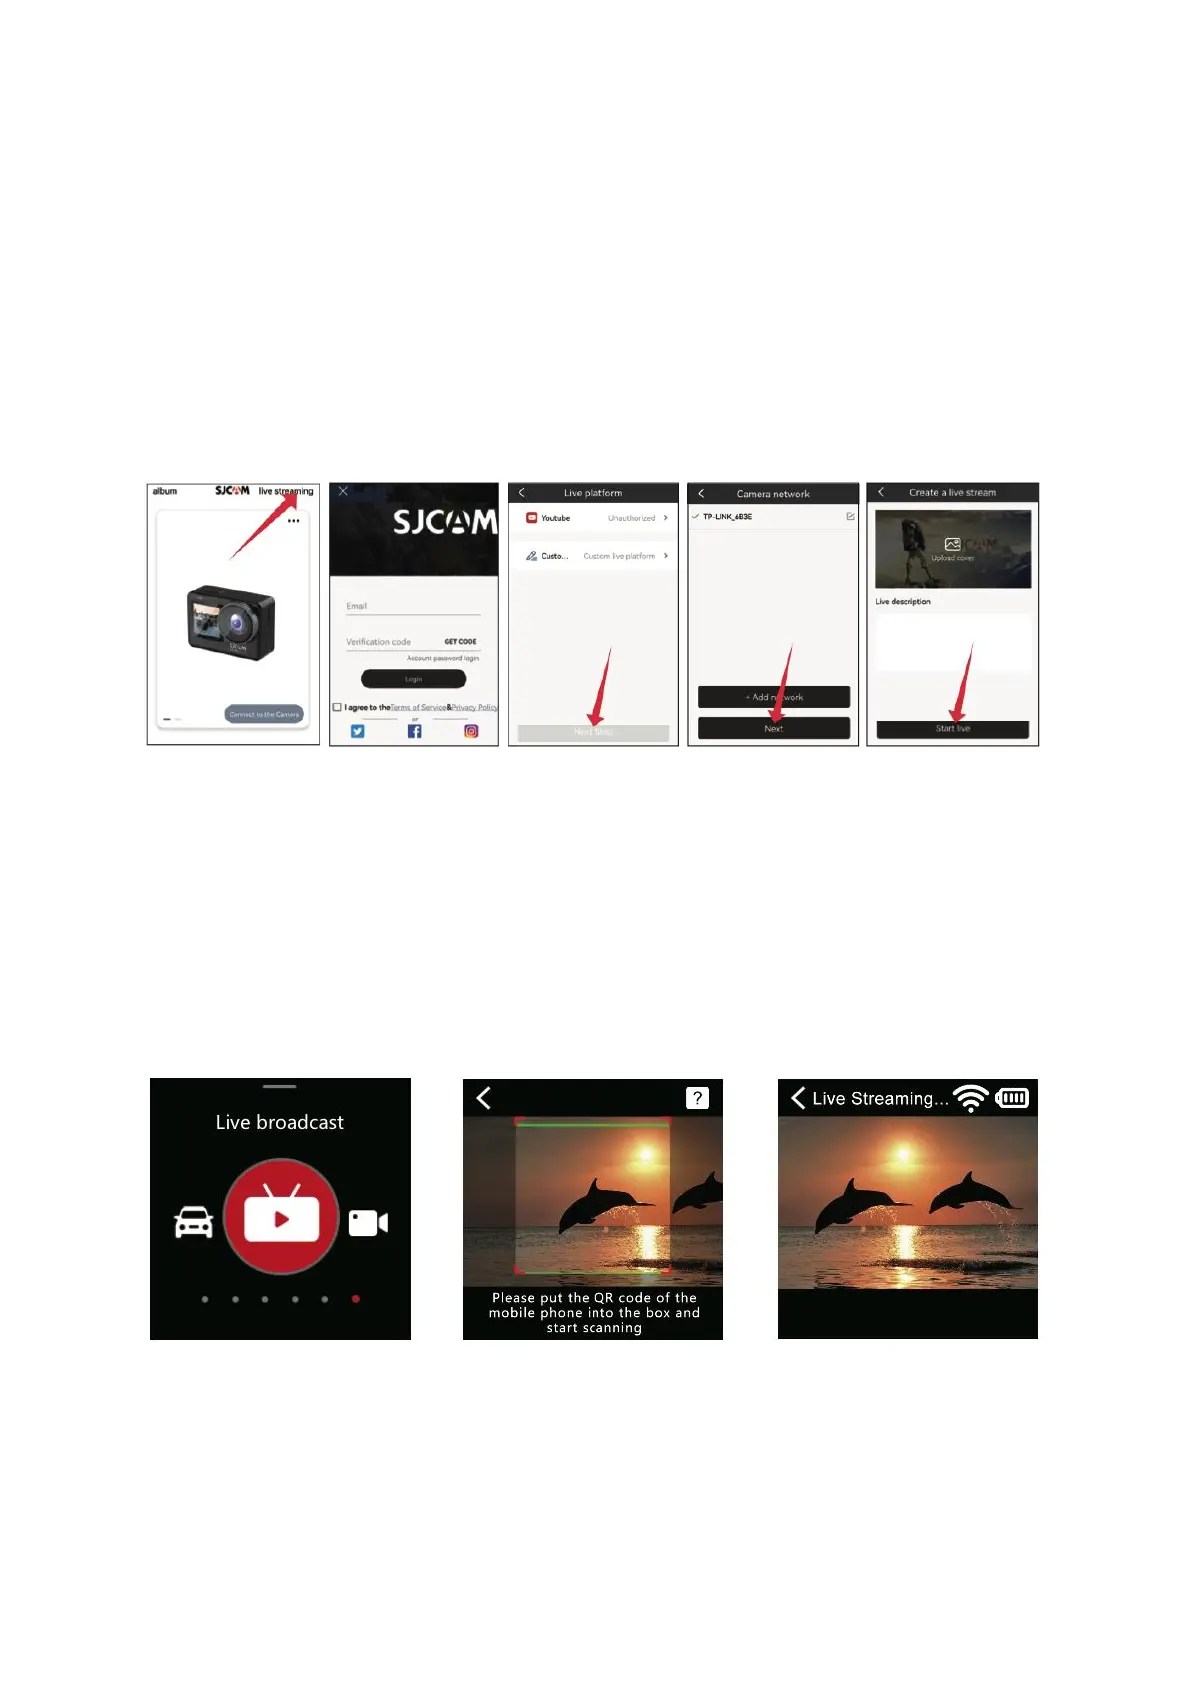
Configuration in SJCAM Zone APP: Initiate the SJCAM Zone APP. Tap on Live (Figure 1),
proceed to log into the SJCAM Zone APP (Figure 2), access the settings for live streaming
platforms, opt for a streaming platform or personalize an RTMP stream, and then tap
Next (Figure 3). Integrate a network by entering the correct Wi-Fi credentials, including
name and password, followed by another tap on Next (Figure 4). Move into the Create
Live interface and input the pertinent details for the live stream (Figure 5). Once the
details are in place, select Start Live to generate a QR code containing live streaming
information.
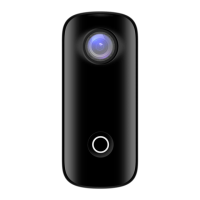
Configuring the Action Camera: Swipe the screen upward, pick the live mode (Figure
1), tap the icon for live mode, engage the QR code scanning (Figure 2), and utilize the
camera lens to scan the QR code for live streaming provided by the APP. Upon
successful scanning, the camera will automatically switch into live mode (Figure 3).
Progress into the Create Live Broadcast page, grant authorization for the live streaming
platform, and you'll be able to instantly view the camera's live video feed.