18
• If for any reason the old plug is cut o the cord of this tool,
it must be disposed of safely and not left unattended
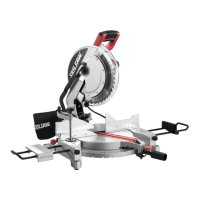
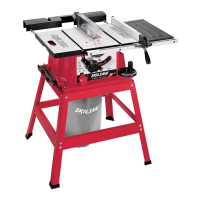
USE
• Assembly
- assemble the transport handle E with 2 bolts using hex
key AN
9
- assemble the mitre lock knob AE into the front of the
table
q
- assemble the sliding fence U (see Adjusting sliding
fence(s))
• Transport/working position
For releasing the tool (working position)
- press handle B
8
downward with one hand while
pulling out locking pin C with the other hand
w
a
- guide the head assembly slowly upward
For securing the tool (transport position)
- slide the head assembly to the stop in the direction
of fence S (keep approx. 5 cm distance) and tighten
locking knob AH
w
b
- set the bevel angle to 0° (see Setting bevel angle)
- set the mitre angle to 45° left or right (see Setting mitre
angle)
- press handle B downward with one hand while pushing
locking pin C with the other hand
- wind up the power cord
- use transport handle E
8
for carrying the tool
w
d
- alternatively, use the side handles for carrying the tool
w
e
! never lift the tool by holding the main handle, or
the power cord
• Mounting tool on working surface
e
!
- use 4 mounting holes F for attaching the tool with
suitable screws to the working surface
- you may also clamp the tool to the working surface with
commercially available screw clamps
- for stabilizing the tool the height of support foot G can
be adjusted
- alternatively, the tool can be mounted onto a mitre saw
stand
! read all the warnings and instructions included
with the saw stand
• Dust/chip extraction
r
- mount dustbag H/vacuum cleaner as illustrated
- empty dust bag regularly for optimal dust pick-up
performance
! never let the vacuum cleaner hose interfere with
the lower guard or the cutting operation
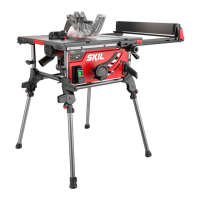
• Saw table extension
t
- use knobs L to fasten extension bars K (on either side
of the tool)
- the length of extension bars K is steplessly adjustable
from minimum to maximum
• Clamping the workpiece
y
!
the workpiece with the adjustable clamp supplied
- do not work with workpieces that are too small to clamp
- for maximal workpiece dimensions use table
u
as
reference
- fasten workpiece clamp into support hole N with knob P
(on either side of the tool)
• Use only accessories with an allowable speed matching
at least the highest no-load speed of the tool
• Never use saw blades made of high speed steel (HSS)
• Do not use a saw blade which is cracked, deformed or
dull
• Only use saw blades with a hole diameter which ts the
tool spindle without play; never use reducors or adaptors
to t large-hole saw blades
• Protect accessories from impact, shock and grease
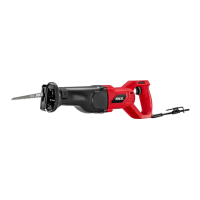
DURING USE
• Do not force the tool (apply light and continuous
pressure in order to avoid overheating the blade tips and,
in case of cutting plastics, melting the plastic material)
• Keep ngers, hands and arms away from the rotating
saw blade
• If the saw blade becomes blocked, switch o the tool
immediately and disconnect the plug; only then remove
the wedged workpiece
• In case of jamming or electrical or mechanical
malfunction, immediately switch o the tool and
disconnect the plug
• If the cord is damaged or cut through while working, do
not touch the cord, but immediately disconnect the plug
• Never use the tool when the cord is damaged; it must be
replaced by a specially prepared cord available through
the service organization.
LASER RADIATION
• Do not direct the laser beam at persons or animals
beam yourself, not even from a distance (you could
blind somebody, cause accidents or damage your eyes)
• If laser radiation strikes your eye, you must deliberately
close your eyes and immediately turn your head away
from the beam
• Do not make any modications to the laser equipment
• Do not look into the laser beam (laser radiation)
• Do not use any magnifying optical tools (such as
magnifying glasses, telescopes, or binoculars) to view
the laser beam
• Do not operate the tool in the presence of ammable
liquids, gases or dust
• Do not operate the tool with children around
• Do not replace the installed laser with another laser type
AFTER USE
• After switching o the tool, never stop the rotation of the
accessory by a lateral force applied against it
• Only remove cut-os or other parts of the workpiece from
the cutting area when all moving parts have come to a
complete standstill
• The saw blade becomes very hot during use; do not
touch it before it has cooled down
• Store the tool indoors in a dry and locked-up place, out
of reach of children
EXPLANATION OF SYMBOLS ON TOOL
2
Read the instruction manual before use
3
Wear protective glasses and hearing protection
4
arms away from this area.
5
Double insulation (no earth wire required)
6
Do not dispose of electric tools and batteries together
with household waste material
7
Laser radiation / Do not stare into beam / Class 2
laser product
WHEN CONNECTING NEW 3-PIN PLUG (U.K. ONLY):
• Do not connect the blue (= neutral) or brown (= live) wire
in the cord of this tool to the earth terminal of the plug

 Loading...