Boom
3-5
6036, 6042, 8042, 10042, 10054 31211015
3.4.2 Third Boom Section Removal
1. Remove any attachment from quick coupler assembly.
Note: If replacing the third section boom, remove the quick
coupler from the third section. Refer to Section 3.9, “Quick
Coupler”.
2. Park the machine on a hard, level surface, level the
machine, fully retract the boom, lower the boom, place
the transmission in (N) NEUTRAL, engage the park brake
and shut the engine OFF.
3. Place a Do Not Operate Tag on both the ignition key
switch and the steering wheel, stating that the machine
should not be operated.
4. Open the engine rear and side engine doors. Allow the
system fluids to cool.
5. Move the attachment tilt joystick in both directions to
relieve any trapped pressure in the attachment tilt
system. If the machine is equipped with auxiliary
controls, move the auxiliary hydraulic joystick in both
directions to relieve any trapped pressure in the
auxiliary hydraulic system.
6. Label, disconnect and cap the hoses attached to the
attachment tilt cylinder. Cap all fittings to keep dirt and
debris from entering the hydraulic system.
7. If the machine is equipped with auxiliary hydraulics,
label, cap and remove the hoses from the bulkhead
fittings.
8. If replacing the third boom section with a new boom
section: Remove the female coupler, male nipple and
bulkhead fittings from the bulkhead plate inside the
boom head.
9. Remove the rear cover from the boom.
10. If equipped with Auxiliary hydraulics, inside the third
boom section, loosen, but DO NOT remove the
capscrews securing the left side wear pad and hose
clamp support bracket to the top of the third boom
section.
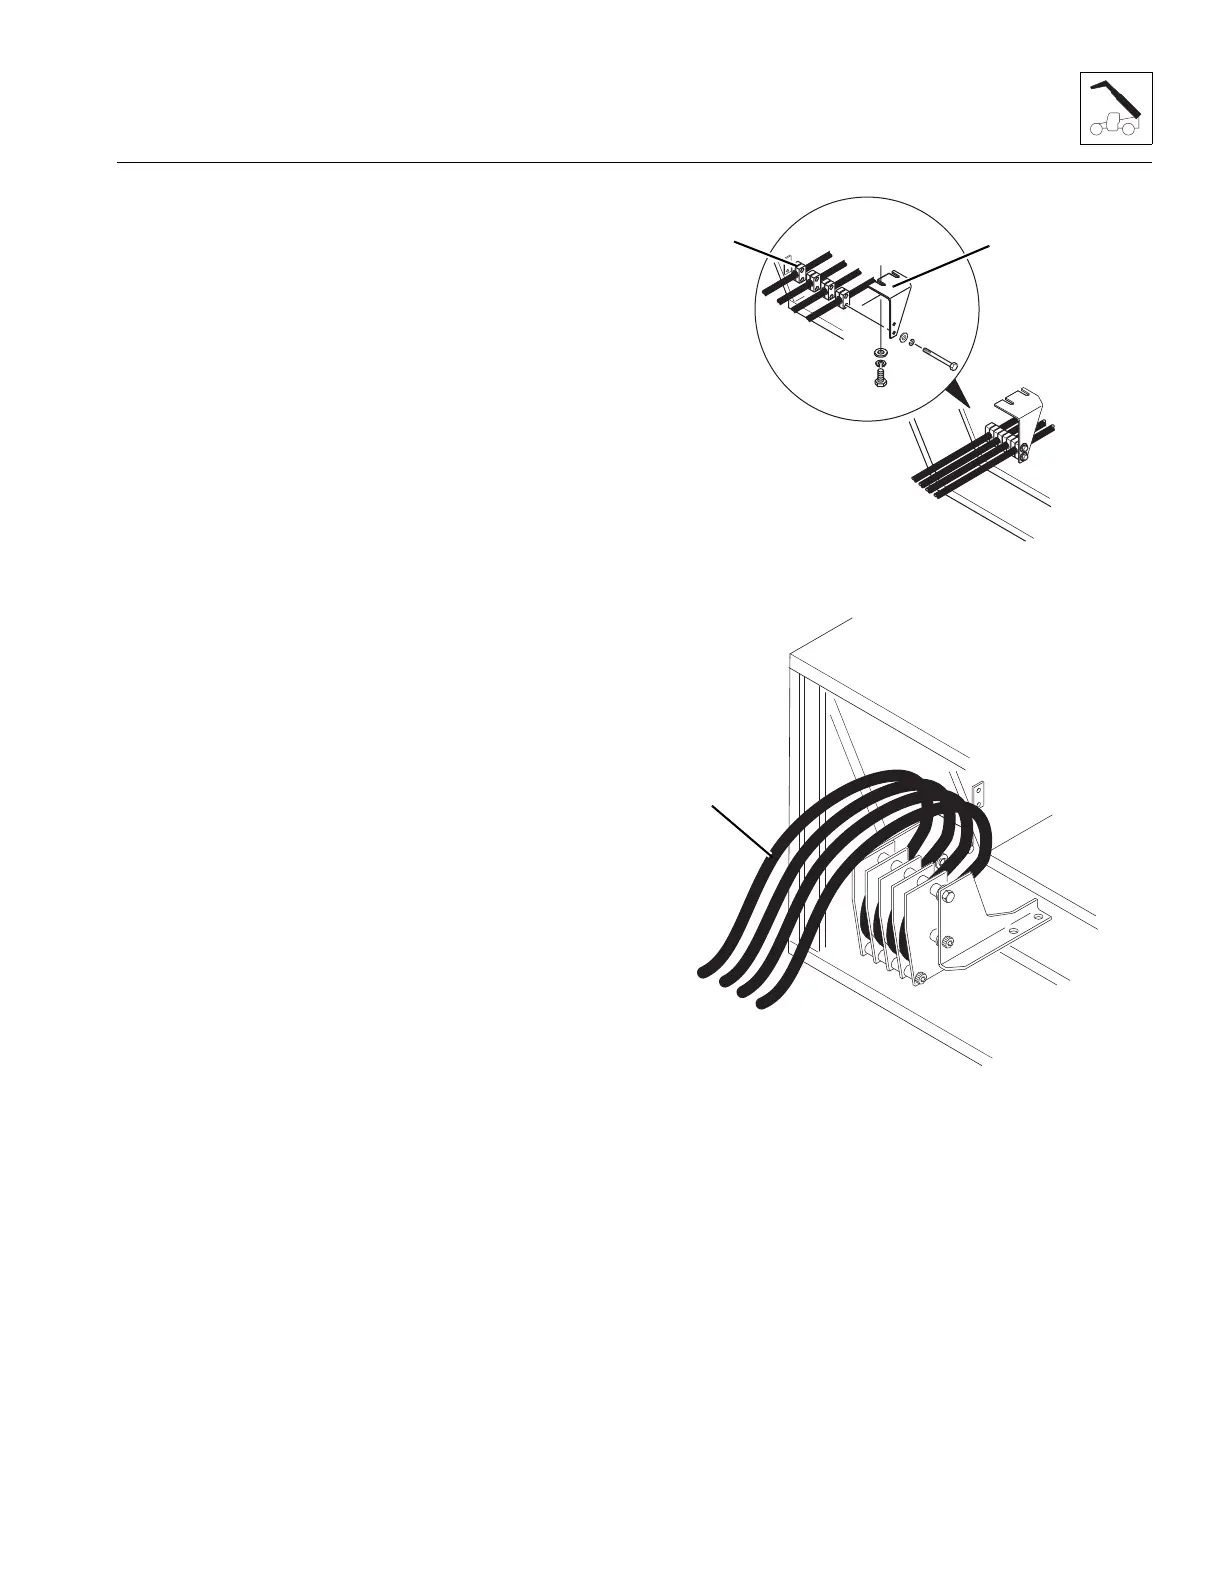
11. Remove the stack clamps (1) and hose clamp support
bracket (2) to the left side of the third boom section.
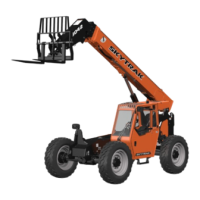
12. Pull the free ends of the hydraulic hoses (3) from the
inside the third boom section and out of the rear of the
boom. Allow the hoses to hang from the rear of the
boom.
13. Remove the top and side wear pads and spacers to the
inside of the second boom section. Label and tag each
set of wear pads being removed.