CALIBRATION
31
CALIBRATION PROCEDURE
Calibration Equipment Required
High Impedance, Direct Reading, High Voltage, Standard Voltmeter
Set of High Voltage Leads
Standard Resistors: 100kΩ, 100MΩ, 1GΩ
• Step 1. Plug the instrument into a properly grounded receptacle and switch the
instrument “OFF”.
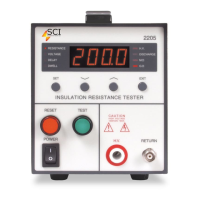
• Step 2. Attach the High Voltage and Return leads to the front of the instrument
• Step 3. Press the “Cal.” button on the rear panel, and while holding it in, power up
the instrument to enter the calibration mode. Release the “Cal.” button. The
screen will display “2205”, the firmware version number and then “Cal.”.
• Step 4. Use the ∧ (up) or ∨ (down) button to select “HI”.
• Step 5. Short the High Voltage and Return leads together and press TEST. There
will be a slight delay and then a short beep. The screen will display “OPEN”.
• Step 6. Disconnect the leads from the front panel and connect a standard, high
voltage voltmeter between high voltage and return. Press TEST, and enter the
reading shown on the standard voltmeter by using the ∧ (up) and ∨ (down)
buttons. When finished, press the “Set” button to enter the voltage.
• Step 7. The instrument will then display “LO”. Repeat Steps 5 and 6 for this item.
• Step 8. The instrument will then display “AOFF”. With the leads removed from the
front panel, press the TEST button. After a short delay the screen will display
A1.
• Step 9. Connect a standard 100kΩ resistor between High Voltage and Return, and
press the TEST button. After a short delay and a small beep the screen will
display A2.
• Step 10. Repeat Step 9 for items A2 – A7 by connecting the standard resistor as
indicated by an “X” in Table 1.
• Step 11. After items A1 – A7 are calibrated, the instrument will display “END” and
the TEST button will be illuminated. Switch the instrument “OFF” and
disconnect the leads.
• Step 12. Seal the “Cal.” Button.
Table 1
100kΩ 100MΩ 1GΩ
A1
X
A2
X
A3
X
A4
X
A5
X
A6
X
A7
X