Door 1
Door 2
Camera 1
Camera 2 Output
Ext. powerNetwork
Sonik 7 Сloud (Master)
Door 1
Door 2
CCTV 1
CCTV 2
Input
Output
Ext. power
Door 1
Door 2
CCTV 1
CCTV 2
Input
Output
Ext. power
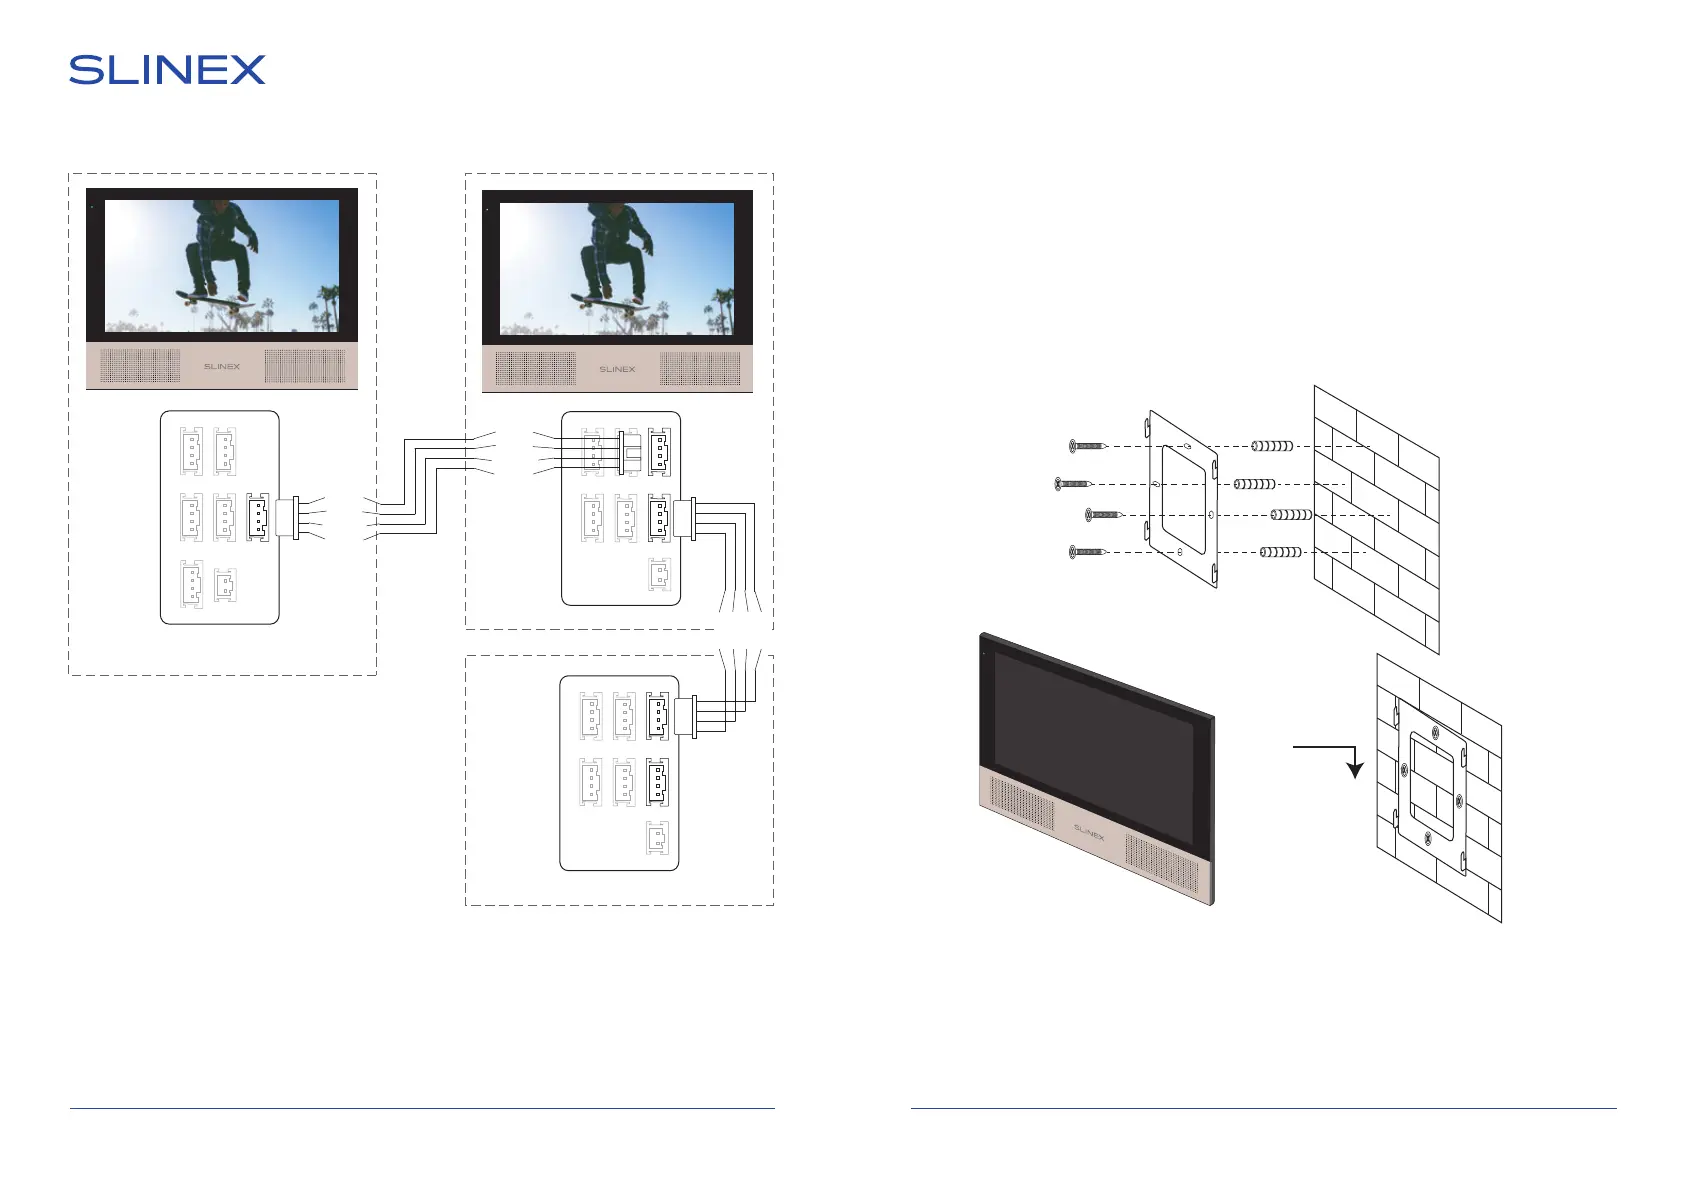
Diagram 2. Sonik 7 Cloud and Sonik 7 monitors connection into one system.
SONIK 7 Cloud
7 8
Sonik 7 (Slave)
Sonik 7 (Slave)
4.3. Unit mount
1) Take the surface mount bracket from the kit and place it on 150-160 cm height.
2) Mark and drill four halls in the wall.
3) Take four anchors from the kit and hammer them into the drilled halls.
4) Fix surface mount bracket on the wall with four screws from the kit.
5) Connect all communication wires and x the monitor on the surface mount bracket.
Notes:
* Use «Power» plug to connect external power supply +13,5 V. While use external power supply please
keep main power cord ~100-240 V disconnected from the outlet, otherwise it can damage monitor
circuits.
** Outdoor panels, cameras, power supplies, locks and motion sensors illustrated on the diagrams are
optional devices and aren’t included into monitor kit.
Audio
GND
Data
Video
Audio
GND
Data
Video
Audio
GND
Data
Video