-5-
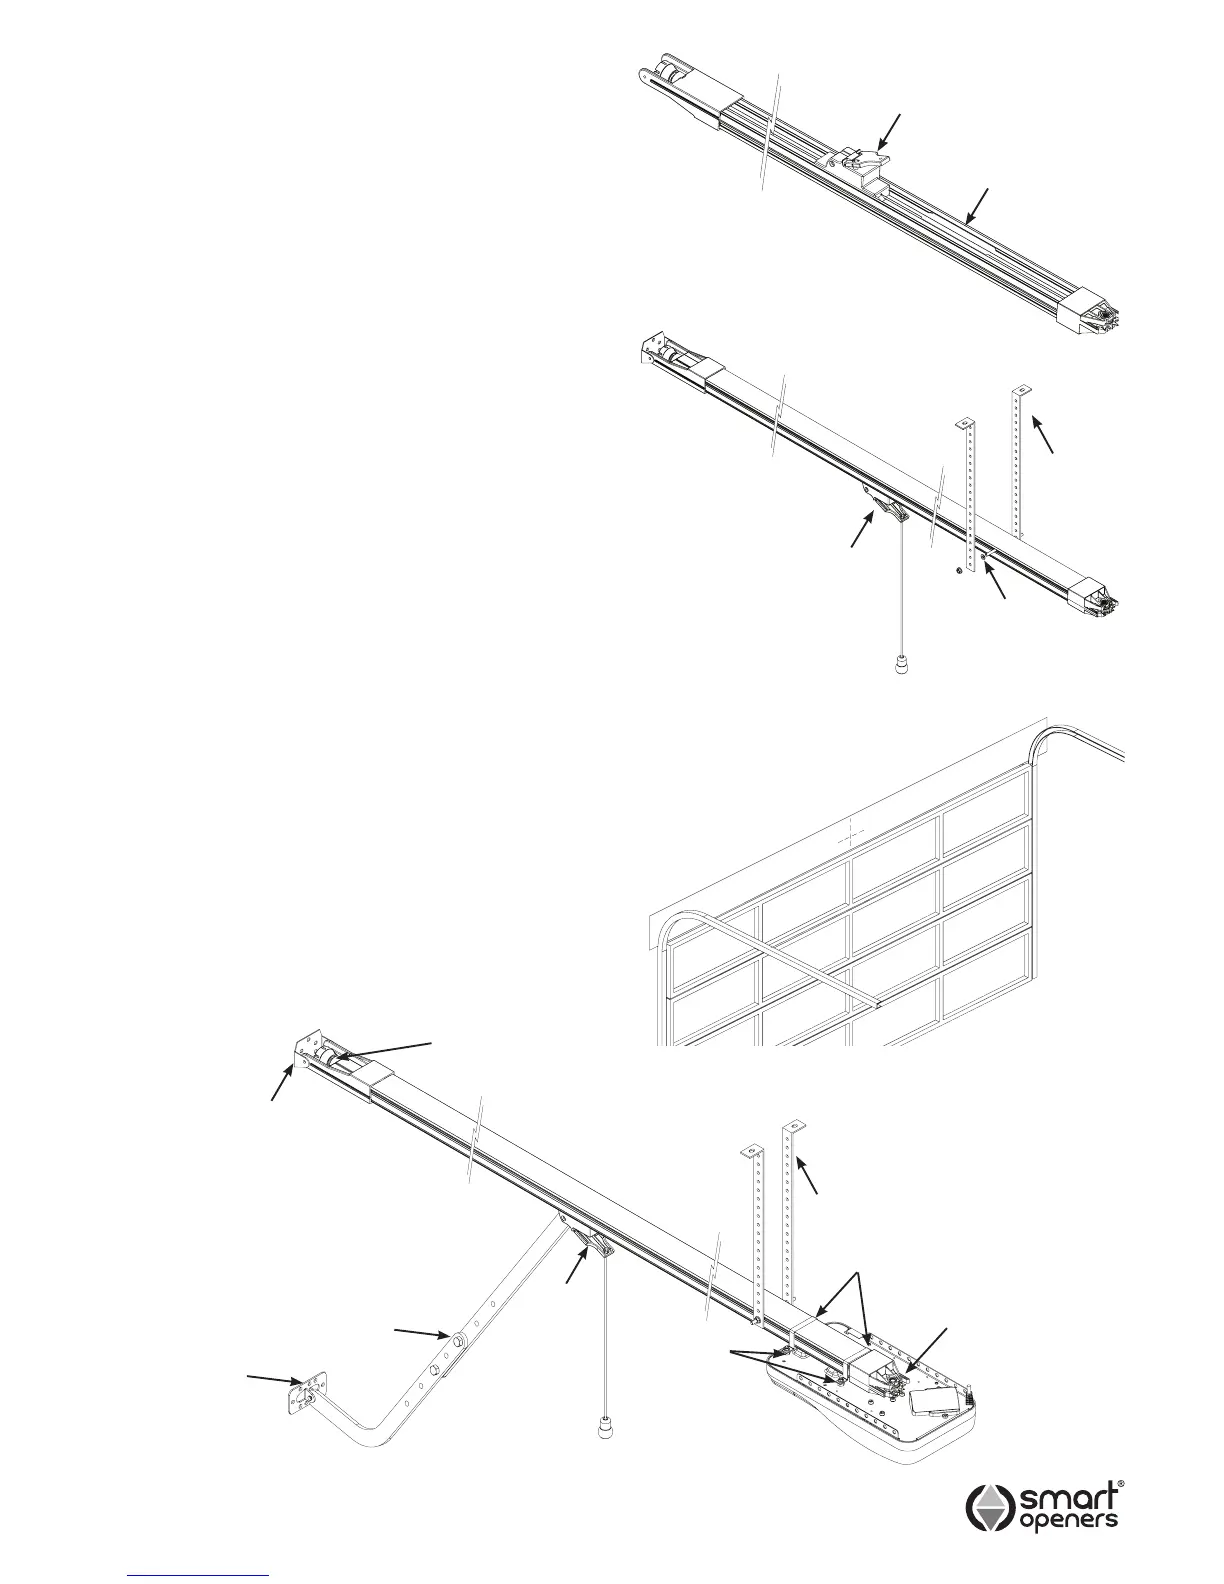
Track Assembly
The track is preassembled in the factory with the chain
lubricated and pretensioned. Before mounting the opener
conrm that the chain is correctly tensioned.
1 Insert shuttle into slot in track ensuring that shuttle is
facing the correct way - the red disengagement lever
should point towards the power head not to the door
(Fig. 2).
2 Insert anchor bolts for mounting straps into both sides
of track and slide forward at least 300mm (Fig. 3).
Note: Anchor bolts must be inserted before the track is
tted to the power head.
Installation
1 Locate the centre of the door and mark position.
2 Move the door by hand and note the highest point of
travel. Make a mark 30mm higher than this position on
the lintel Fig. 4.
3 Fix wall bracket in place with appropriate fasteners -
use loxins or dynabolts for brick work Fig. 6.
4 Connect track to wall bracket with bolt and split pin.
5 Raise track into position and rest on ladder or similar
support.
6 Fix track to ceiling using strap or other appropriate
material ensuring that the track is level.
7 Cut off any excess strap.
Note: Make sure that track is supported in the centre
to prevent exing which may cause phantom
reversing.
WARNING: Make sure the opener is afxed to
noggins in ceiling and not just plasterboard. Failure
to have a safe and secure xing will lead to opener
falling causing serious personal injury and/or
property damage.
8 Position power head onto track ensuring that the
chain sprocket meshes with the spline shaft.
9 Place U-brackets onto studs and secure ni-lock nuts
(do not over tighten).
Fig. 2
Fig. 3
SHUTTLE
STRAP
ANCHOR BOLT
SHUTTLE SLOT
RELEASE HANDLE
POINTS TO
POWER HEAD END
© September 2011 Smart Openers Pty Ltd
Fig. 4
Fig. 5
MOUNTING
STRAP
HOCKEY STICK
SHUTTLE
DOOR BRACKET
WALL BRACKET
CHAIN TENSIONER
U-BRACKET
CHAIN SPROCKET
& SPLINE SHAFT
NUTS
 Loading...