-7-
Shuttle Stop
A shuttle stop must be tted to prevent the door contacting
the opener when in manual mode. Failure to t the shuttle
stop will void the warranty.
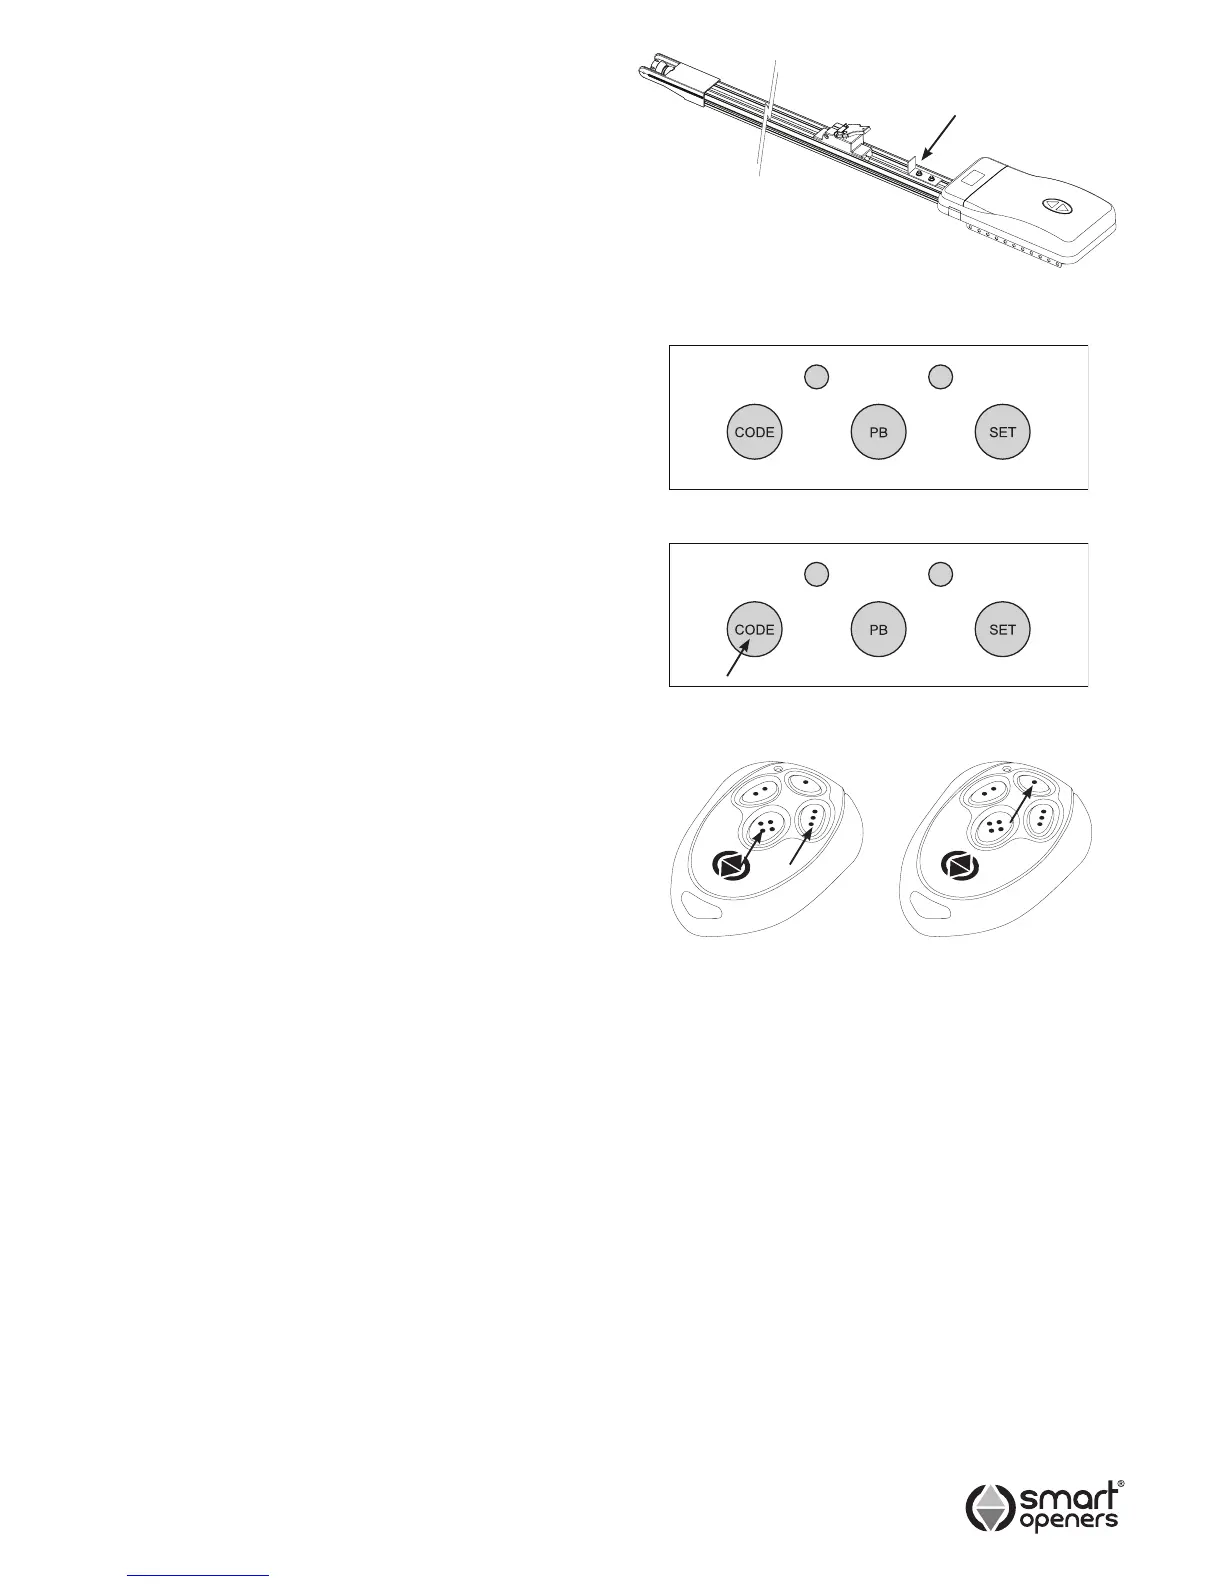
1 Locate shuttle stop just in front of power head and
secure the bolts as per Fig. 7
IMPORTANT: If the only entry to the garage is via the
garage door, Smart Openers strongly recommend the
tting of an external key release device.
Powering Up
1 Inspect the power cable for damage. Ensure that the
cable will not interfere with the moving door or the
opener.
2 Connect to power. The opener will perform a software
check and LEDs will ash to indicate ready for set up.
Button Function
CODE Button Learn transmitter code.
PB Button Open/Stop/Close and used during limits
set up.
SET Button Limits set up and save settings.
Coding Transmitters
Note: The button you choose (1-4) for the rst TX you
code will be the same button for all subsequent
transmitters. Up to twenty TXs can be stored into
memory. If more than twenty are stored the system
will disregard any attempts to code new TXs.
1 Press the CODE button for 2 seconds the courtesy
LEDs will ash to indicate Code Learn (Fig. 9).
2 Choose which transmitter button will operate the door
and press that button twice.
3 Test the transmitter - the opener will beep to conrm.
Repeat the above steps to code additional transmitters.
REMOTE TRANSMITTER CODING
It is possible to code new transmitters via an already
coded remote without being in contact with the control
panel. This is useful if more than one device is operated
by the transmitter. This also takes the guess work out of
button allocation as this is done automatically.
1 Press TX BUTTON 3 + 4 together for 2 seconds. The
opener will beep and light will ash once to signal
Code Learn Mode.
2 Press any button on new transmitter twice (Fig. 10).
The opener will beep and light will ash twice to
conrm code learned. Test new transmitter.
DELETING ALL TRANSMITTERS
1 Press and hold the CODE button for 10 seconds.
2 The courtesy LEDs will ash 3 times to conrm
memory cleared.
Fig. 8
Fig. 7
SHUTTLE STOP
© September 2011 Smart Openers Pty Ltd
Transmitter Button Allocation
The button chosen on the rst transmitter that was coded
into memory determines which button becomes the default
for all subsequent transmitters to be coded into this
opener. This is useful for sites where there are multiple
openers so that Hands Free Learning via a pre-coded
remote will automatically allocate all buttons to their
function in one action.
Note: You cannot change the button allocation without
clearing the receiver memory.
Fig. 9
Fig. 10
Existing
Remote
Uncoded
Remote