64 - INSTALLATION 91477A418/A
Fixed connection
Fit the power line with an all-pole circuit breaker
with a contact separation distance sufficient to
provide complete disconnection in category III
overvoltage conditions, pursuant to installation
regulations.
For the Australian/New Zealand market:
The circuit breaker incorporated in the fixed
connection must comply with AS/NZS 3000.
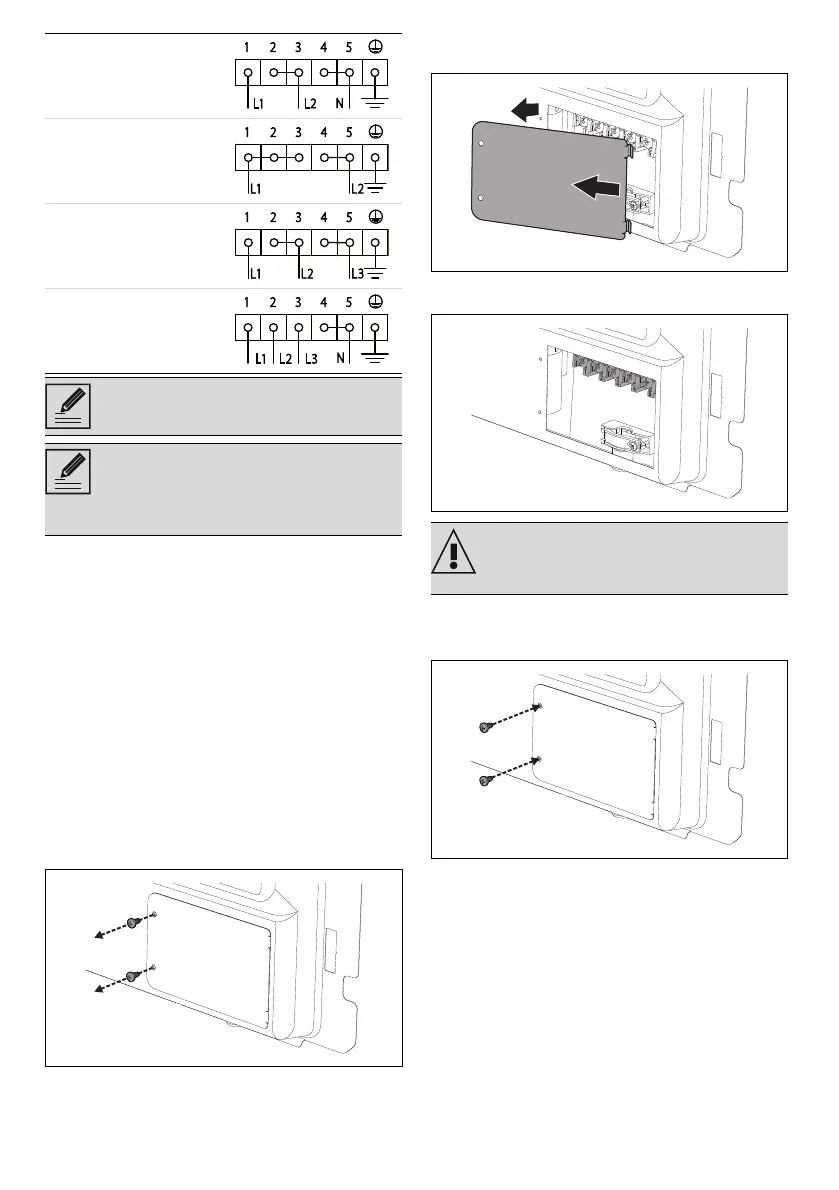
Accessing the terminal board
To connect the power supply cable, you have to
access the terminal board on the rear casing
1. Remove the screws fastening the plate to the
rear casing
2. Gently rotate the plate and remove it from its
seat.
3. Proceed with installation of the power
supply cable.
4. When finished, replace the plate on the rear
casing and secure it using the screws that
were previously removed.
Instructions for the installer
• If you use a plug to connect to the power
supply, the plug must be accessible after
installation.
• Do not bend or trap the power cable.
• The appliance must be installed according
to the installation diagrams.
• Do not try to unscrew or force the threaded
elbow of the fitting. You may damage this
part of the appliance, which may void the
manufacturer’s warranty.
• Use soap and water to check for gas leaks
380-415 V 2N~
4 x 1.5 mm ²
four-core cable
220-240 V 2~
3 x 2.5 mm ²
three-core cable
220-240 V 3~
4 x 1.5 mm ²
four-core cable
380-415 V 3N~
5 x 1.5 mm ²
five-core cable
The values indicated refer to the cross-
section of the internal conductor.
The aforementioned power cables are
sized taking into account the
coincidence factor (in compliance with
standard EN 60335-2-6).
It is recommended to slacken off the
cable clamp screw before installing the
power supply cable.