19
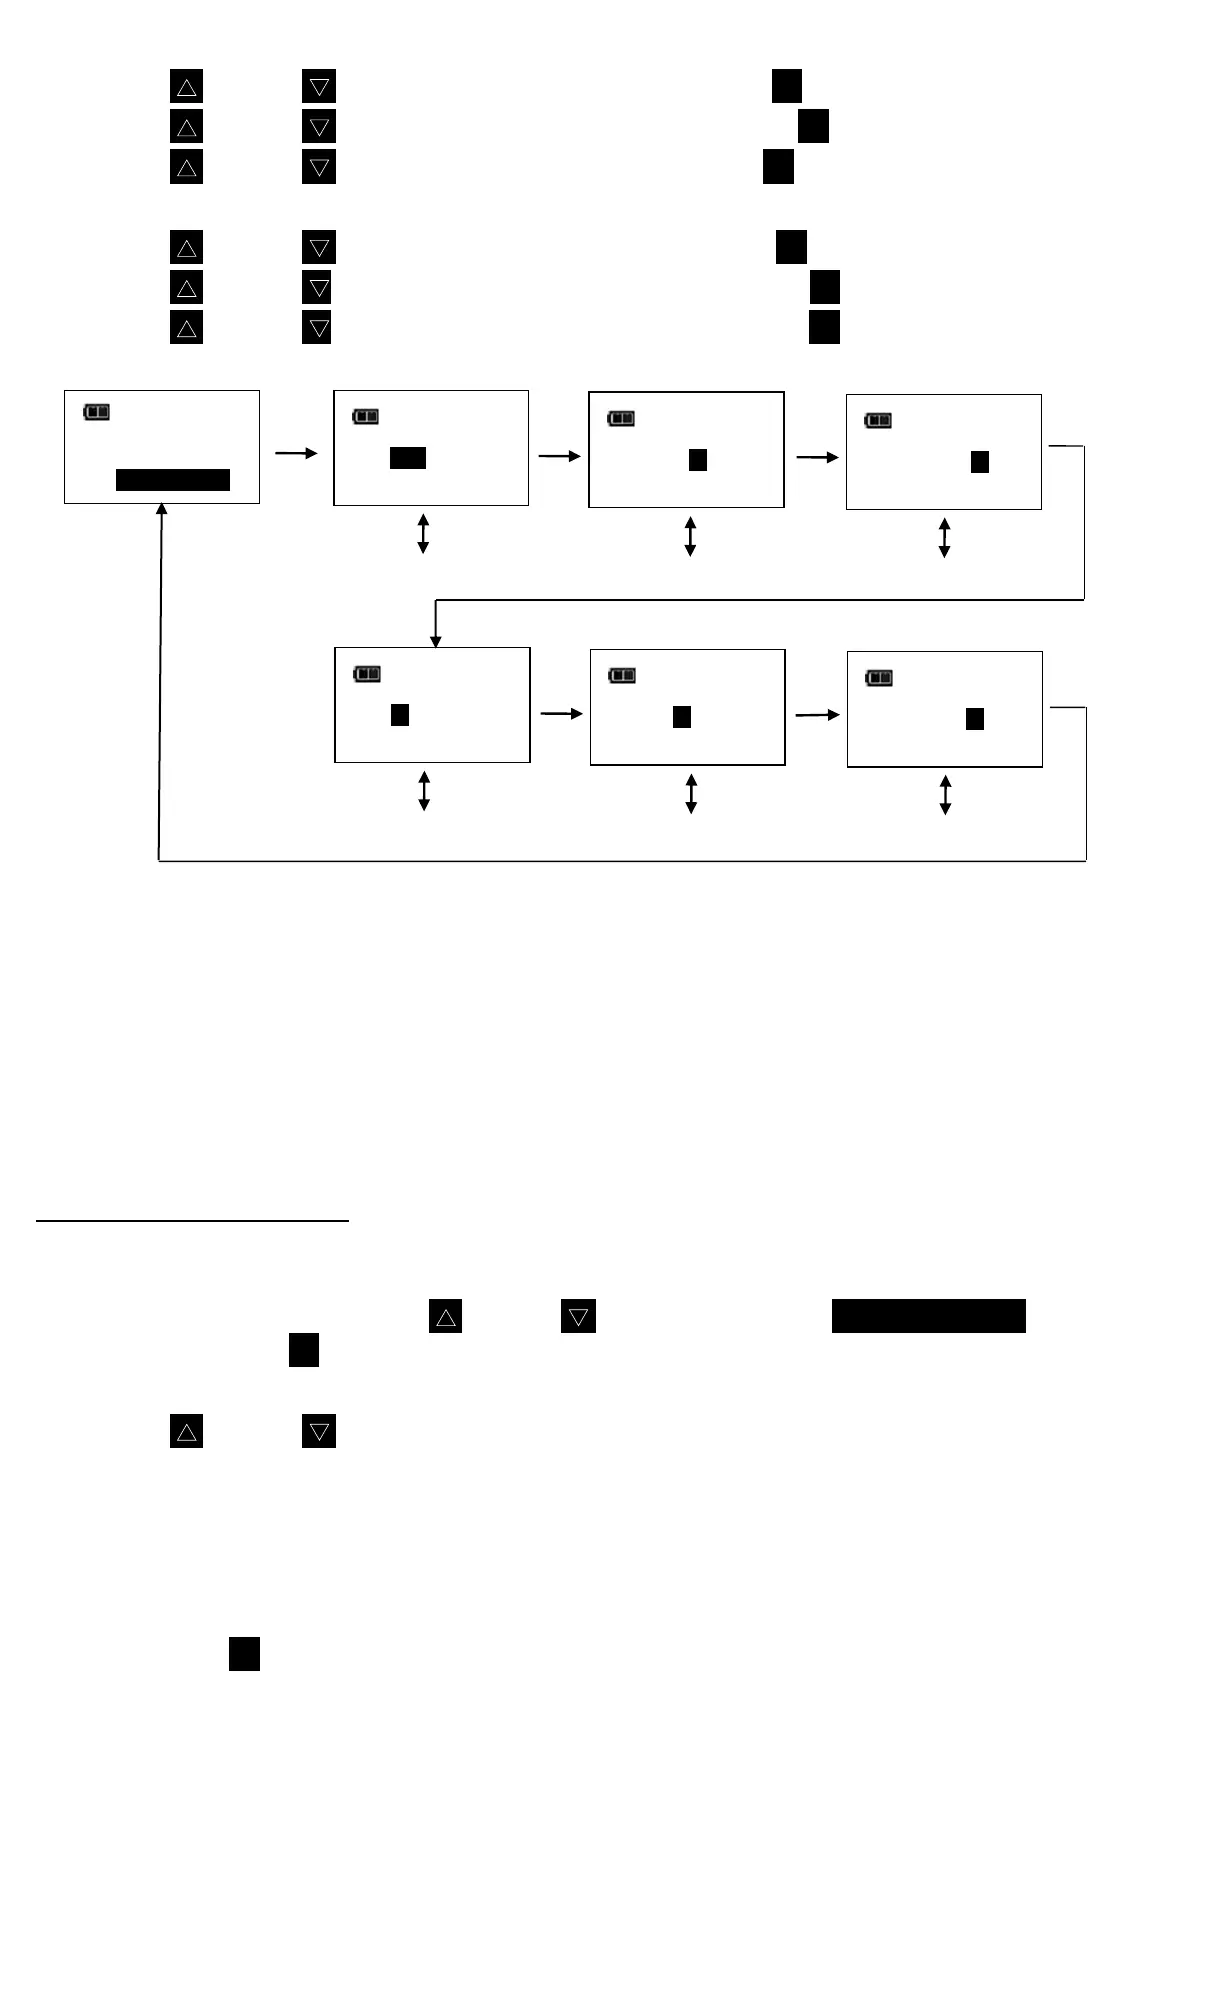
2. SET DATE screen is displayed with year highlighted.
3. Use UP S /DOWN T buttons to set year then press ENTER button to highlight month.
4. Use UP S /DOWN T buttons to set month then press ENTER button to highlight day.
5. Use UP S /DOWN T buttons to set day then press ENTER button.
6. SET TIME screen is displayed with Hour highlighted.
7. Use UP S /DOWN T buttons to set hour then press ENTER button to highlight minutes.
8. Use UP S /DOWN T buttons to set minutes then press ENTER button to highlight seconds.
9. Use UP S /DOWN T buttons to set seconds then press ENTER button.
10. Clock is set and Configure menu is displayed.
Note: Year selection will scroll up from 2014. Month selection will scroll from 1 to 12. Day selection
will scroll from 1 to 31.
Note: Hour selection will scroll through 0 to 23. Minute and Second selections will scroll through 0 to
59.
Note: If batteries are removed from wrench for longer than 20 minutes, clock will revert to default
settings and must be re-entered at power on.
Setting Calibration Interval
This function will allow user to set calibration interval for when "CAL NEEDED" message will be
displayed.
1. From Configure menu, use UP S /DOWN T buttons to highlight SET CAL INTRVAL selection
then press ENTER button.
2. CAL INTERVAL screen is displayed.
3. Use UP S /DOWN T buttons to change calibration interval.
Selectable Intervals:
x DISABLED (factory default)
x 3 MON
x 6 MON
x 12 MON
4. Press ENTER button to accept selection and exit to Configure menu.
SET DATE
2014/01/01
YR MON DAY
SET DATE
2014/01/01
YR MON DAY
SET DATE
2014/01/01
YR MON DAY
EXIT
MODE SETUP
CALIBRATION
SET DATE/TIME
button
button
button
SET TIME
12 : 00 : 00
HR MIN SEC
SET TIME
12 : 00 : 00
HR MIN SEC
SET TIME
12 : 00 : 00
HR MIN SEC
button
button