Page 15
3-in-1 3D Printer Quick Start Guide
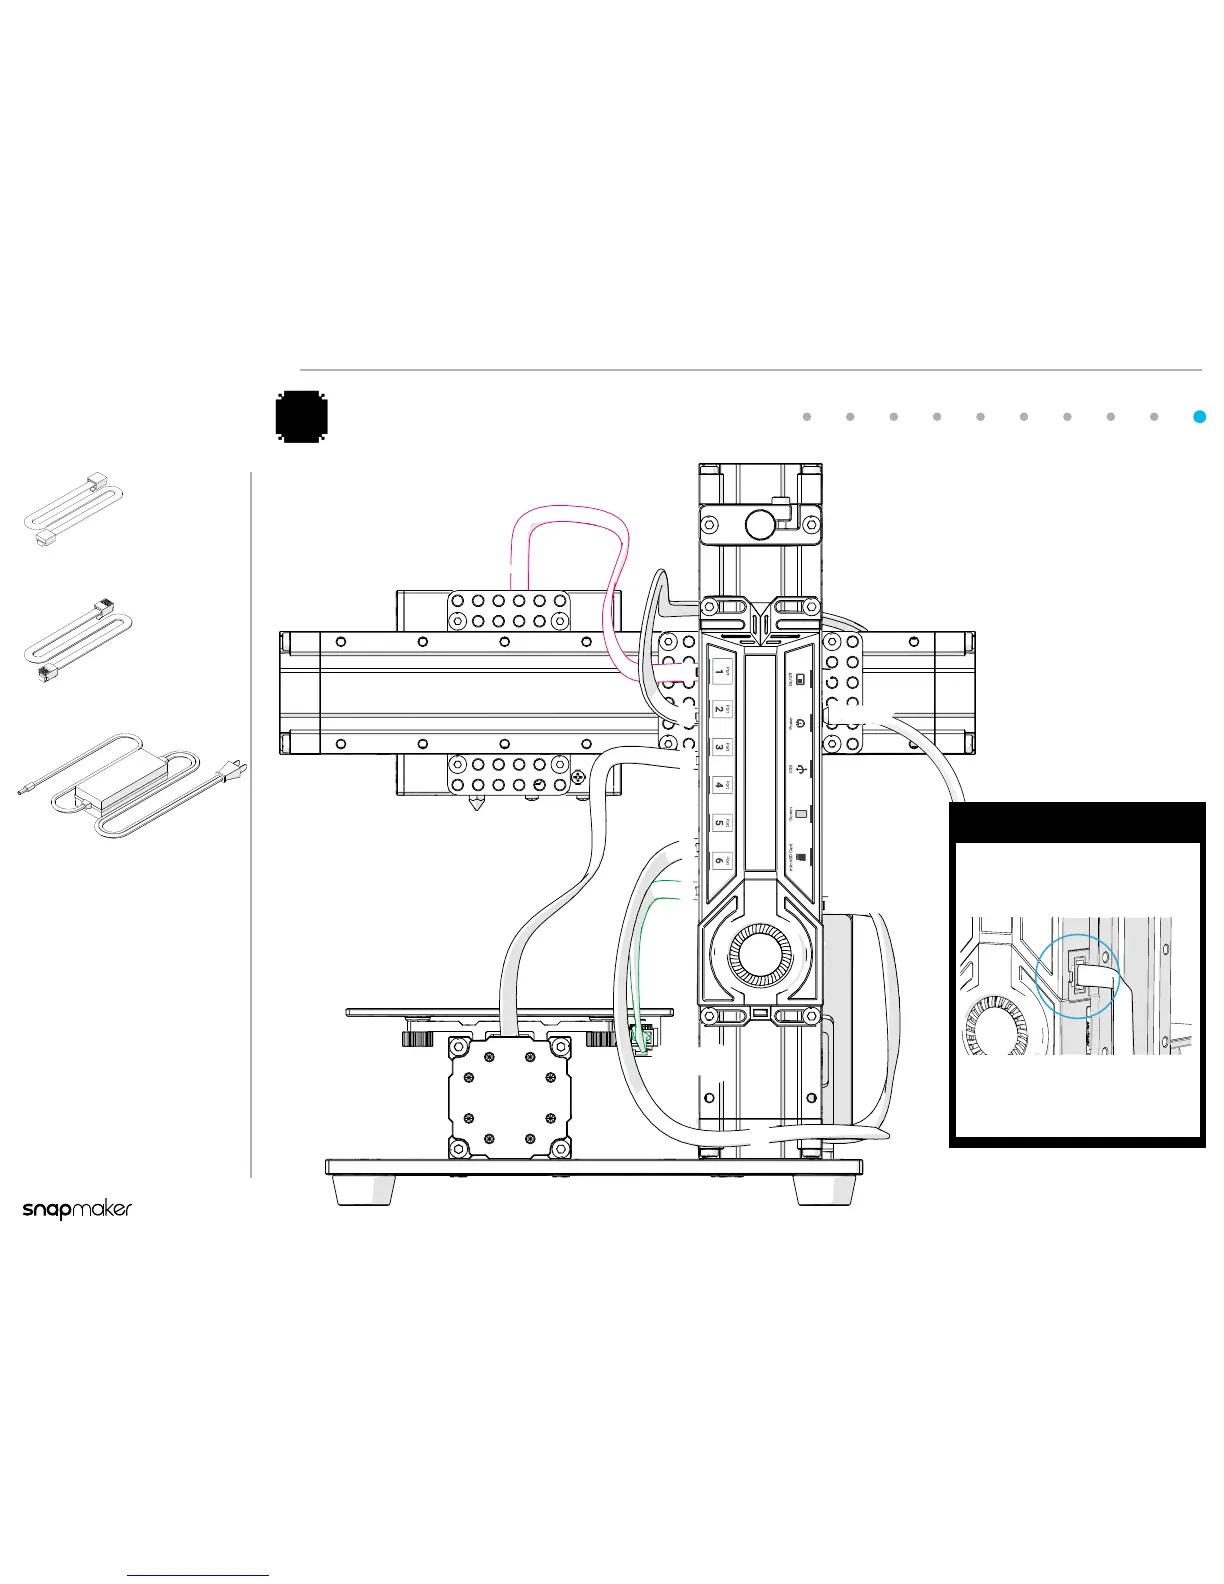
RJ25 Cable
x 1
1
2
3
5
6
Screen
1(RJ 45)
2
3
6
(RJ 25)
5
Power
RJ45 Cable
x 1
Power Adapter
x 1
The RJ25 Cable (Heated
Bed Cable) is comparatively
smaller than the RJ45 Cable
(Module Cable).
Connect the Modules to the Controller and Power On
10
Caution
Do NOT connect or disconnect the
cables or microSD card when the
machine is powered on.
!
Make sure all the cables are
correctly and properly connected
before you power on the machine.