Do you have a question about the Snapper 7800979-00 and is the answer not in the manual?
Indicates a hazardous situation that will result in death or serious injury.
Indicates a hazardous situation that, if not avoided, could result in death or serious injury.
Indicates a hazardous situation that, if not avoided, could result in minor or moderate injury.
Indicates a situation that can cause damage to the equipment, personal property, or environment.
Keep children away from the operating area as they are attracted to the unit.
Operate safely on slopes, avoiding steep inclines and ensuring adequate footing.
Mower blade can throw debris; keep area clear and ensure safety devices are in place.
Engine exhaust contains carbon monoxide; operate only outdoors.
Grass and debris accumulation can cause fire; clean regularly.
Understand instructions, warnings, controls, and proper use before starting.
Handle fuel with care; it's flammable and vapors are explosive. Use approved containers.
Keep hands/feet away from rotating parts, clear discharge area, stop engine when crossing hazards.
Always stay behind handle, do not leave machine running, disconnect spark plug before servicing.
Keep mower clean, check bolts, ensure adequate ventilation, service engine when stopped.
Squeeze drive control against handle to engage wheel drive.
Squeeze blade control to start engine/blade; release to stop.
Move control toward Fast/Slow to adjust ground speed.
Labels for Mulching Cover, Height Latch, Oil Cap, and Start Handle.
Check guards, covers, blade control, drive control, and ground speed control.
Use clean, fresh, unleaded gasoline; 10% ethanol is acceptable. Avoid E15/E85.
For altitudes over 5,000 ft, use 85 octane; carbureted engines may need adjustment.
Chart showing recommended oil viscosity based on outdoor temperature.
Use Ready Start system; move speed control, squeeze blade control, start engine.
Squeeze wheel drive control to move forward; adjust speed with ground speed control.
Release wheel drive control to stop motion; release blade control to stop engine.
Loosen nuts, move handle, tighten nuts to adjust height.
Pull latch, move to desired height, set all wheels to same height.
Cut 1/3 of blade length, recycle dry grass; adjust wheel height for dense grass.
Remove knob nuts and washers to detach the mulching cover.
Install deflector over studs, aligning holes and slots.
Install adapter over studs, aligning holes and slots, secure with nuts.
Install plug into bag adapter after installing adapter; secure with grass bag.
Slide bag connector over adapter flange, attach hooks to handle bar.
Charge battery after use or storage; connect charger for 16-24 hours.
Schedule for checking interlock system, debris, hardware, lubrication, blades, belts, battery.
Schedule for oil changes, filter cleaning/replacement, spark plug, muffler, spark arrester.
Drain fuel, tip mower, drain oil from fill tube into container.
Drain oil, remove old filter, lubricate new gasket, install and tighten.
Clean or replace air filter and pre-cleaner; wash pre-cleaner in detergent and water.
Wash foam element in detergent/water, saturate with oil, squeeze excess.
Loosen fastener, remove cover, remove filter, clean or replace.
Clean deck and engine area, check components for wear.
Disconnect spark plug, drain fuel, run engine dry, store in dry area.
Start mower, release blade control; engine must stop within 3 seconds.
Remove fill plug, check for grease, add Snapper "00" grease if needed.
Check torque of blade screw, inspect blade for sharpness, wear, and damage.
Inspect blade for signs of wear or damage; replace if worn or cracked.
Check engine and transmission belts for wear or damage. Replace if worn.
Inspect Ninja blade for wear, cracks, or notches; replace if damaged.
Sharpen blade at 22-28 degrees; check for balance and reinstall.
Adjust wheel drive control for proper clearance between spring hook and cable eye.
Check for grease on discs, broken spring, or worn rubber for slippage.
Wipe discs with a clean cloth or solvent to remove oil/grease causing slippage.
Reconnect loose drive spring; replace if broken.
Move speed control to FAST, adjust driven disc assembly position.
Realign transfer rod, recheck measurement, tighten nut.
Remove spring, snap rings, driven disc; install new disc and secure.
Drive out old bearing, install new bearing, secure with screws.
Remove lock nut, holder, O-ring, bearing; install new bearing and components.
Empty fuel tank, note belt routing, remove old belt, install new belt.
Remove driven disc, note routing, place new belt over pulleys, twist and pull into groove.
Covers engine not starting, stalling, losing power, and vibration.
Addresses movement, traction, cutting, discharge problems, and oil leaks.
Outlines warranty terms, coverage, and exclusions for equipment and engines.
Explains warranty service availability, coverage, and exclusions like improper use or maintenance.
Details warranted emissions parts, coverage length, and exclusions.
Owner's duty for maintenance, presenting product, and avoiding abuse.
Excludes add-on parts, abuse, neglect; covers consequential failures.
Explains hours of operation for emissions compliance based on engine displacement.
Lists specific engine components covered under the emissions warranty.
Details categories (C, B, A) for emissions compliance hours based on displacement.
Mow across slopes, not up/down; do not mow slopes over 10 degrees.
Fold page to create 10-degree angle guide for comparing slopes.
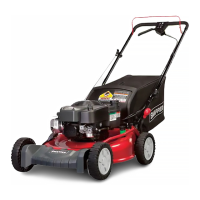
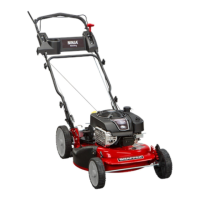
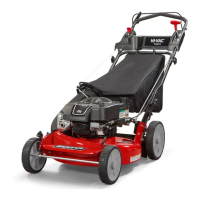
Details deck size, cut height, transmission type, ground speed, blade torque.
Details gross power, displacement, fuel/oil capacity, spark plug gap/torque.
| Engine | Briggs & Stratton |
|---|---|
| Deck Material | Steel |
| Grass Collection | Rear Bag |
| Cutting Width | 21 inches |
| Cutting Height | 1.25 - 3.75 in |
| Start Type | Pull Cord |