13
&RQ¿JXUH,3VHWWLQJPDQXDOO\
,QUDUHFDVHVLWPLJKWEHQHFHVVDU\WRFRQ¿JXUH,3DGGUHVVHV
manually. This might be the case if the DHCP* function is
deactivated on the router. If this is the case, please continue as
follows:
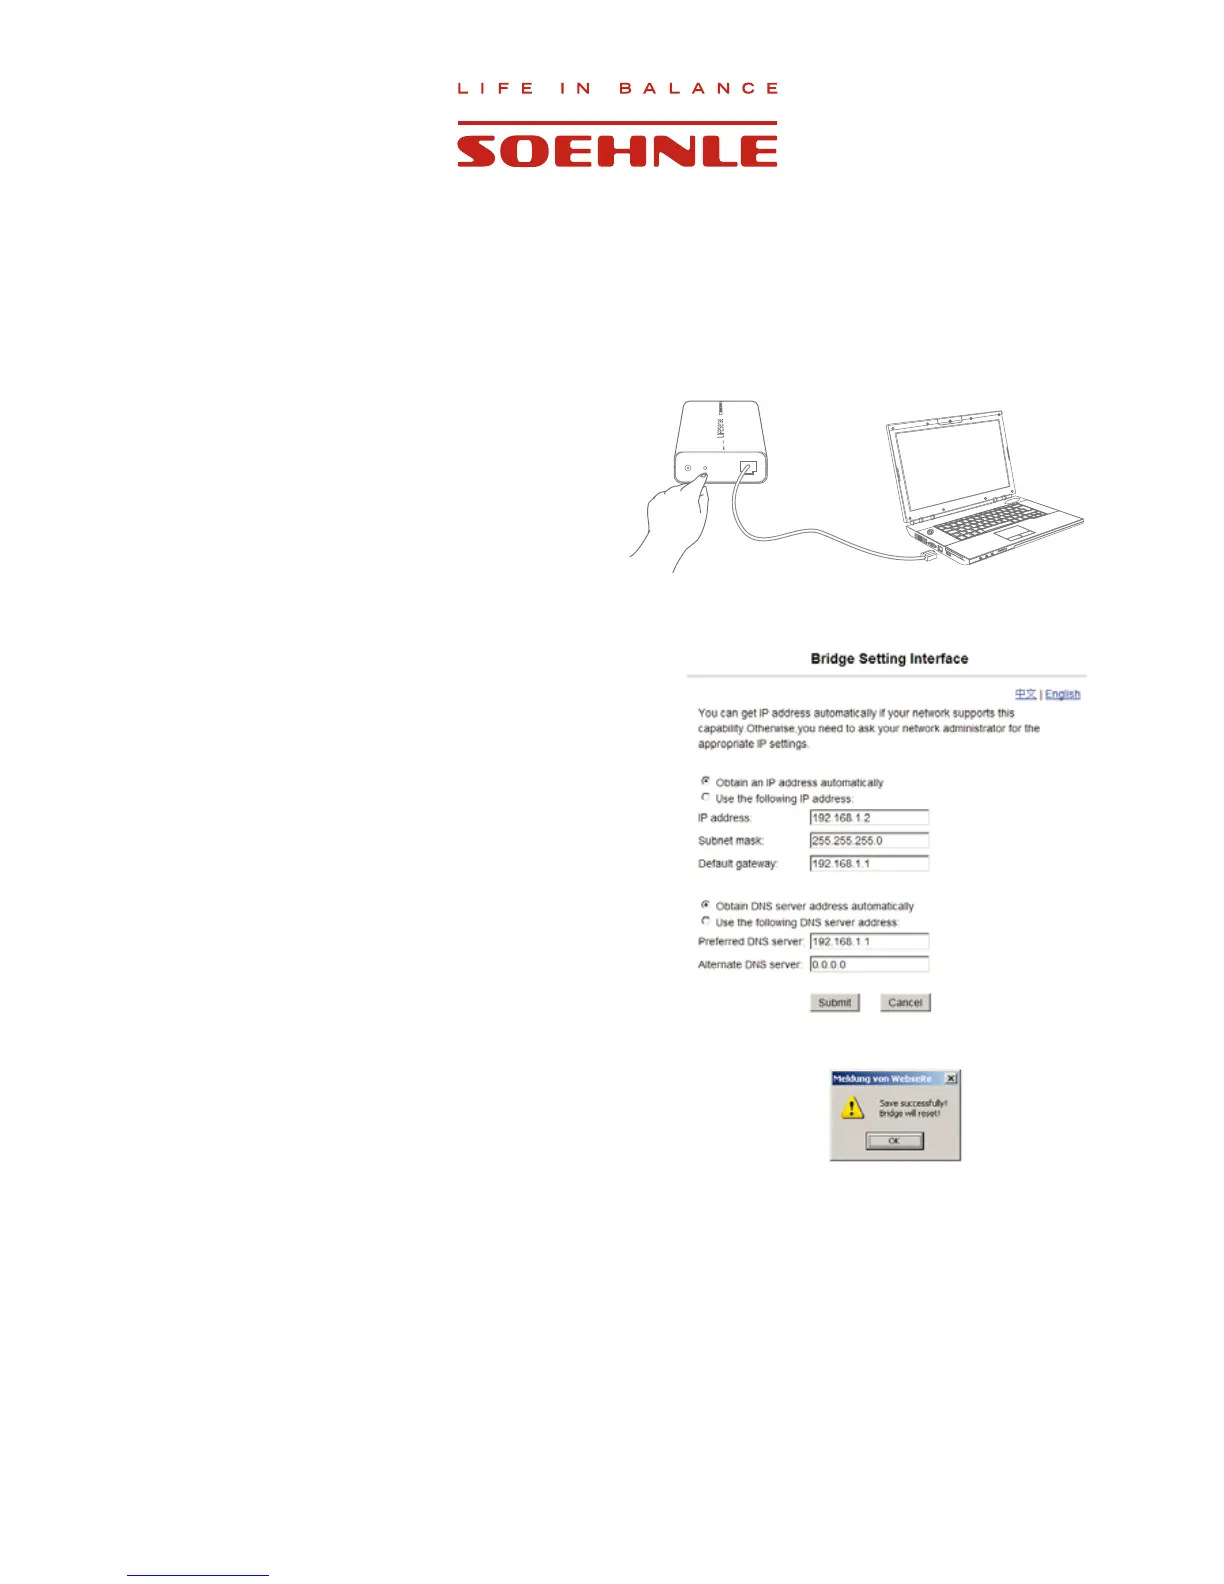
1. The web box must be switched on (both LEDs are
ÀDVKLQJ
2. Push the reset key and hold it for approx. 5 seconds.
Both LEDs will light up simultaneously.
:KHQERWK/('VEHJLQWRÀDVKUHOHDVHWKHNH\
3. Then connect web box and PC using the network cable.
4. Access the network connections via Start => Control panel =>
Network connections.
5. Click on LAN connection (for WIN95 use right mouse button)
and select settings.
6. Next to internet protocol, mark (TCP/IP) and select settings.
7. You now have the choice to obtain the IP address automatically
RUWRFRQ¿JXUHLWPDQXDOO\
Select ”Use following IP address” and enter the following
IP address: 192.168.1.5 Subnet mask: 255.255.255.0 and
FRQ¿UP
8. Now enter the following information into your browser:
http://192.168.1.2/
The adjacent input screen will appear and must contain this
LQIRUPDWLRQSUHFLVHO\&KDQJHLIUHTXLUHGDQGWKHQFRQ¿UP
9. The web box can now be connected via the router (chapter 2.3).
7KH'\QDPLF+RVW&RQ¿JXUDWLRQ3URWRFRO'+&3SURYLGHVD
IUDPHZRUNIRUSDVVLQJFRQ¿JXUDWLRQLQIRUPDWLRQWRKRVWVRQD
TCP/IP network.