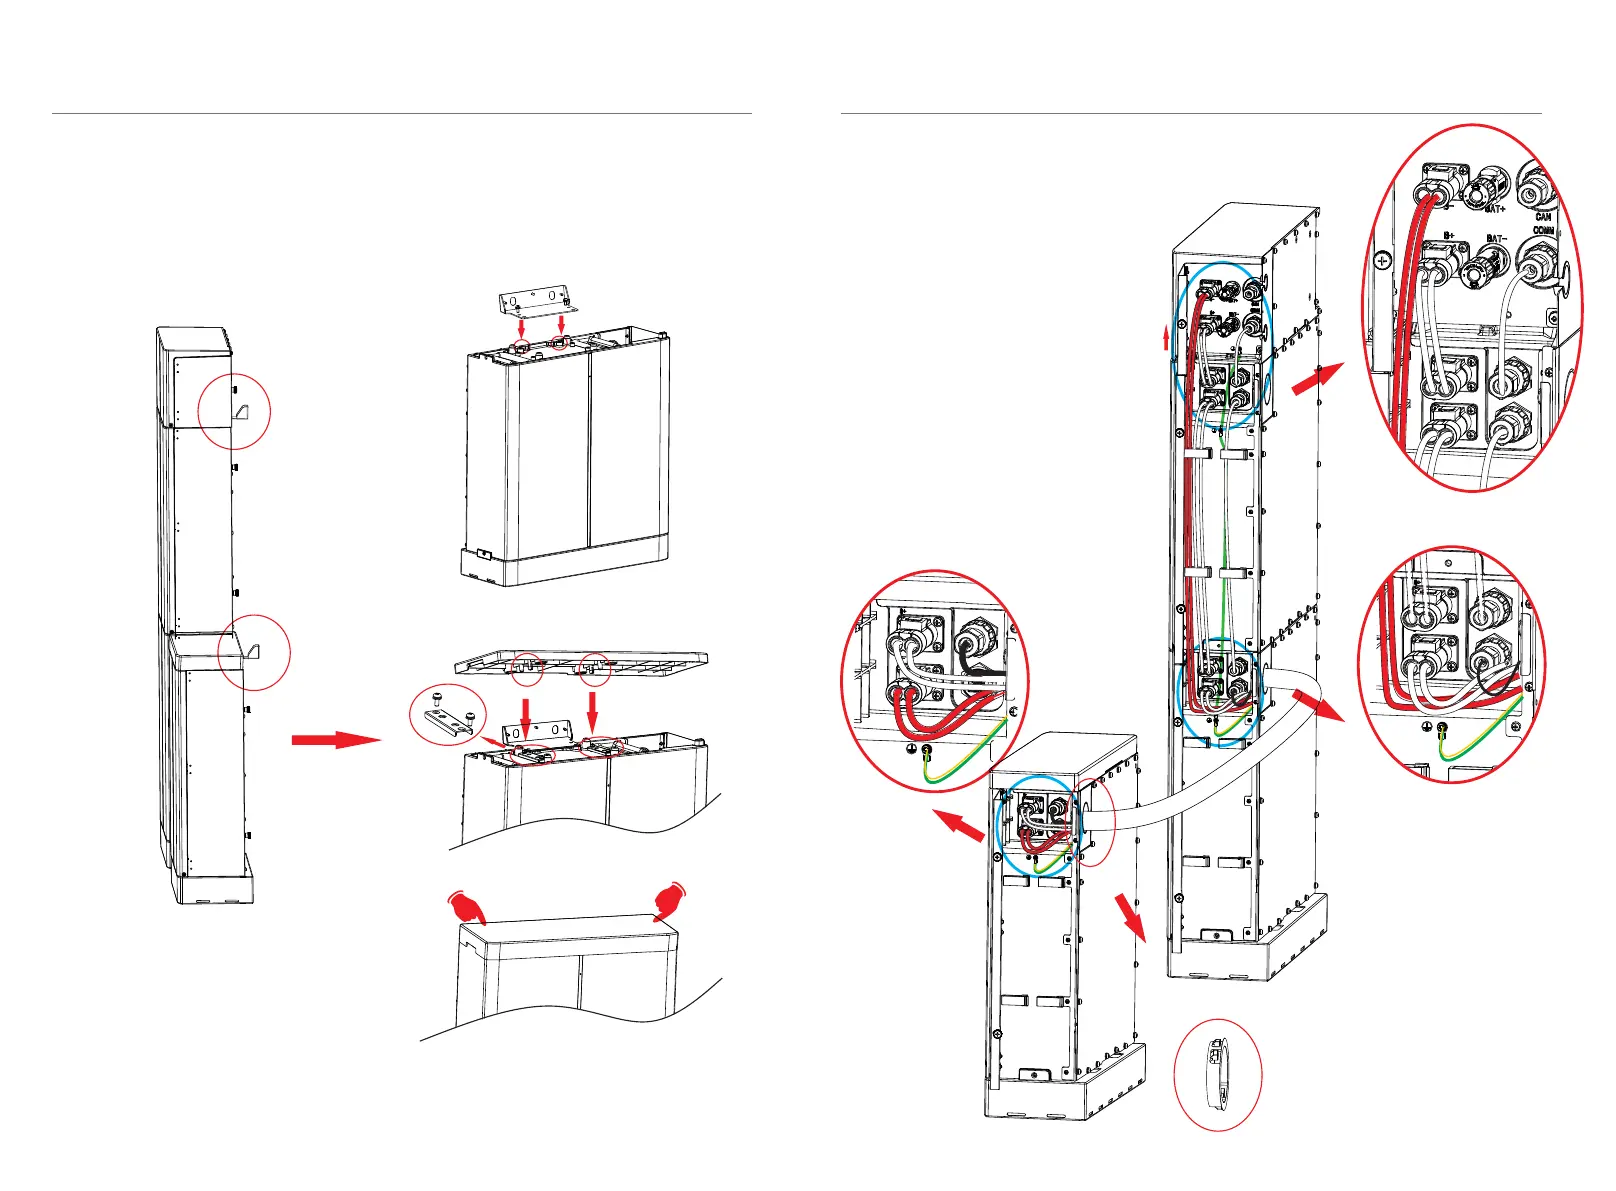
For three battery modules:
Install a fixed wall bracket on the battery modules.
Ø
Check to make sure the connections are securely locked.
BMS to Slave1:
B+ to B+ (C:120mm); COMM to
COM1 (E:200mm);
BMS to Slave3:
B- to B- (B3:1.8m); Get the cables
through corrugate pipe.
Slave1 to Slave2:
B- to B+ (A1:690mm); COM2 to
COM1 (B1:600mm)
Slave2 to Slave3:
B- to B+ (A2:1.2m); COM2 to
COM1 (B2:1.2m); Get the cables
through corrugate pipe.
Ø
4. Installation
4. Installation
28
29
Slave3
BMS
It (slave3 and slave4 if you need) is required to install the snap-fits to fix the cover plate.
(1)
(2)
(3)
Slave1
Slave2
The two ends of the corrugated pipe need
to be protected with guard rings.