5. Equipment Installation 5. Equipment Installation
Step 5. Repeat the Step 4 to install the remaining battery modules and BMS
After installation is completed, it is shown as follows:
26
27
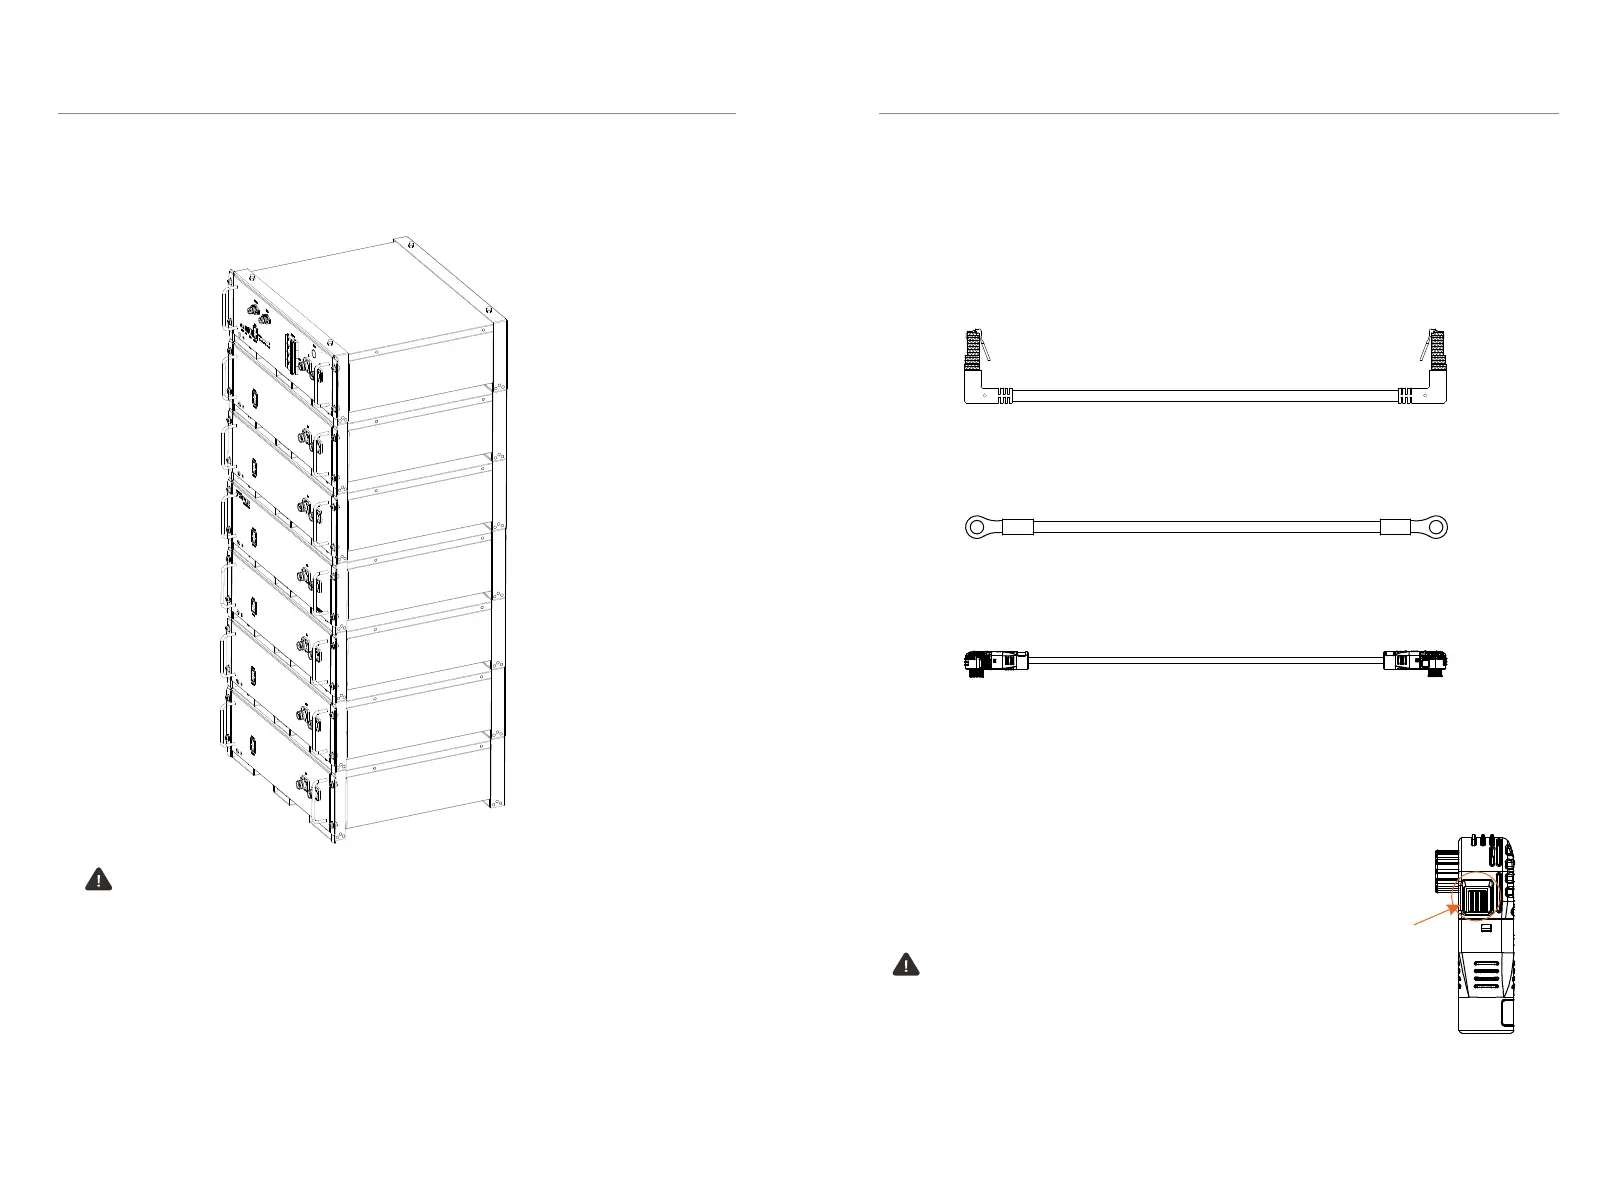
■ Wiring
After installation, connect a battery module to another battery (or BMS), and BMS
to inverter.
• Battery module to battery module (or BMS)
Communication cable (1 pcs), power cable (1 pcs) and ground wire (1 pcs) are
provided in our packing list.
Power cable: there are two terminals with the same function at both ends; a power
cable in the packing list of battery module, one end connects to B+ of a battery
module, and the other connects to B- of the neighboring battery module (or B- of
BMS). A power cable in the packing list of BMS, one end connects B+ of BMS and
the other connects B- of a battery module at the bottom of the rack.
Ground wire: there are two terminals at both ends; one connects to a grounding
point of a battery module; and the other connects to grounding point of the
neighboring battery module or BMS.
Communication cable: there are two registered jacks at both ends; one connects to
Com-A of a battery module, and the other connects to Com-B of the neighboring
battery module (or COMM of BMS).
Caution!
There are two disassembly methods, with details as follows:
1. In case the entire device needs to be replaced, remove it from the top down,
including Rack;
2. In case one of the battery modules needs to be maintained, remove such a
battery module, reinstall it after finishing maintenance. If there is any other
battery that needs to be maintained, repeat the above-mentioned steps.
Caution!
Press and hold the “Lock Button” while unplugging the
power cable. Otherwise, it cannot be pulled out.
Lock Button
 Loading...