Note!
5. Equipment Installation 5. Equipment Installation
5.2.2 Cabinet Installation
As for the installation of outside cabinet, please follow the guide delivered with
the cabinet.
As for the installation of inside cabinet, please follow the steps as below.
There are two alternative sizes of cabinets available for users. The following
steps take 42U (1U = 4.445 cm) as an example.
Installation Step
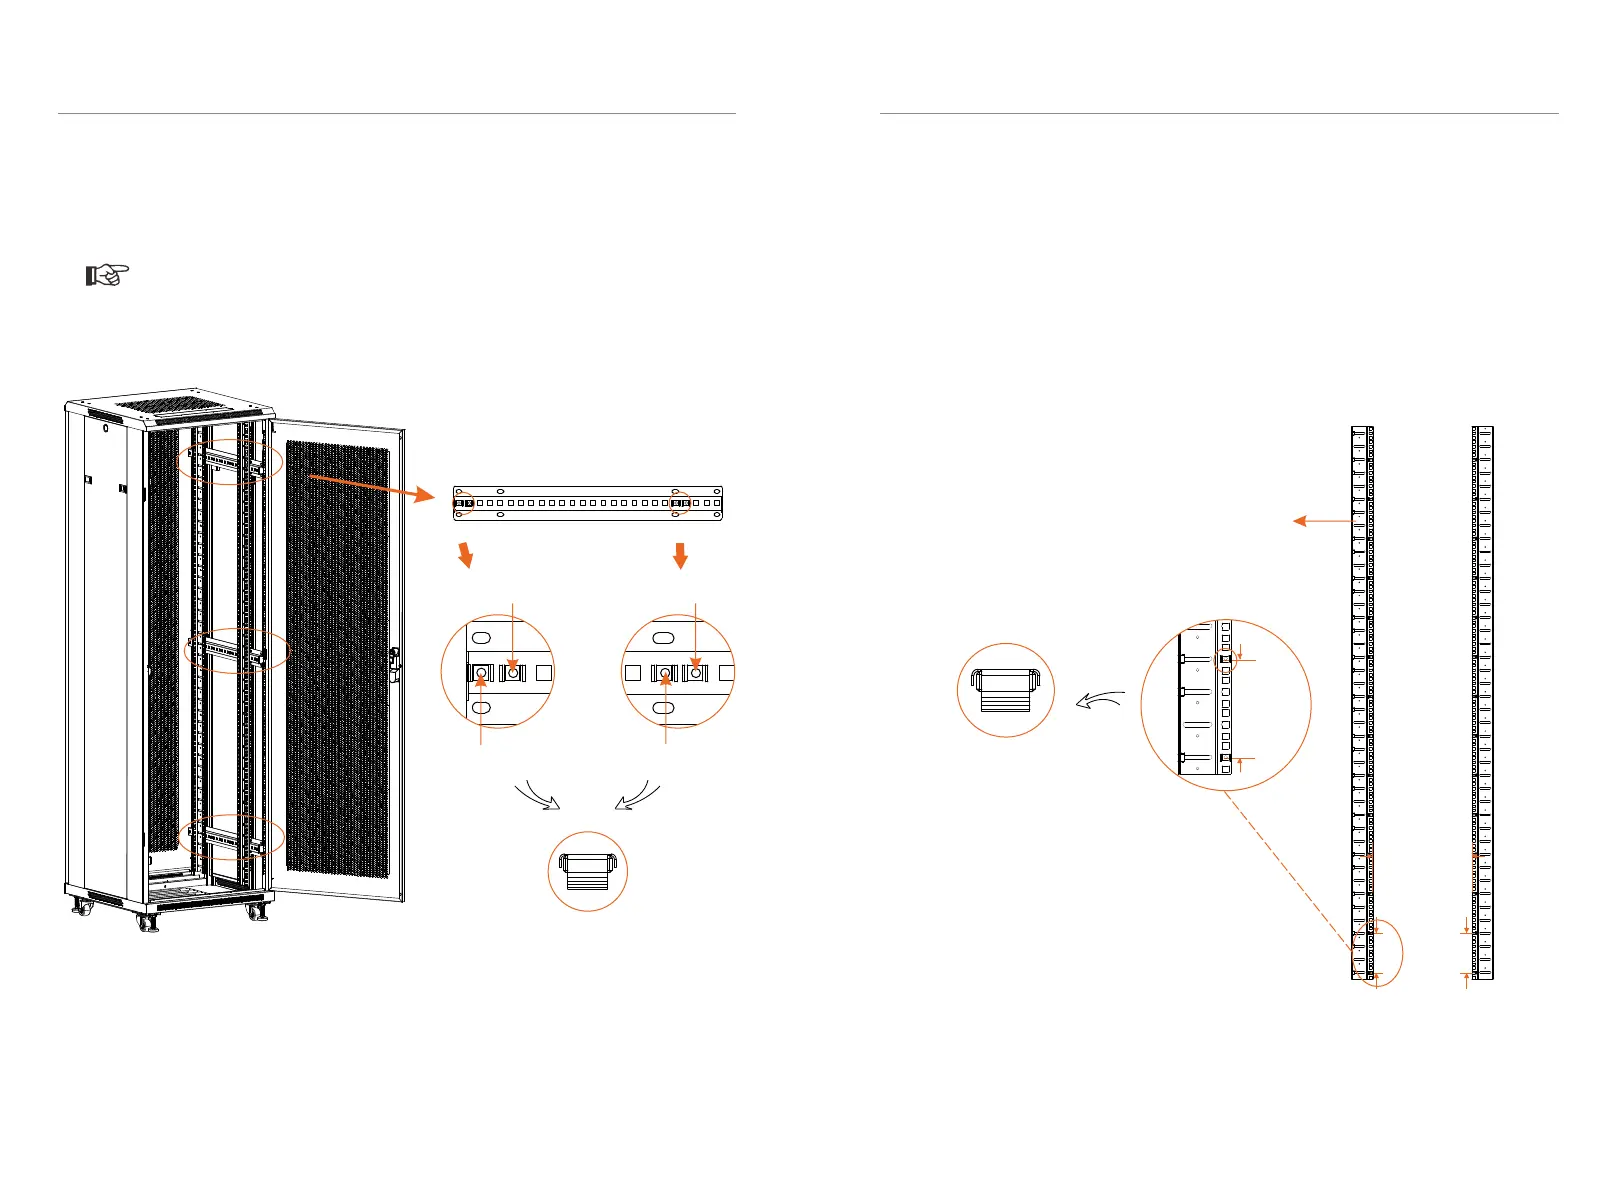
Step 1. Attach Mounting Rails into the cabinet. Make sure all four Mounting Rails
are at the same level. The distance between two Mounting Rails on one side shall
not be less than 15.75 in/400 mm.
32
33
5.2.2 Cabinet Installation
Note!
When installing outside cabinet, Cassette Nuts shall be inserted before installing
Fixed Rails, with 4 Cassette Nuts for one Fixed Rails. There are totaling 3 Fixed
Rails. See figure below.
As for the installation of inside cabinet and battery modules, please follow the steps
as below.
There are two alternative sizes (22U and 42U) of cabinets available for users. The
following steps take 42U (1U = 4.445 cm) with 13 battery modules as an example.
Second
First
Fourth
Fifth
Front sideRear side
As for the installation of outside cabinet, please follow the guide delivered with the
cabinet.
■ Installation Step
Step 1. There are totaling 4 Mounting Rails. Insert Cassette Nuts into the holes on
the Mounting Rails every 3U (1U = 4.445 cm), with totaling 14 Cassette Nuts of one
Mounting Rail. See figure below. The distance between two Mounting Rails on one
side shall be at about 12.99 inches/330 mm.
Side View of Cabinet
3U
A distance at
about
12.99 inches
330 mm
3U
Front Rear
Note!
The four Mounting Rails are in the Package
C of NCB Network Cabinet.
(Cassette Nuts *14) x
(Mounting Rail * 4)
 Loading...