5. Equipment Installation 5. Equipment Installation
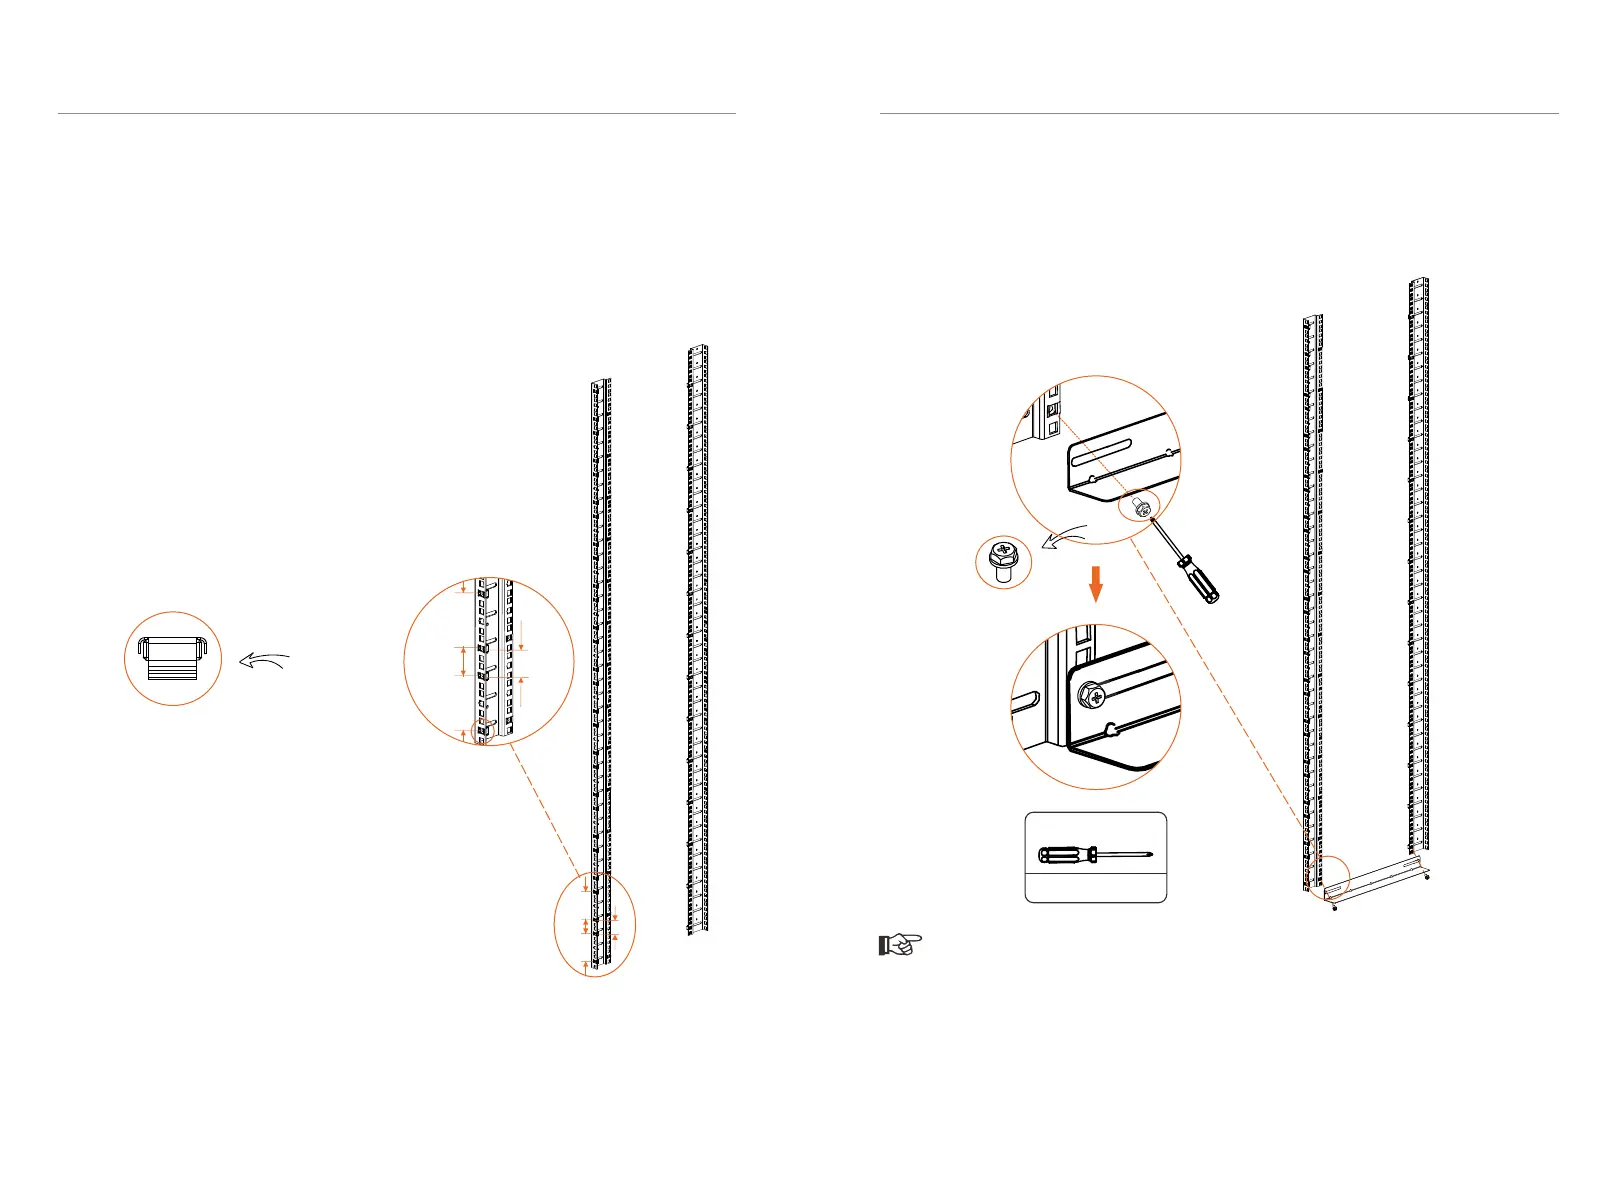
Step 2. Insert Cassette Nuts into holes on the front Mounting Rail facing the cabinet
door, with totaling 28 Cassette Nuts of one front Mounting Rail.
① Insert the first Cassette Nut into a hole;
② Insert the second Cassette Nut 2U from the first;
③ Insert the third Cassette Nut 1U from the second;
④ Then repeat ② and ③.
Side View of Cabinet
34
35
Step 3. Fix and screw the L-shaped Transverse Support on the Mounting Rails with
Cross External Hexagon Screw (M6*L16 X 4) (Torque: 4-5 N·m). Make sure the two
Mounting Rails on one side are at the same level.
The two location holes on the L-shaped Transverse Support are long, please attach
the screws at the end of holes near mounting rail.
Note!
2U
1U
2U
Front
Rear
First Cassette Nut
Second Cassette Nut
Third Cassette Nut
Forth Cassette Nut
(Cassette Nuts * 28) x
(Mounting Rail (front) * 2)
Front
Rear
M6 X L16 * 2
Torque: 4-5 N·m
 Loading...