After
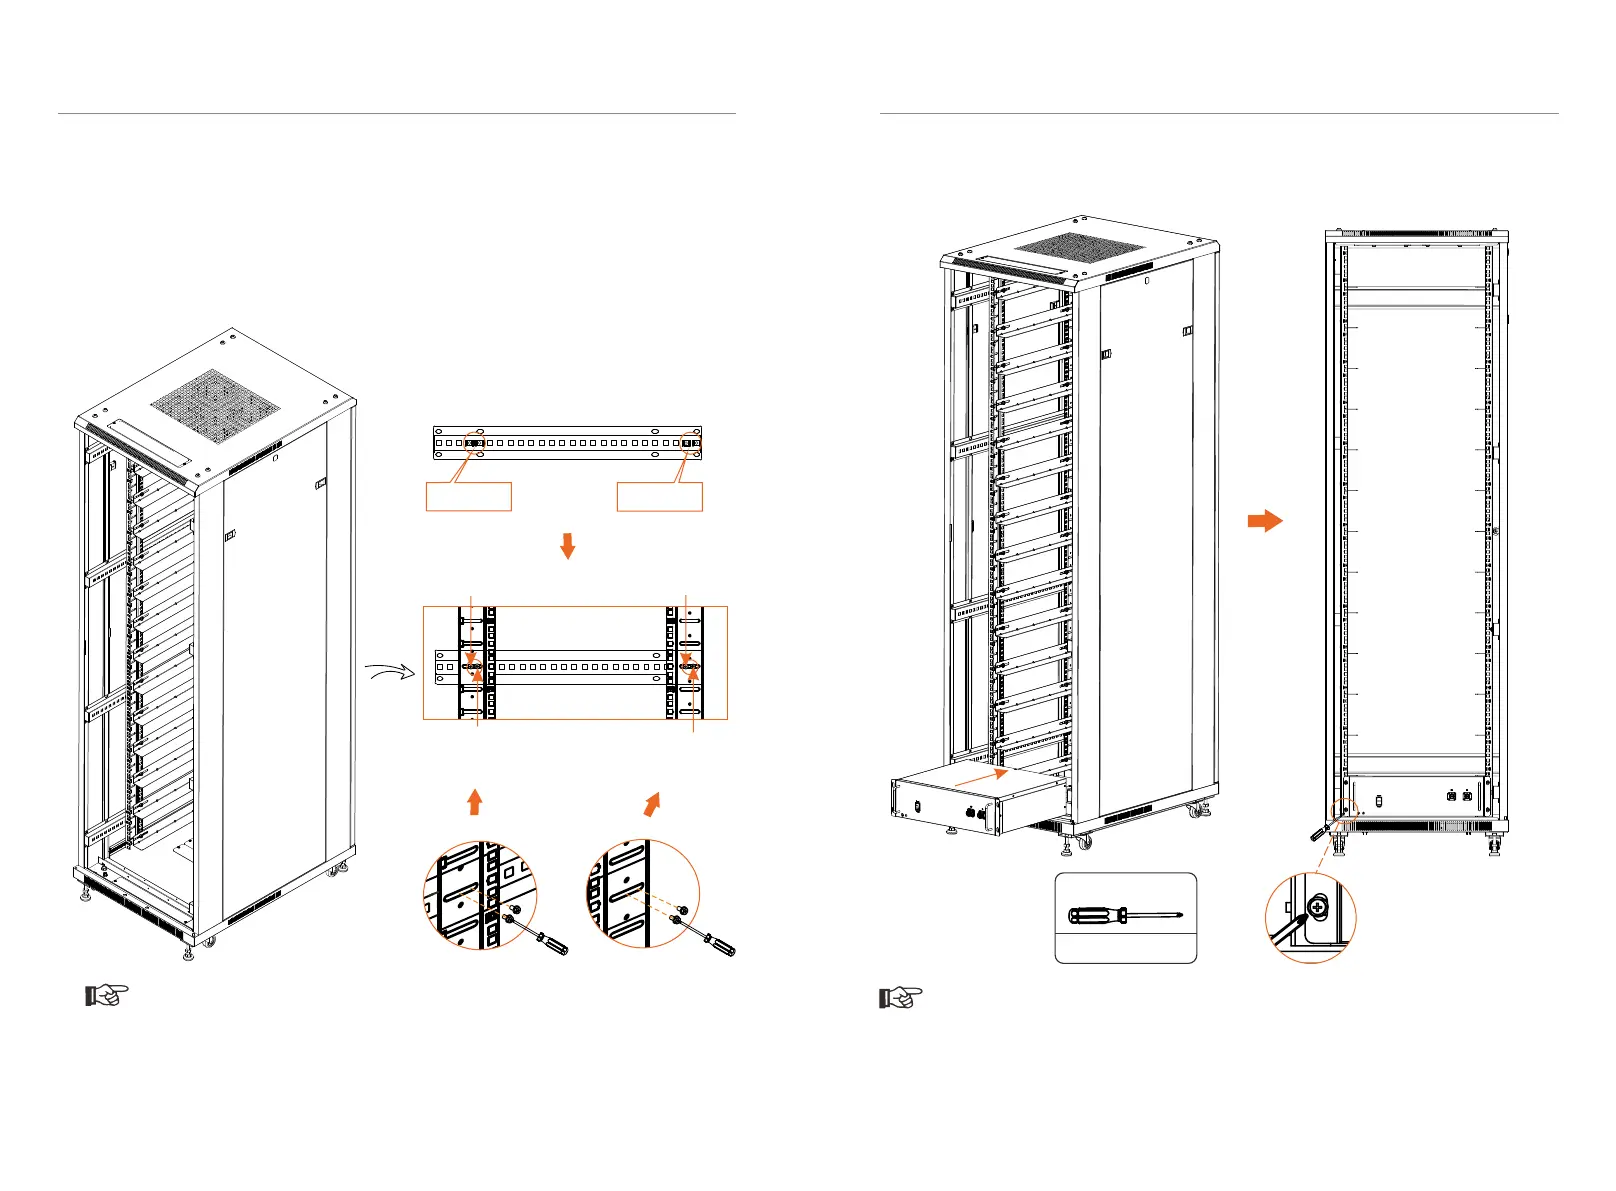
5. Equipment Installation 5. Equipment Installation
Mounting Rail
Not less than
15.75 in
400 mm
Step 4. After all L-shaped Transverse Support are secured,
(1) Attach the assembled Mounting Rails into the cabinet, making sure all four
Mounting Rails are at the same level.
(2) Fix the assembled Mounting Rails on Fix Rail by using 4 screws (delivered with
the cabinet), and insert 2 screws into the 4th and 5th location holes near the front
side, and 2 screws into the 1st and 2nd holes near rear side.
■ Please prevail in kind.
■ Cassette Nuts shall be inserted before installing the assembled Mounting Rails,
with 4 screws for one Fixed Rails.
■ Ensure that heavy duty castors are tight and firm.
Note!
Adjust
Front side Rear side
Page 30
Page 30
Fourth
Second
Fifth
First
Front side Rear side
36
37
Step 5. Place battery modules into the cabinet, and screw them (Torque: 4-6 N·m)
Please prevail in kind.
Note!
M6 X L16 * 4
Torque: 4-6 N·m
 Loading...