5.3 Installation Precaution
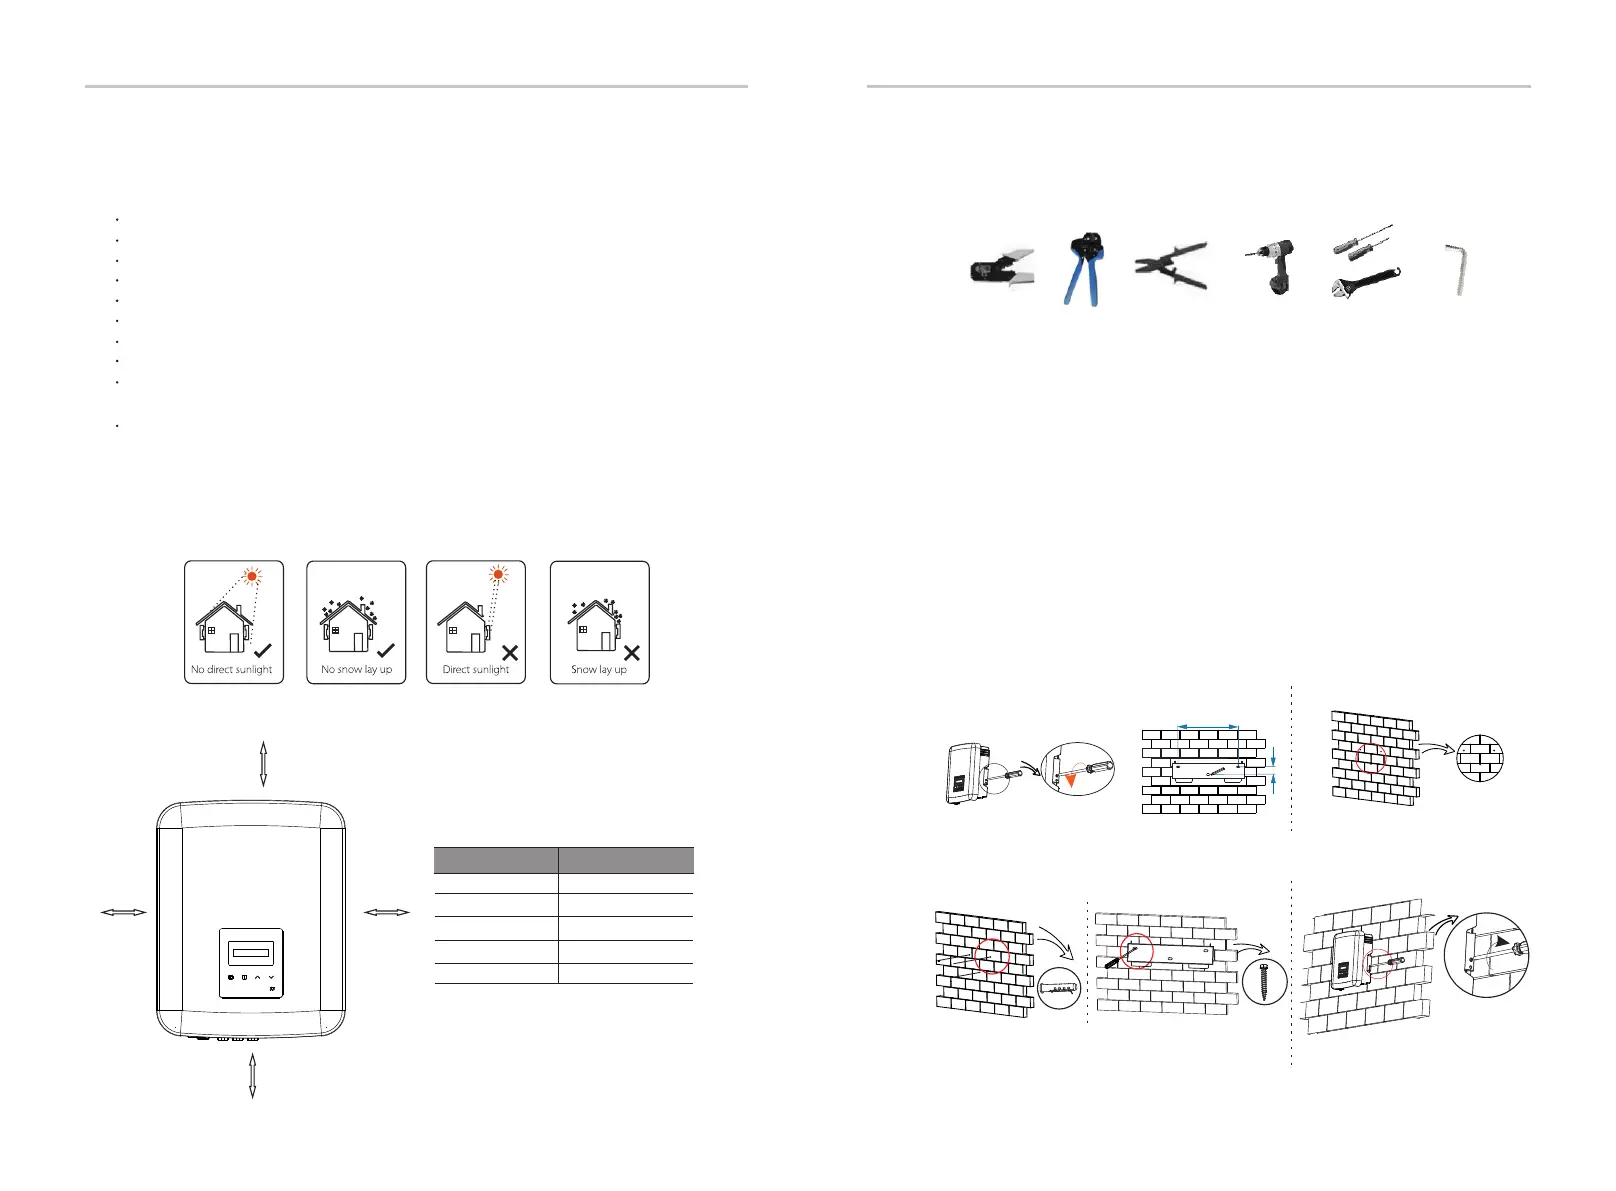
Please avoid direct sunlight, snow laying up during installing and operating.
Available Space Size
X3-MIC G2 Series inverter is designed for outdoor installation (IP 66).
Make sure the installation site meets the following conditions:
Not in direct sunlight.
Not in areas where highly flammable materials are stored.
Not in potential explosive areas.
Not near the television antenna or antenna cable.
Not higher than the maximum operating altitude of the inverter.
Not in environment of precipitation or humidity.
Be sure the ventilation is good enough.
The ambient temperature in the range of -30℃ to +60℃.
The slope of the wall should be within ±5°.
Position Min.size
Ø
30 cm 30 cm
Left
30 cm
30 cm
30 cm
30 cm
30 cm
Right
Top
Bottom
Front
Table Available Space Size
30 cm
30 cm
5.4 Installation Steps
Preparation
Step 1: Screw the wall bracket on the wall
Step 2: Match the inverter with wall bracket
Ø
Ø
Ø
Below tools are needed before installation.
Installation tools : crimping plier for binding post and RJ 45, wire crimper,
stripping plier, φ 10 drill, screwdrivers, manual wrench and allen wrench.
a) Unscrew the bracket from the back of the inverter. Use it as a template
to mark the position of the 3 holes (223 mm*30 mm) on the wall.
b) Drill holes with the drill, make sure the holes are deep enough (at least
60 mm) for installation.
c) Insert the expansion bolts in the holes. Then install the wall bracket by
screwing the expansion screws.
d) Hang the inverter over the bracket, move the inverter close to it,
slightly lay down the inverter, and make sure the 2 grooves on the back of
the inverter are fixed well with the 2 lugs on the bracket. Screw the cross
recessed screw on the right side.
16 17
Installation Installation
The wall hanging the inverter should meet conditions as below:
1. solid brick/concrete, or strength equivalent mounting surface;
2. Inverter must be supported or strengthened if the wall’s strength isn’t enough
(such as wooden wall, the wall covered by thick layer of decoration).
2
2
3
3
0
cross screwdriver, torque: 0.8±0.1 N·m
torque: 0.8±0.1 N·m
X1
X1
a) b)
c) d)

 Loading...


