4948
16. Fill the water tank 8 with cold tap water.
17. Insert the water tank 8 into the appliance.
18. Empty the container and the drip tray 6.
19. Place back the container (step 6 through 7).
20. Press the steaming function button l to start the rinsing process. During the process:
• Rotate the steaming knob z anticlockwise when the display shows OP.
• Rotate the steaming knob z clockwise when the display shows CL.
When the rinsing process is nished the appliance beeps twice.
21. Remove the water tank 8 from the appliance (see image J).
22. Empty the water tank 8 above a sink.
23. Rinse the water tank 8 multiple times under a tap.
24. Insert the water lter cartridge 9 into the bracket in the water tank 8 with the selector facing
downwards.
25. Fill the water tank 8 with cold tap water.
26. Insert the water tank 8 into the appliance.
When the cup extraction buttons light up white, the appliance is ready for use .
V TECHNICAL SPECIFICATIONS
Model-No. 1019
Voltage / frequency 220–240 V~ / 50 – 60 Hz
Output 1420 - 1700 W
Dimensions (W x D x H) 30.9 x 41.2 x 37.3 cm
Weight 9.0 kg
Technical changes reserved.
d Snelstartgids
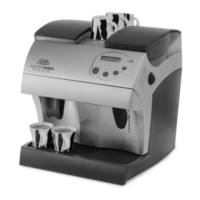
GRIND & INFUSE PERFETTA Type 1019
Een uitgebreide handleiding, antwoorden op veelgestelde vragen en recepten zijn te vinden op
www.solis.com/manuals
V BEDOELD GEBRUIK
• Dit apparaat is geschikt voor de bereiding van verschillende soorten koe met versgemalen
bonen.
• Gebruik het apparaat alleen zoals beschreven in deze handleiding.
• Dit apparaat is bedoeld voor gebruik in huishoudelijke en soortgelijke toepassingen zoals:
– de keukenruimtes van het personeel in winkels, kantoren en andere werkomgevingen;
– boerderijen;
– door klanten in hotels, motels en andere residentiële omgevingen;
– voor "bed and breakfasts" en niet voor commercieel gebruik.
• Dit apparaat is uitsluitend bedoeld voor gebruik binnenshuis.
8. Let the appliance cool down.
9. Remove the portalter s from the brewing head 4.
10. Remove the rubber insert for cleaning i from the portalter s.
11. Before rst use, clean the appliance as described in the chapter Daily maintenance.
V DESCALING
Descale the appliance when the corresponding alarm is visible.
For descaling of the machine, please use a descaling agent which is suitable for espresso machines.
6 When the descaling alarm shows up, descale the appliance immediately to
avoid permanent damage to the appliance. Damage related to limescale
is not covered by warranty if the descaling procedure is not performed
regularly as described in this chapter.
6 Wipe o spilled descaling solution immediately. The descaling solution can
damage the surface of the appliance.
To descale the appliance:
1. Switch o and unplug the appliance.
2. Empty the drip tray 6 (see chapter Weekly maintenance).
3. Remove the water tank 8 from the appliance (see image G).
4. Empty the water tank 8 above a sink.
5. Remove the water lter cartridge 9 from the water tank 8.
6. Fill the water tank 8 with descaling agent and water. The minimum level required for descaling is 1
litre.
4
For best results, we recommend Solipol special (Art.-no. 703.02) which is available in selected
countries.
7. Insert the water tank 8 into the appliance.
8. Place a large container (> 2.5 l) underneath the brewing head 4.
9. Aim the steaming wand 5 into the container
10. Plug in and switch on the appliance.
11. Press the programming button d.
12. Press the steaming function button l to start the descaling process.
The descaling process takes 20 minutes. During the process:
• Rotate the steaming knob z anticlockwise when the display shows OP.
• Rotate the steaming knob z clockwise when the display shows CL.
6 If the descaling procedure is interrupted (e.g. during a power loss) we
recommend to complete the procedure when the interruption is solved.
Rinse the appliance thoroughly when the process is nished.
When the rst part of the process is nished the display shows H2O and the appliance is ready for rinsing:
13. Remove the water tank 8 from the appliance (see image G).
14. Empty the water tank 8 above a sink.
15. Rinse the water tank 8 multiple times under a tap.

 Loading...