DISTRIBUTION: INTERNAL + SOLOPROTECT CUSTOMERS
SoloProtect ID US: User Guide
US SoloProtect ID User Guide v2.0 d1909189
© SoloProtect Ltd, 2018 Page 8 of 31
3. Initial Set Up and Care and Maintenance
3.1 Initial Set Up
3.1.1 What’s included
The box containing your SoloProtect ID includes the following items:
• SoloProtect ID
• Quick Reference Guide
• Lanyard with Lanyard rip plug pin attached
• Lapel clip
• Charger (including your country’s adapter)
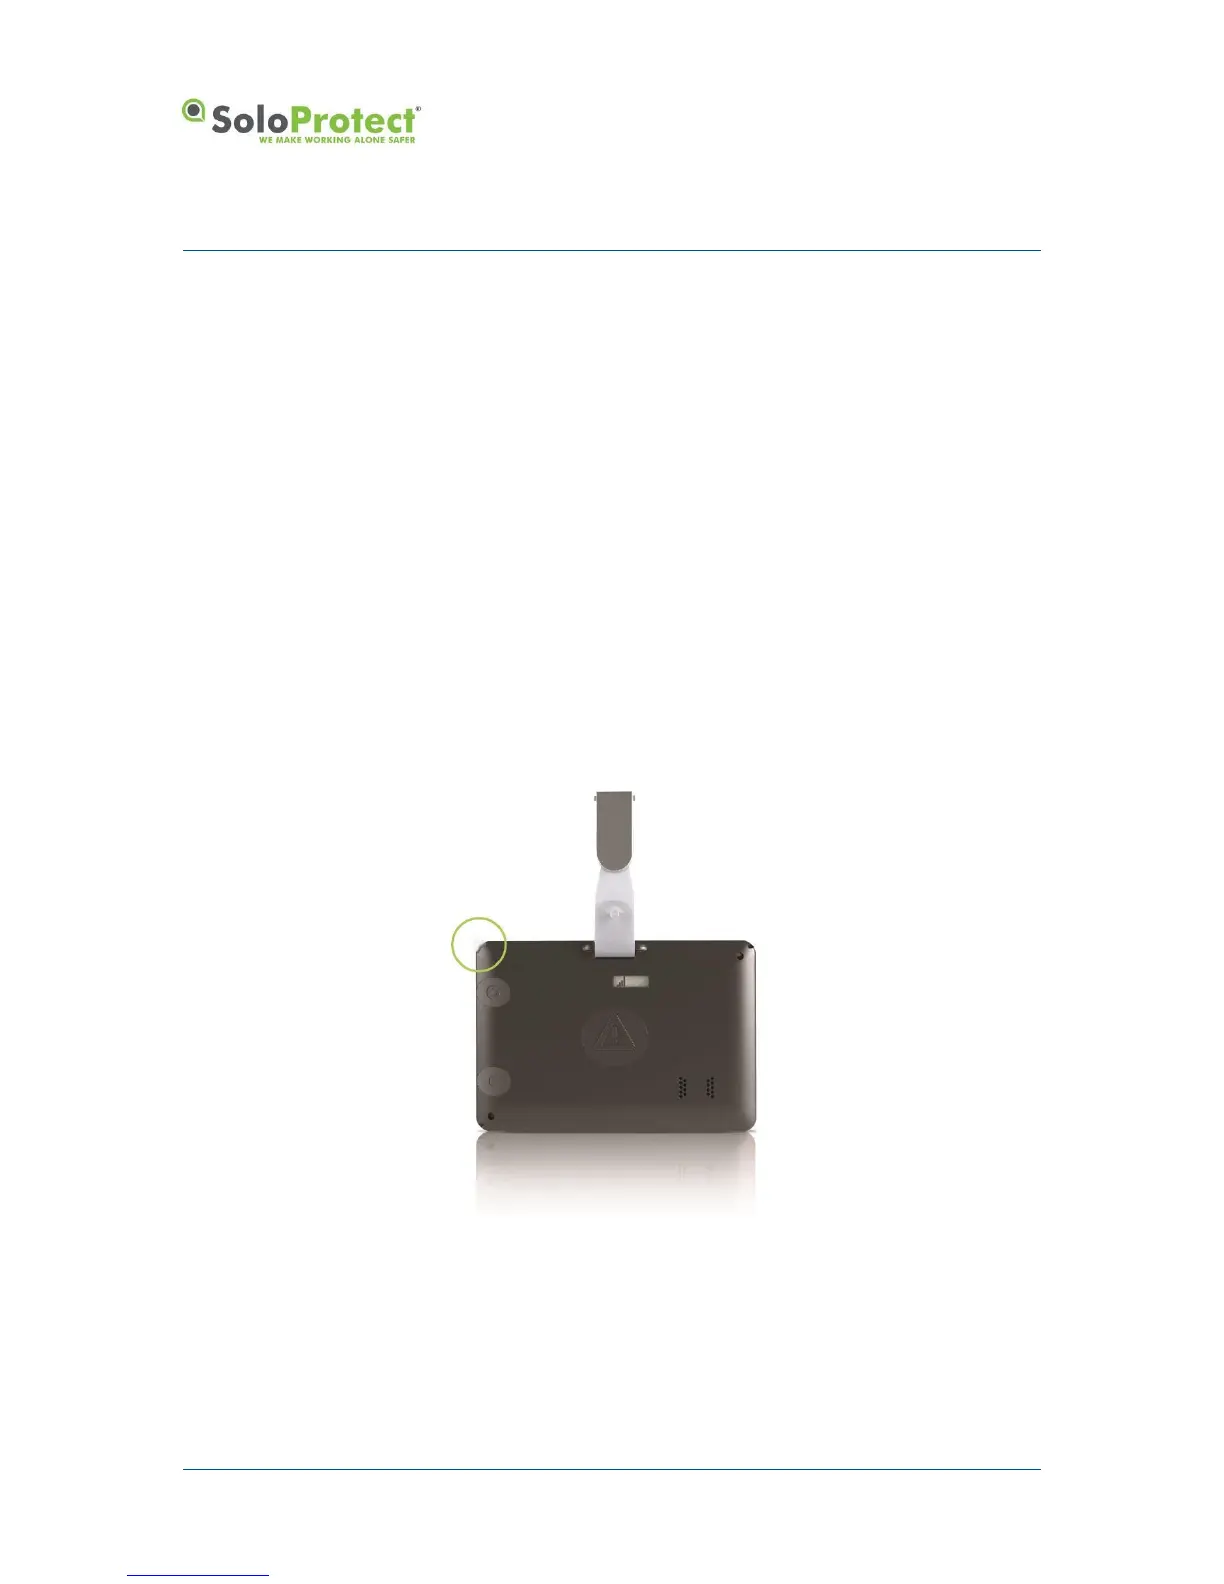
3.1.2 Installing the Lanyard or Lapel Clip
You install the lanyard pin in the corner circled attaching the pin to the longer part of the lanyard. The
shorter part of the lanyard loops into the opposite corner for landscape ID card, or loops into the
corner below for a portrait ID card. The attachment in the circled corner is by way of a plastic pin which
fits tightly in its socket but will pull out if tugged firmly.
Figure 2: Inserting the Lanyard
The pin provided fits in the socket one way only. The pin is held in place by a magnet and pip and the
pin will ‘click’ into its correct location in the socket.