Solwise Ltd., www.solwise.co.uk, sales@solwise.co.uk
- 19 -
Double click on the video will enlarge the video to full screen.
Quality can be “High”, “Standard” or “Low”. “High” consumes largest bandwidth, thus the
frame per second will down.
If you feel the frame per second (fps) is too slow, and hope to increase it, you may select
“Low” quality and lower resolution. If you hope to see clearer image, you may choose
“High” quality and higher resolution.
Brightness and Contrast can be changed according to different environment. “+” means
add, “-” means reduce. “STD” means a standard (middle) value.
Zoom will show the video in a scale of half or double. It won’t affect the transport fps or
bandwidth.
Click [Snapshot] will pop up a new page to snap a static JPEG image, you may click right
key of mouse and select “save as…” to store it to your computer.
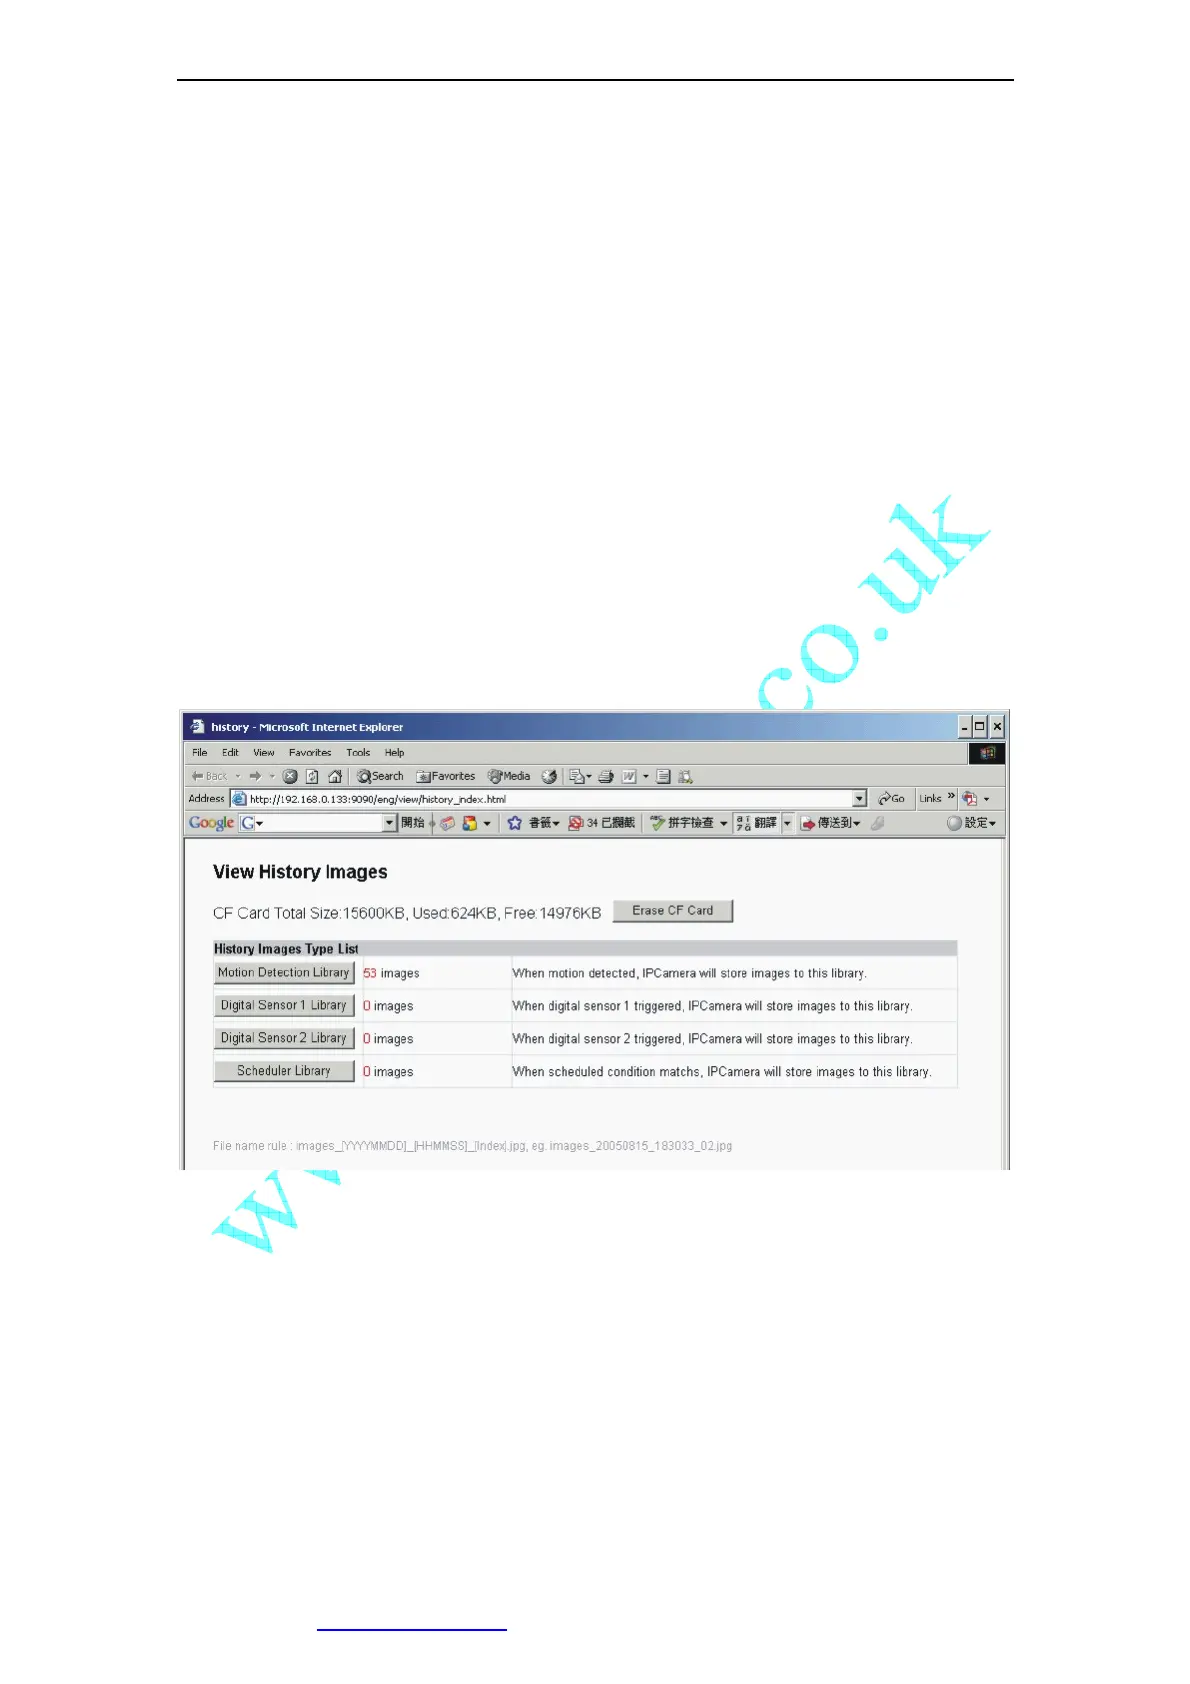
Click [History], will pop up a History View Page (You must have inserted CF Card first).
Figure 23 History Images View
4.5 Setup IP Camera on Web
You can click [System Setup] to modify all parameters. See the Chapter 5 for details
.
4.6 Mounting the IP Camera
The IP Camera can sit on a flat surface, such a shelf or bookcase, be mounted to a wall using
the included bracket, or mounted atop a tripod stand using the standard tripod mount located
on the underside of the base. When using the camera free standing, be sure to secure the
cables. Failing to secure the cables could cause the camera to be pulled off the mounting
surface resulting in damage to the camera.