EN
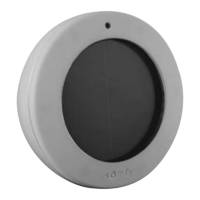
Soliris io
24 Copyright
©
2019-2020 SOMFY ACTIVITES SA, Société Anonyme. All rights reserved.
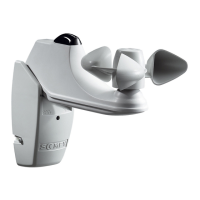
3] Unscrew the front panel of the mounting bracket (O) to remove
the housing and access the terminal blocks and the mode selector.
4] If necessary, loosen the screws fastening the mounting bracket
to the wall.
2.6.3. Unpairing Solirisio from an io receiver or motor
The procedure to be followed to unpair Solirisio from an io receiver or motor is identical to the pairing
procedure, see 2.5.1.
2.6.4. Replacing a broken or faulty Solirisio
1] Press the PROG button on the Somfy io local control point until
the motorised product performs an up-and-down movement (≈
2 s).
2] Press the PROG button (I) on the new Soliris io sensor for
7seconds:
The Wind LED (K) on the new Solirisio sensor is lit green after
2seconds and remains lit for 5 seconds:
All the broken or faulty sensors are deleted from the memory of the io motor(s) or receiver(s).
3] Pair the new Solirisio sensor with the io motor(s) or receiver(s); see 2.5.1.
2.6.5. Returning Solirisio to its original configuration
1] Press the PROG button (I) on Solirisio for 7 seconds:
The Wind LED (K) is lit green after 2s and remains lit for 7s:
The original Solirisio settings have been restored and the io bi-directional control points have been
deleted.
2] To use Solirisio again, carry out a complete commissioning procedure; see 2.5.
K
3]
2 s
1]
PROG.
7 s
2]
PROG.
 Loading...