EN
Soliris io
20 Copyright
©
2019-2020 SOMFY ACTIVITES SA, Société Anonyme. All rights reserved.
2.3.3. Activating a rain sensor
Presentation of the operating modes
When it is connected to the Solirisio sensor, the rain sensor can be configured in 2 operating modes: safety
mode or comfort mode.
• In safety mode, the motorised product moves to the safety position if the rain sensor detects rain.
This position is determined by the type of motorised product and protects the motorised product
from the rain.
• In comfort mode, when the rain sensor detects rain:
- If it is paired with a Somfy io bi-directional control point (e.g. TaHoma), via Solirisio, follow the
instructions for this control point.
- Otherwise, the motorised product goes to its lower end limit. This mode serves, for example, to
protect users from the rain under their awning.
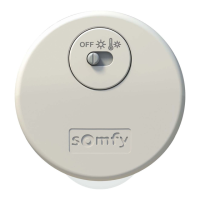
Selecting the operating mode
By default, the mode selection button (X) is set to the central position:
the rain sensor is not activated.
To activate it, select a mode on the Solirisio sensor mounting bracket:
• Turn the mode selection button to C: the rain sensor is activated
in comfort mode.
• Turn the mode selection button to S: the rain sensor is activated in safety mode.
Attention
Do not use tools to turn the mode selection button (X).
Fitting the mounting bracket
1] Check the presence, good condition and the position of the seal
(R) before fitting the cover.
2] Screw the front panel (N) of the mounting bracket back on.
Attention
Tighten the screws completely to maintain the tightness of the
mounting bracket.
To complete the installation, go to section 2.4.
2.4. FITTING THE PROTECTIVE HOUSING
1] Insert the protective housing (G) on the mounting bracket (H)
until it clicks into position.
2] Fix the protective housing (G) onto the mounting bracket using
the screws.
3] Connect the cable (B) to the power supply.
2.5. COMMISSIONING
2.5.1. Pairing Solirisio with an io motor or receiver
Prerequisite: The motorised product must already be adjusted and paired with an io-homecontrol® control
point.
C
S
X
1]
R
N
2]
G
1]
H
G
2]
 Loading...