Soliris io
EN
21Copyright
©
2019-2020 SOMFY ACTIVITES SA, Société Anonyme. All rights reserved.
1] Switch on the power supply.
2] Press the PROG button on the Somfy io control point paired with
the motorised product for about 2s until the motorised product
completes an up-and-down movement.
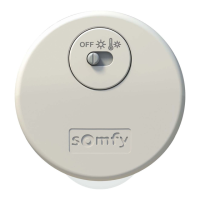
3] Briefly press the PROG button on Solirisio.
The motorised product performs another up-and-down
movement.
The Solirisio sensor is paired.
To pair the Solirisio sensor with other io motors or receivers, repeat this procedure.
To pair using an io-homecontrol® control point from a partner brand or a Somfy io bi-directional control
point (e.g.TaHoma), please refer to the relevant guide.
The Solirisio sensor can also be paired with a Somfy io bi-directional control point (e.g.TaHoma), please
refer to the relevant guide.
2.5.2. Checking Solirisio pairing
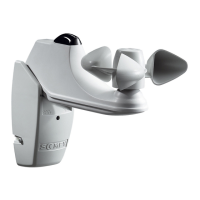
1] Position the motorised product at the lower end limit.
2] Turn the Wind potentiometer (M) to the Demo position.
The motorised product moves up and down briefly.
3] Turn the anemometer (F) manually to simulate the wind blowing.
The motorised product automatically moves to safety position
after 2s.
The Solirisio sensor is paired with this io motor or receiver.
Attention
Never leave the Wind potentiometer set to Demo.
2.5.3. Setting the wind sensitivity threshold
Table of thresholds
In addition to the value in km/h and the number of flashes indicating the level set, the corresponding value on
the Beaufort scale is given for information purposes.
Thresholds 1 2 3 4 5 6
km/h
28 38 49 61 74 88
Number of flashes
★
★ ★
★ ★ ★ ★ ★ ★ ★ ★ ★ ★ ★ ★ ★ ★ ★ ★ ★ ★
Beaufort
equivalent
Bf 5 Bf 6 Bf 7 Bf 8 Bf 9 Bf 10
ON
1]
2]
PROG.
3]
PROG.
1]
2]
3]
 Loading...