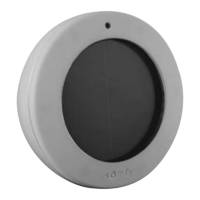
Soliris io
EN
19Copyright
©
2019-2020 SOMFY ACTIVITES SA, Société Anonyme. All rights reserved.
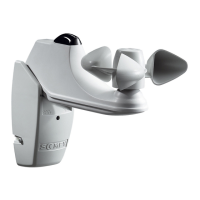
2.3.2. Connecting a rain sensor (e.g. Ondeis) to the Solirisio sensor
Attention
• In addition to the instructions provided in this manual, you must also comply with the detailed
instructions in the rain sensor manual.
• Perform disassembly and wiring operations away from any dust, moisture or foreign bodies to maintain
tightness.
To connect a rain sensor after completing the procedure in section 2.3.1., go directly to step 4].
To add the wiring for a rain sensor later on, after the Solirisio sensor has been installed, follow the procedure
below :
1] Switch o the mains power supply.
2] Remove the protective housing (G).
3] Unscrew the front panel (N) of the mounting bracket to access
the terminal block.
Attention
Never remove the cover located under the anemometer.
4] Unscrew the right-hand metal tab (S).
5] Drill a hole in the right-hand sealant pad (T).
Attention
• Never remove the sealant pad.
• The hole drilled in the pad must not exceed the diameter of the
cable in order to maintain tightness.
6] Feed the rain sensor output cable (U) through the right-hand
sealant pad.
7] Connect the rain sensor output cable (U) to the Solirisio sensor
using the right-hand terminal block marked "RAIN" (V).
8] Screw in the metal tab (W): the cable must be fed under the tab.
Attention
The cable sheath must exceed the tab by at least 2mm.
OFF
1]
2]
STOP
90°
G
N
3]
S
4]
5]
T
6]
U
7]
V
U
8]
W
 Loading...