80
DCR-HC32/HC42 2-584-906-11(1)
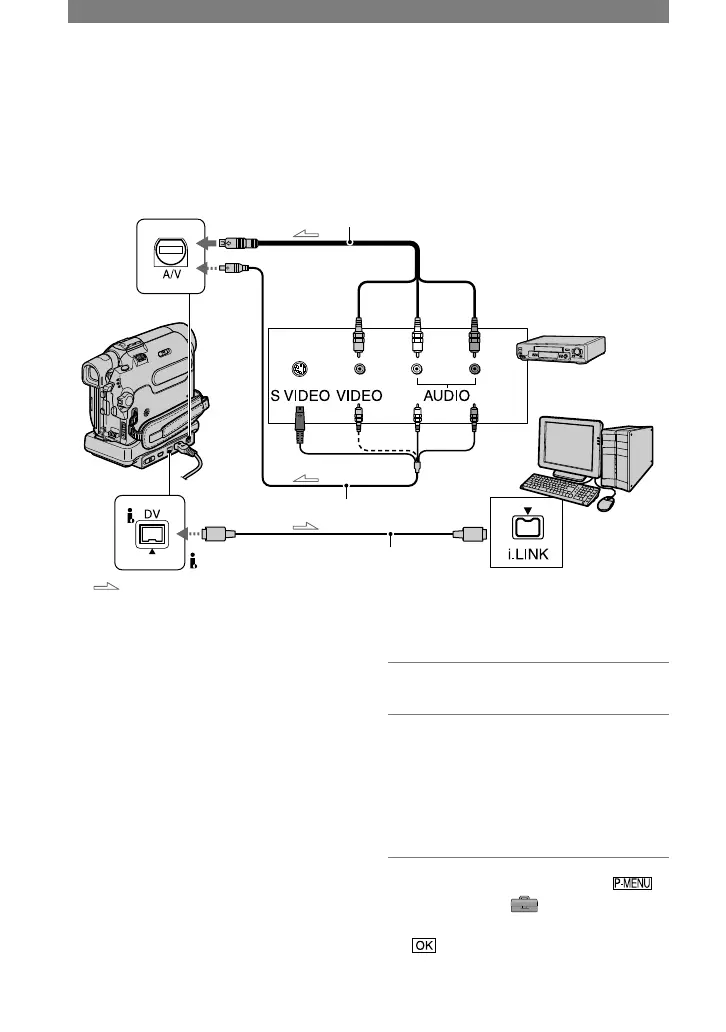
Connecting an analog VCR to the computer via your
camcorder (Signal convert function)
Using the A/V connecting cable and an i.LINK cable (optional), you can convert an analog
signal output from an analog device such as a VCR to a digital signal and transfer it to a
digital device, such as a computer, via your camcorder.
Software that can record the video signal must be installed on your computer beforehand.
A/V jack
(yellow) (white) (Red)
VCR
Computer
To i.LINK (IEEE
1394) jack
i.LINK jack
DV Interface
i.LINK cable (optional)
:Signal flow
A/V connecting cable (supplied)
Connect the A/V connecting cable to your
camcorder or the Handycam Station. The A/V
jack accepts analog signals.
A/V connecting cable with S
VIDEO (optional)
When connecting to another device via the
S VIDEO jack, by using the A/V connecting
cable with an S VIDEO cable (optional),
pictures can be reproduced more faithfully
than with the supplied A/V cable connection.
Connect the white and red plugs (left/right
audio) and S VIDEO plug (S VIDEO
channel) of an A/V connecting cable
(optional). In this case, the yellow (standard
video) plug connection is not necessary. S
VIDEO connection only will not output
audio.
Set [DISP OUTPUT] to [LCD PANEL] on
the menu (p. 56) beforehand. (The default
setting is [LCD PANEL].)
1 Turn on the analog video unit.
2 Slide the POWER switch of your
camcorder down to turn on the
PLAY/EDIT lamp.
Use the supplied AC Adaptor as the
power source.
3 On the LCD screen, touch
[MENU]
(STANDARD
SET)
[A/V
DV OUT]
[ON]
.