EasyManuals Logo

Sony DMX-R100 Quick Reference

Sony DMX-R100
121 pages
To Next Page IconTo Next Page
To Previous Page IconTo Previous Page
Page #6 background imageLoading...
Page #6 background image
First Bootup
Chapter 1 Getting Started
Chapter 1
1-2
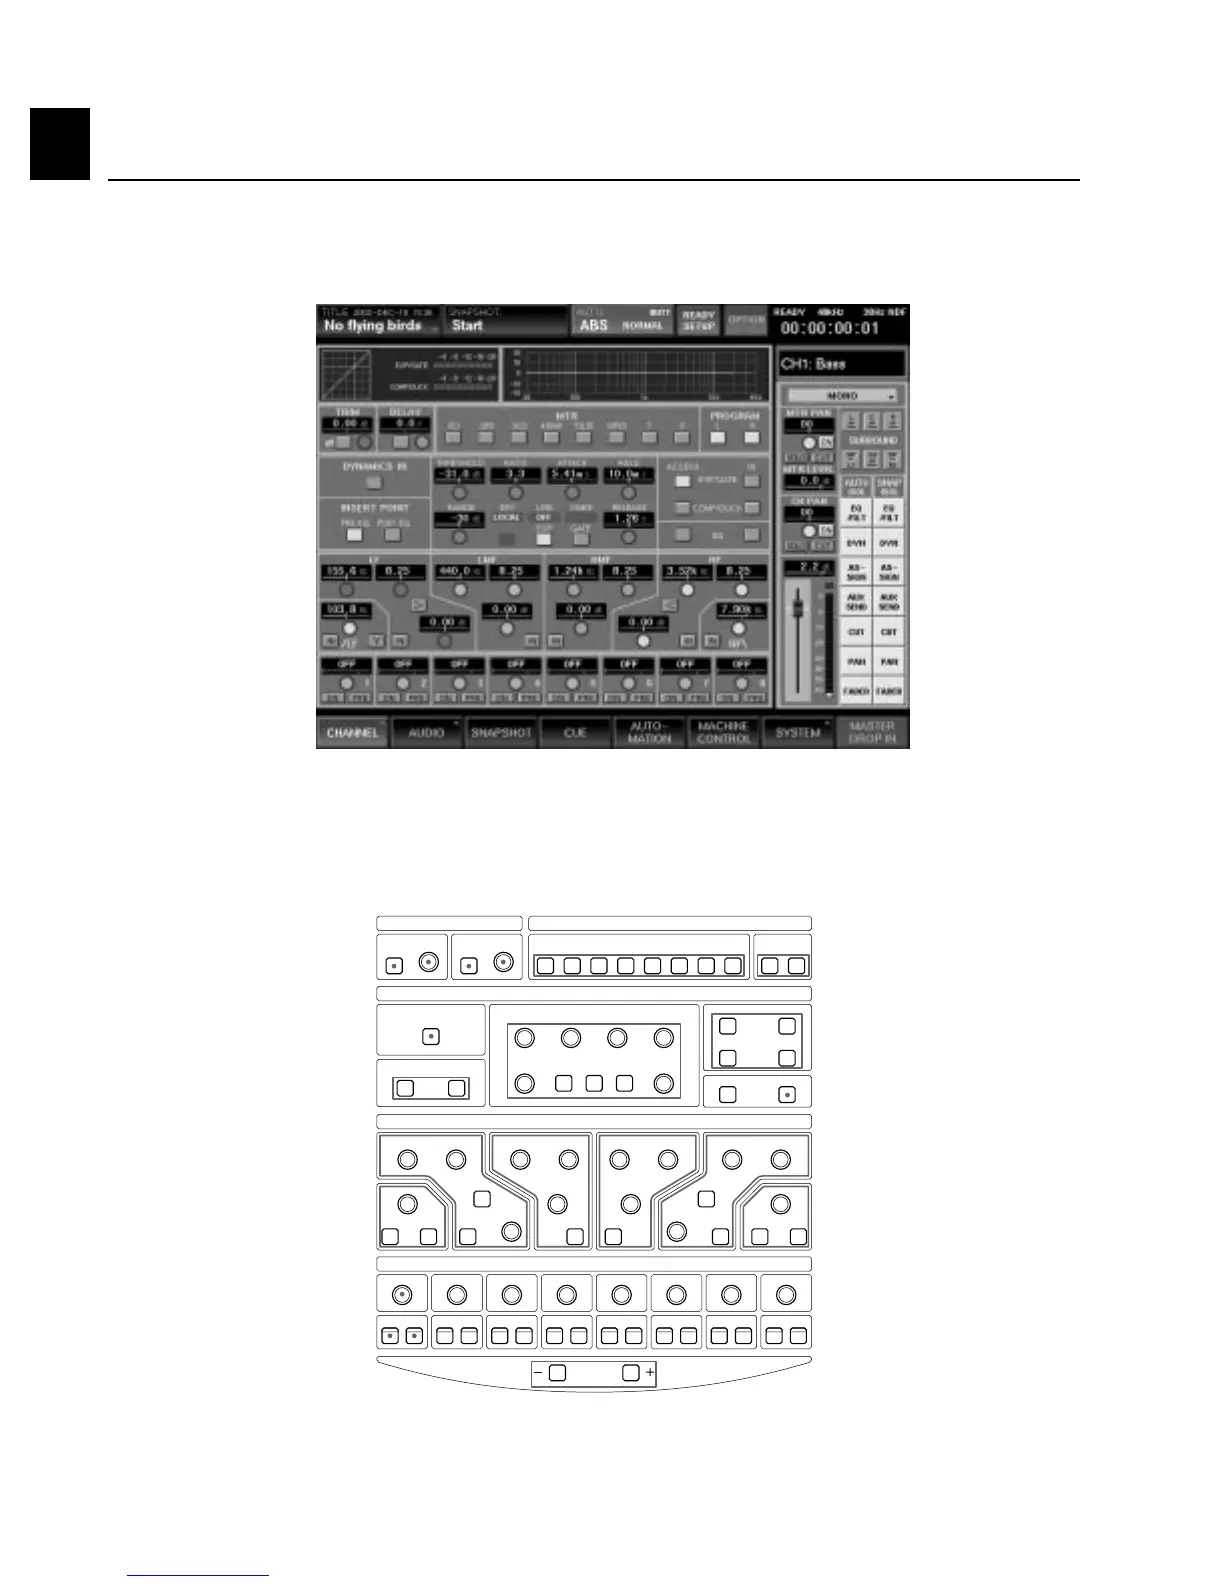
Set the POWER switch to ON. After about a minute, the DMX-R100 will complete its boot-up process, and
the first screen that appears is the Channel Window. (See Figure 1)
This Window shows all parameters for input channel 1 (note that the ACCESS button for channel 1 is lit). You
can view the parameters for any channel (including the Program master bus) by pressing that channel's ACCESS
button, or you can use the CHANNEL - / + buttons in the Parameter Setting Panel to increment or decrement
the channel being viewed. (See Figure 2)
AUX SEND
CHANNEL
ON PRE
1
ON PRE
2
ON PRE
3
ON PRE
4
ON PRE
5
ON PRE
6
ON PRE
7
ON PRE
8
EQUALIZER
LF
IN IN ININ IN
SHELV SHELV
LEVEL LEVEL
FREQ FREQ
FREQ Q
LMF
FREQ Q
HMF
FREQ Q
HF
FREQ Q
LEVEL LEVEL
NOTCH IN
ACCESS IN
DYNAMICS IN
DYNAMICS
PRE EQ POST EQ
ACCESS IN
ACCESS IN
RANGE
GAIN
EXPAND
GATE
COMPRESS
DUCK
THRESHOLD RATIO AT TA CK
RELEASE
HOLD
INPUT BUS ASSIGN
PROGRAMMTRTRIM
Ø
DELAY
IN 1 2 3 4 5 6 7 8 L R
Figure 1
Figure 2

Table of Contents

Other manuals for Sony DMX-R100

Questions and Answers:

Question and Answer IconNeed help?

Do you have a question about the Sony DMX-R100 and is the answer not in the manual?

Sony DMX-R100 Specifications

General IconGeneral
BrandSony
ModelDMX-R100
CategoryRecording Equipment
LanguageEnglish

Related product manuals