Tutorial 3 Automated Mixing Session
T3-1
Tutorial 3
The Concept of Automated Mixing
Tutorial 3 Automated Mixing Session
T
3
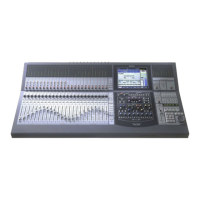
This tutorial will take you through the basic procedures for dynamic automated mixing with a DMX-R100.*
The following peripherals are required for this Tutorial:
• A multitrack tape or hard disk recorder with signal recorded on at least 8 tracks and the capability to
either chase SMPTE time code (recommended) or to output it (either directly or from a striped
track); alternatively, a device that outputs stable MTC (MIDI Time Code) can be used
• A digital or analog two-track recorder
• A signal processor with either digital or analog inputs and outputs
The concept behind automated mixing is to allow a computer to memorize your all your moves as you mix and
then replay them perfectly, in precise synchronization to incoming time code. Being a digital mixer, the
DMX-R100 can be thought of as a highly specialized computer, optimized for the task of routing, summing,
and processing audio, but another very important function is its ability to record and play back automated
mixes. Virtually every DMX-R100 parameter can be incorporated into an automated mix — not just fader
levels, channel cuts and pan positions, but even things like alterations to equalization and dynamics processing,
as well as changes to Aux send and return levels.
The DMX-R100 automated mix system is designed to be flexible, often offering several different ways to
accomplish the same end result, in recognition of the fact that there are many different ways to approach
automated mixing — all of them valid. It is entirely possible, for example, to use an automated mixing system
in ways that it was never intended to be used! The Tutorial presented here is simply intended to guide you
through an example of how the DMX-R100 system can be used; depending upon your individual working style,
you may find that you use it in an entirely different way.
One common approach to creating an automated mix is to build a complex series of moves through a series of
"passes," each time adding some data that helps refine the mix further. An automated mix begins with a static
rough mix of the overall sound, which can, of course, be changed and modified freely as the song develops.
The first "pass" will typically consist simply of writing these basic fader levels. In the second pass, the engineer
will often write cuts — muting tracks when signal isn't playing or when he doesn't want to hear a recorded part.
Successive passes will usually consist of level riding, as the engineer raises and lowers faders in order to shape the
sound dynamically as the song plays. For instance, a vocal might be slightly boosted during choruses, or a
guitar part lowered in volume during verses. These early passes are usually done in what is termed Absolute
mode, where the mix moves are written exactly as they are performed. Later passes often involve fine-tuning —
a piano part might need to be just shaved down a dB or two for the first few bars of the bridge, for example —
and this is where Trim mode comes in. In this mode, the fader moves themselves are not written; instead, they
are used to create offsets, so, in the case of the example just given, the engineer would simply "punch in" just
before the bridge and lower the level of the fader controlling the piano track by a dB or two. The overall level
of succeeding events would then decrease by that amount (although all relative movements would remain),
while all previous moves (a rapid boost in level, for example, on the opening chord) would still be retained.
* Non-dynamic, or "scene"-based automation using timecode-triggered cues is covered in detail in Tutorial 2
in this guide.
 Loading...