Setting The Sample Rate and Master Clock Source
Chapter 1 Getting Started
Chapter 1
1-4
6 Press YES to accept the new sample rate (in which case the DMX-R100 will go through a complete new
power-up cycle and reboot) or press CANCEL to return to the previous sample rate.
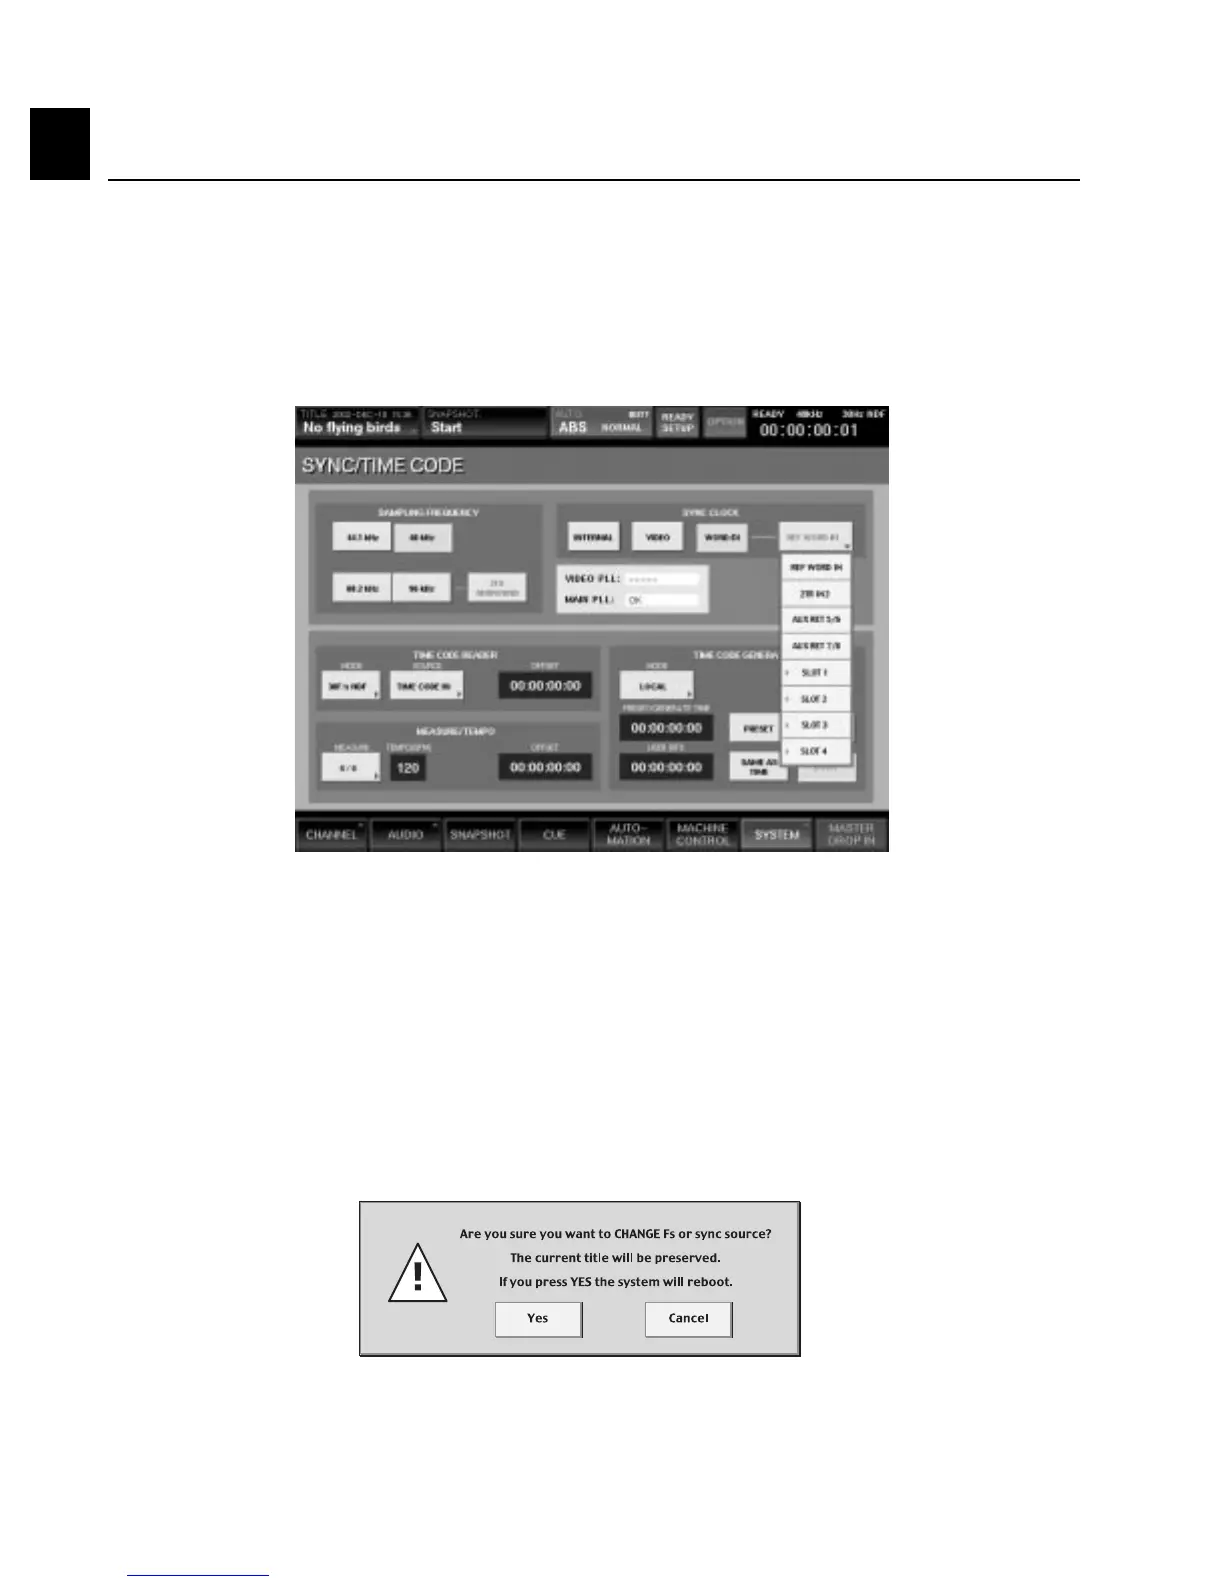
Figure 5
2 In the upper right-hand corner, select the master Sync Clock for your system. Options are: INTERNAL,
VIDEO, and WORD DI. If using WORD DI (Digital Input), press the REF WORD IN button in order
to select the reference source from the pull-down menu. (See Figure 4) The DMX-R100 is able to derive
master clock from its word clock input (REF WORD IN), or from AES/EBU signal arriving at its 2TR
IN2 or AUX RETURNS 5 - 8, or from digital signal arriving at any two channels of any expansion card
slot providing digital audio input.
Figure 4
3 The current sample rate is shown in the upper left-hand corner. If you wish to use a sample rate other
than the current one, select it (options are: 44.1, 48, 88.2, and 96 kHz) and then press the CHANGE
button. (NOTE: the CHANGE button only becomes active when a new sample rate is selected, and
the DMX-R100 does not actually change its sample rate until the CHANGE button is pressed). If you
select a double-speed sample rate (88.2 or 96 kHz), the 2FS SURROUND button becomes active.
Press it so that it lights green if you wish to do surround mixing at these higher sample rates. For more
information, see Appendix D in this guidebook.
4 If you have not changed the sample rate from its current setting, skip ahead to the next exercise.
5 If you have changed the sample rate by selecting a new one and then pressing the CHANGE button,
the following dialog will appear: (See Figure 5)
 Loading...