18
GB
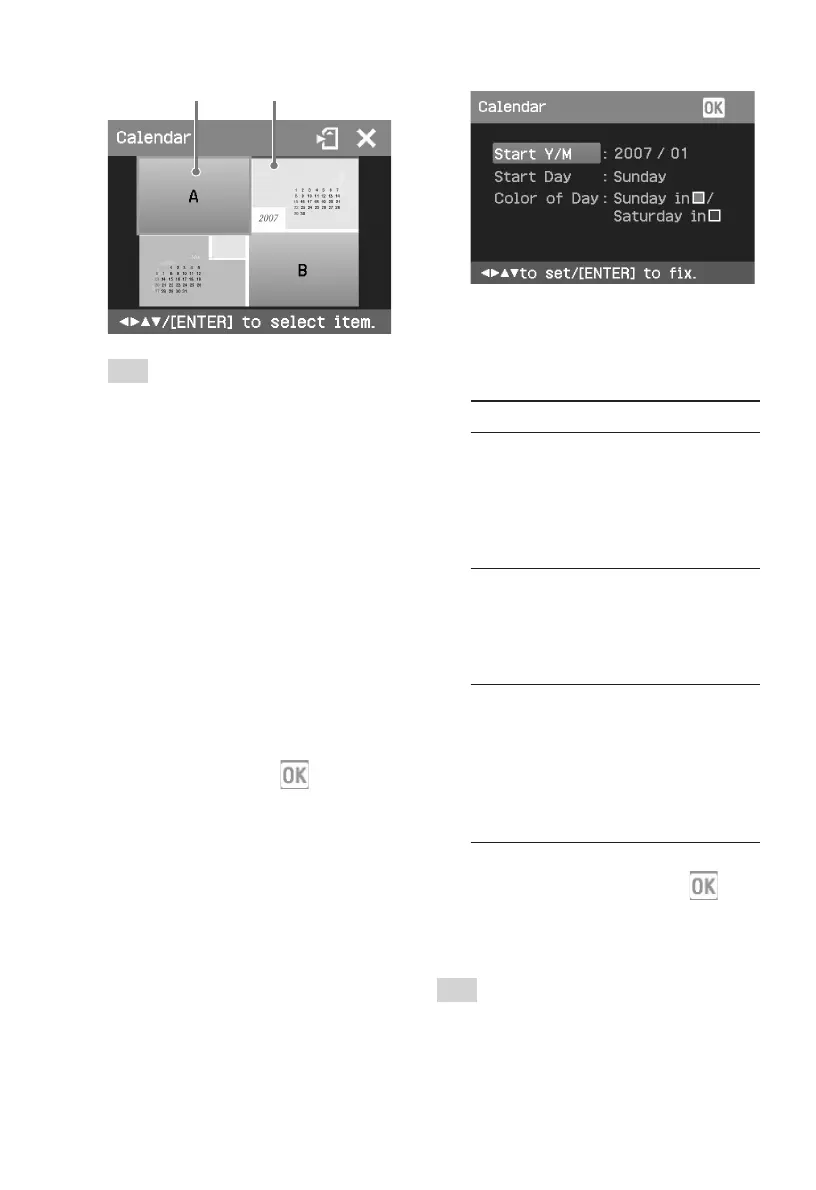
Image area Calendar area
Tip
You can select and set an image area or
calendar area in any order.
4
Select an image.
When you select a template with
multiple images, repeat the
procedures below to select an image
for each area.
1 Press g/G/f/F to select an image
area, then press ENTER.
The image list is displayed.
2 Press g/G/f/F to select the
desired image, then press ENTER.
The window used for adjusting the
image angle and position is
displayed. For information on
adjustment, see step 6 on page 17.
3 Press g/G to select
and then
press ENTER.
The image is selected and displayed
in the relevant area.
5
Set the calendar.
1 Press g/G/f/F to select the
calendar area and press ENTER to
display the calendar setting
window.
2 Press f/F to select the following
items and then press g/G to select
an option.
Item Procedures
Start Y/M
Set the first month and the year
starting the calendar. Press g/G
to select the month or year and
press f/F to set the number.
Press ENTER.
Start Day
Set the day of the week (placed
furthest left in the calendar).
Press f/F to select “Sunday” or
“Monday”. Then press ENTER.
Color of Day
Set the color of Sunday and
Saturday to be displayed in the
calendar. Press G and then f/F
to select the desired color for
Sunday and Saturday. Then press
ENTER.
3 Press g/G/f/F to select and
then press ENTER.
The calendar is displayed in the
calendar area.
Tip
To save or print the calendar previewed, see
page 14.