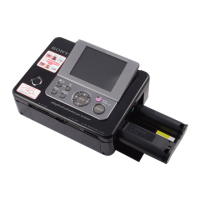
EasyManua.ls Logo

Sony DPP-FP97 - User Manual

Sony DPP-FP97
96 pages
Print Icon
To Next Page IconTo Next Page
Loading...
SONY:
Digital
Photo
Printer
DPP-FP97
Operating
Instructions
Before operating this unit, please read "Read This First" and
"About the Print Packs" supplied and this manual, "Operating
Instructions," thoroughly and retain them for future reference.
Owner's
Record
The model and serial numbers are located on the bottom
of
the
printer. Record the serial number
in
the space provided below.
Refer to these numbers whenever you call upon your Sony
dealer regarding this product.
Model No.: DPP-FP97
Serial No.
4-129-103-11 (4)
Before
you
begin
Preparations
Direct
printing
Printing
from
a
PictBridge
digital
camera
Printing
from
a
Bluetooth-
compliant
device
Printing
from
a
PC
Error
messages
Troubleshooting
Additional
information
SUPERS)
COATLS
MEMORY
STICK
".,
f(PictBridge
HOm.
III
© 2009 Sony Corporation

Questions and Answers

  • A
    Amanda CampbellSep 23, 2025
    Why can't I format the “Memory Stick” media on my Sony Printer?
    • R
      Robert SmithSep 23, 2025
      Ensure that the write-protect switch is in the write enable position. Also, note that you cannot delete an image from or format a “Memory Stick-ROM.”
  • F
    Francis PetersenAug 23, 2025
    Why are my printed pictures from my Sony DPP-FP97 inferior in quality?
    • J
      jerryadamsAug 23, 2025
      The printed quality of preview images may not be as good as the primary images. Also, a small image displayed with a black frame will have rough printing quality due to its size. Enlarged images may also exhibit deteriorated picture quality depending on their original size. If you shot an image in the RAW file format, a highly-compressed JPEG file may be used to print an image, because the printer does not support the RAW file format. A RAW file can be printed from a PC.
  • G
    George LewisAug 25, 2025
    What to do if the 1 (on/standby) button on my Sony DPP-FP97 Printer cannot be turned on?
    • P
      Peter BentleyAug 26, 2025
      Ensure the AC power cord is securely connected to an AC outlet.
  • M
    Michael LevyAug 27, 2025
    What to do if my Sony Printer image is printed at an angle?
    • S
      Shawn CampbellAug 27, 2025
      Make sure to re-insert the paper tray firmly and straight all the way in.
  • A
    Angela WoodAug 27, 2025
    How to fix white lines or dots on printed pictures from my Sony Printer?
    • M
      Margaret Gonzales DVMAug 27, 2025
      The print head or paper path may be soiled. Use the supplied cleaning cartridge and sheet to clean the head and path.
  • B
    Brittany OwensSep 18, 2025
    Why do blank areas appear in the Edit menu on my Sony DPP-FP97?
    • D
      Dale ZhangSep 18, 2025
      If an image is extremely stretched vertically or horizontally, blank areas may appear in the Edit menu. The standard aspect ratio of an image shot with a digital camera is 3:4. When you use a device other than the printer to edit or save an image, it is saved as a more horizontal print image and its top and bottom edges will be cut and displayed in black.
  • T
    Tamara AustinSep 15, 2025
    Why is my Sony DPP-FP97 Printer printing with borders even when “Borderless” is selected?
    • R
      Ronald KellerSep 15, 2025
      When you use a device other than the printer to edit or save an image, blank areas around an image are also saved as part of image data. Even if you print such data with “Borderless” setting, you cannot eliminate the borders on both sides of a print.
  • R
    Ryan WyattSep 17, 2025
    Why is the file name not displayed correctly on my Sony Printer?
    • J
      Jose HodgesSep 18, 2025
      When you name or rename an image file on your computer and its file name includes characters other than alphanumeric characters, the file name may not be displayed correctly. For a file created with a PC application, the first 8 characters of its file name will be displayed as the file name.
  • M
    Mary BakerSep 6, 2025
    How to print without borders on my Sony DPP-FP97 Printer?
    • T
      Timothy KimSep 6, 2025
      Press the MENU button, and set “Borderless” by selecting Print setup - Borders.
  • W
    walshcindySep 3, 2025
    Why does red-eye correction not work with the AUTO TOUCH-UP button on my Sony DPP-FP97 Printer?
    • S
      Stacey Robinson MDSep 3, 2025
      Adjust for the red-eye phenomenon by pressing the MENU button and then selecting Edit - Red-eye Correction.

Summary

Before you begin

Identifying the parts

Details physical components and their functions.

Preparations

Connecting to the AC power source

How to connect the printer to a power outlet using the AC adaptor.

Direct printing

Basic printing

Covers inserting memory cards and the initial printing process.

Printing selected images

How to select specific images for printing and set print quantities.

Correcting the red-eye phenomenon

Manual steps to remove red-eye from photos.

Printing from a PictBridge digital camera

Printing from a Bluetooth-compliant device

Printing from a PC

Installing the software

System requirements and instructions for installing printer drivers and software.

Installing the printer driver

Step-by-step guide to install the necessary printer driver software.

Error messages

Memory cards and external device

Lists error messages related to memory cards and external devices.

Troubleshooting

If trouble occurs

General guidance to resolve common printer issues and symptoms.

If paper jams

Step-by-step instructions for clearing paper jams.

Sony DPP-FP97 Specifications

General IconGeneral
Print TechnologyDye-sublimation
Print Resolution300 x 300 dpi
ConnectivityUSB, PictBridge
Weight2.5 lbs
LCD ScreenYes
Power SourceAC Adapter
TypeCompact Photo Printer
Maximum Print Size4 x 6 inches
Display2.5" LCD
Print SpeedApproximately 45 seconds for a 4 x 6 print
Paper Size4 x 6 inches
Memory Card SlotsMemory Stick, SD Card

Related product manuals