M
Mary BakerSep 6, 2025
How to print without borders on my Sony DPP-FP97 Printer?
- TTimothy KimSep 6, 2025
Press the MENU button, and set “Borderless” by selecting Print setup - Borders.
How to print without borders on my Sony DPP-FP97 Printer?
Press the MENU button, and set “Borderless” by selecting Print setup - Borders.
What to do if my Sony DPP-FP97 paper does not feed?
If the print paper is not properly loaded, the printer may experience issues. Ensure you are using the correct print paper and ink ribbon, and that the paper is loaded in the correct direction in the tray. The tray can hold a maximum of 20 sheets; remove any excess. Riffle the print paper thoroughly before loading it into the tray. Avoid bending or folding the print paper before printing, as this can cause printer malfunctions. Also, be sure to use print paper specifically designed for the printer, as incompatible paper can lead to problems.
Why does red-eye correction not work with the AUTO TOUCH-UP button on my Sony DPP-FP97 Printer?
Adjust for the red-eye phenomenon by pressing the MENU button and then selecting Edit - Red-eye Correction.
How to print the whole area of an image on my Sony DPP-FP97 Printer?
You can print the whole area of an image by selecting “Pattern 1” in the Print setup menu.
What to do if my Sony DPP-FP97 ejects paper without printing?
Use print paper designed for the printer. If you use incompatible print paper, the printer may develop trouble.
What to do if my Sony DPP-FP97 LCD screen displays no images?
Ensure that a memory card or an external device is properly inserted and contains recorded images. Check that images are recorded in the internal memory. Verify the file formats are compatible with the printer. Note that images not compatible with the DCF standard may not print, even if displayed on a PC monitor.
What to do if the printed pictures are too bright, dark, reddish, yellowish, or greenish on my Sony Printer?
Adjust the image by pressing the MENU button and then selecting Edit- Adjust.
How to fix white lines or dots on printed pictures from my Sony Printer?
The print head or paper path may be soiled. Use the supplied cleaning cartridge and sheet to clean the head and path.
What to do if my Sony Printer image is printed at an angle?
Make sure to re-insert the paper tray firmly and straight all the way in.
What to do if the 1 (on/standby) button on my Sony DPP-FP97 Printer cannot be turned on?
Ensure the AC power cord is securely connected to an AC outlet.
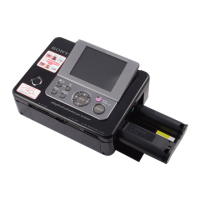
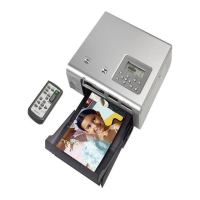
Details physical components and their functions.
How to connect the printer to a power outlet using the AC adaptor.
Covers inserting memory cards and the initial printing process.
How to select specific images for printing and set print quantities.
Manual steps to remove red-eye from photos.
System requirements and instructions for installing printer drivers and software.
Step-by-step guide to install the necessary printer driver software.
Lists error messages related to memory cards and external devices.
General guidance to resolve common printer issues and symptoms.
Step-by-step instructions for clearing paper jams.
| Print Technology | Dye-sublimation |
|---|---|
| Print Resolution | 300 x 300 dpi |
| Connectivity | USB, PictBridge |
| Weight | 2.5 lbs |
| LCD Screen | Yes |
| Power Source | AC Adapter |
| Type | Compact Photo Printer |
| Maximum Print Size | 4 x 6 inches |
| Display | 2.5" LCD |
| Print Speed | Approximately 45 seconds for a 4 x 6 print |
| Paper Size | 4 x 6 inches |
| Memory Card Slots | Memory Stick, SD Card |