GTK-XB90
7
Note: Follow the disassembly procedure in the numerical order given.
2-2. SIDE PANEL L (LEFT SIDE), LITHIUM ION BATTERY CONNECTOR (XP3)
5 Remove the side panel L
in the direction of the arrow.
3 two screws
(M4 u 20)
1 two rubbers
(See Fig. A)
2 two screws
(M3 u 10)
top side
front side
rear side
2 screw
(M3 u 10)
3 five screws
(M4 u 20)
two bosses
two bosses
4 claw
4 two
claws
4 three
claws
4 two
claws
4 three
claws
4 three
claws
6 side panel L
1 two rubbers
(See Fig. A)
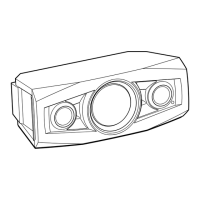
+RZWRUHPRYHWKHUXEEHU
rubber
tweezers, etc.
–/HIWYLHZ–
When removing the rubber, insert a
sharp-tipped object such as tweezers
into the cutout.
)LJ$!
MAIN board
front side
rear side
left side
7 lithium ion
battery
connector
(XP3)
2-3. LITHIUM ION BATTERY
top side
front side
rear side
1 four screws
(M4 u 20)
hole
hole
boss
boss
3 Remove the lithium ion battery block
in the direction of the arrow.
6 lithium ion battery
cushion (battery cable)
cushion (battery)
10 mm
bottom side
top side
lithium ion battery
– Right view –
guide line
cushion (battery)
guide line
+RZWRLQVWDOOWKHWKUHHFXVKLRQV
left side
right side
5 cushion (battery cable)
Note 1:
This parts cannot be reused.
When replacing the lithium
ion battery, be sure to replace
them with new parts
simultaneously.
2 battery cover
Note 2:
When installing the battery cover,
align the two bosses and two holes.
4 two cushions (battery)
Note 1:
This parts cannot be reused.
When replacing the lithium ion battery,
be sure to replace them with new parts
simultaneously.
Wrap the wire part with
the cushion (battery cable).
SYSSET
2020/08/2022:42:53(GMT+09:00)
 Loading...