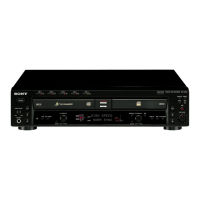
Recording on CDR
21
Erasing a single track of
CD-RW disc
You can erase one track on a CD-RW at a
time. This process starts with the last track on
the disc. Please note that before erasing a track,
you must unfinalize the disc. If the disc is not
unfinalized, follow the instructions of
“Unfinalizing a CD-RW disc” (page 20).
When using the remote, set SELECT to CDR
for operations on DECK B.
1 Press the ERASE button.
The “LAST TR ERASE” indicator will
begin to flash, and the PLAY, PAUSE, and
REC indicators light up for about 8
seconds. Erasing enters in standby mode.
2 Press H while “LAST TR ERASE” is
flashing.
The last track erasing starts. During the last
track erasing, “LAST ERASE” appears in
the display. When this process is finished,
the total track number and the total playing
time appears in the display.
Notes
• The TOC (red) indicator appears on the front panel
display if the disc you put in the DECK B has not
been finalized. Check the indicator each time
before erasing the last track of a disc.
• Once erasing process starts, you cannot stop in the
middle of the process.
• Do not turn off the recorder or disconnect the
recorder from the power source in the middle of the
erasing process.
ERASE
Erasing an Entire CD-RW
disc
Erasing the entire contents of a CD-RW disc is
easy, and it does not matter whether the disc has
been unfinalized or not.
When using the remote, set SELECT to CDR
for operations on DECK B.
1 Press ERASE twice until “DISC ERASE”
appears in the front panel display.
The “DISC ERASE” indicator will begin to
flash, and the PLAY, PAUSE, and REC
indicators light up for about 8 seconds.
Entire disc erasing enters in the standby
mode.
2 Press H while “DISC ERASE” is
flashing.
Entire disc erasing starts. During erasing,
“DISC ERASE” appears in the front panel
display. When this process is finished,
“00.00” appears in the display.
Notes
• Once entire disc erasing process starts, you cannot
stop the erasing in the middle of the process.
• Do not turn off the recorder or disconnect the
recorder from the power source in the middle of the
erasing process.
ERASE