SEL1018 (E 4/10-18 OSS) (E 10-18mm F4 OSS)
4-11
4-5. E-MOUNT LENS ADJUSTMENT
Equipment and Tools
• Personal Computer
Note: Personal computer must have the condition that Windows Vista/7 runs normally and USB is connectable.
• HASP key (SeusEX)
• USB cable
• Lens adjustment program (E-Mount_Lens_Adjustment_(E).zip)
• Flange back adjustment jig
• FB Chart 10 mm
• Camera (NEX-3/5/C3)
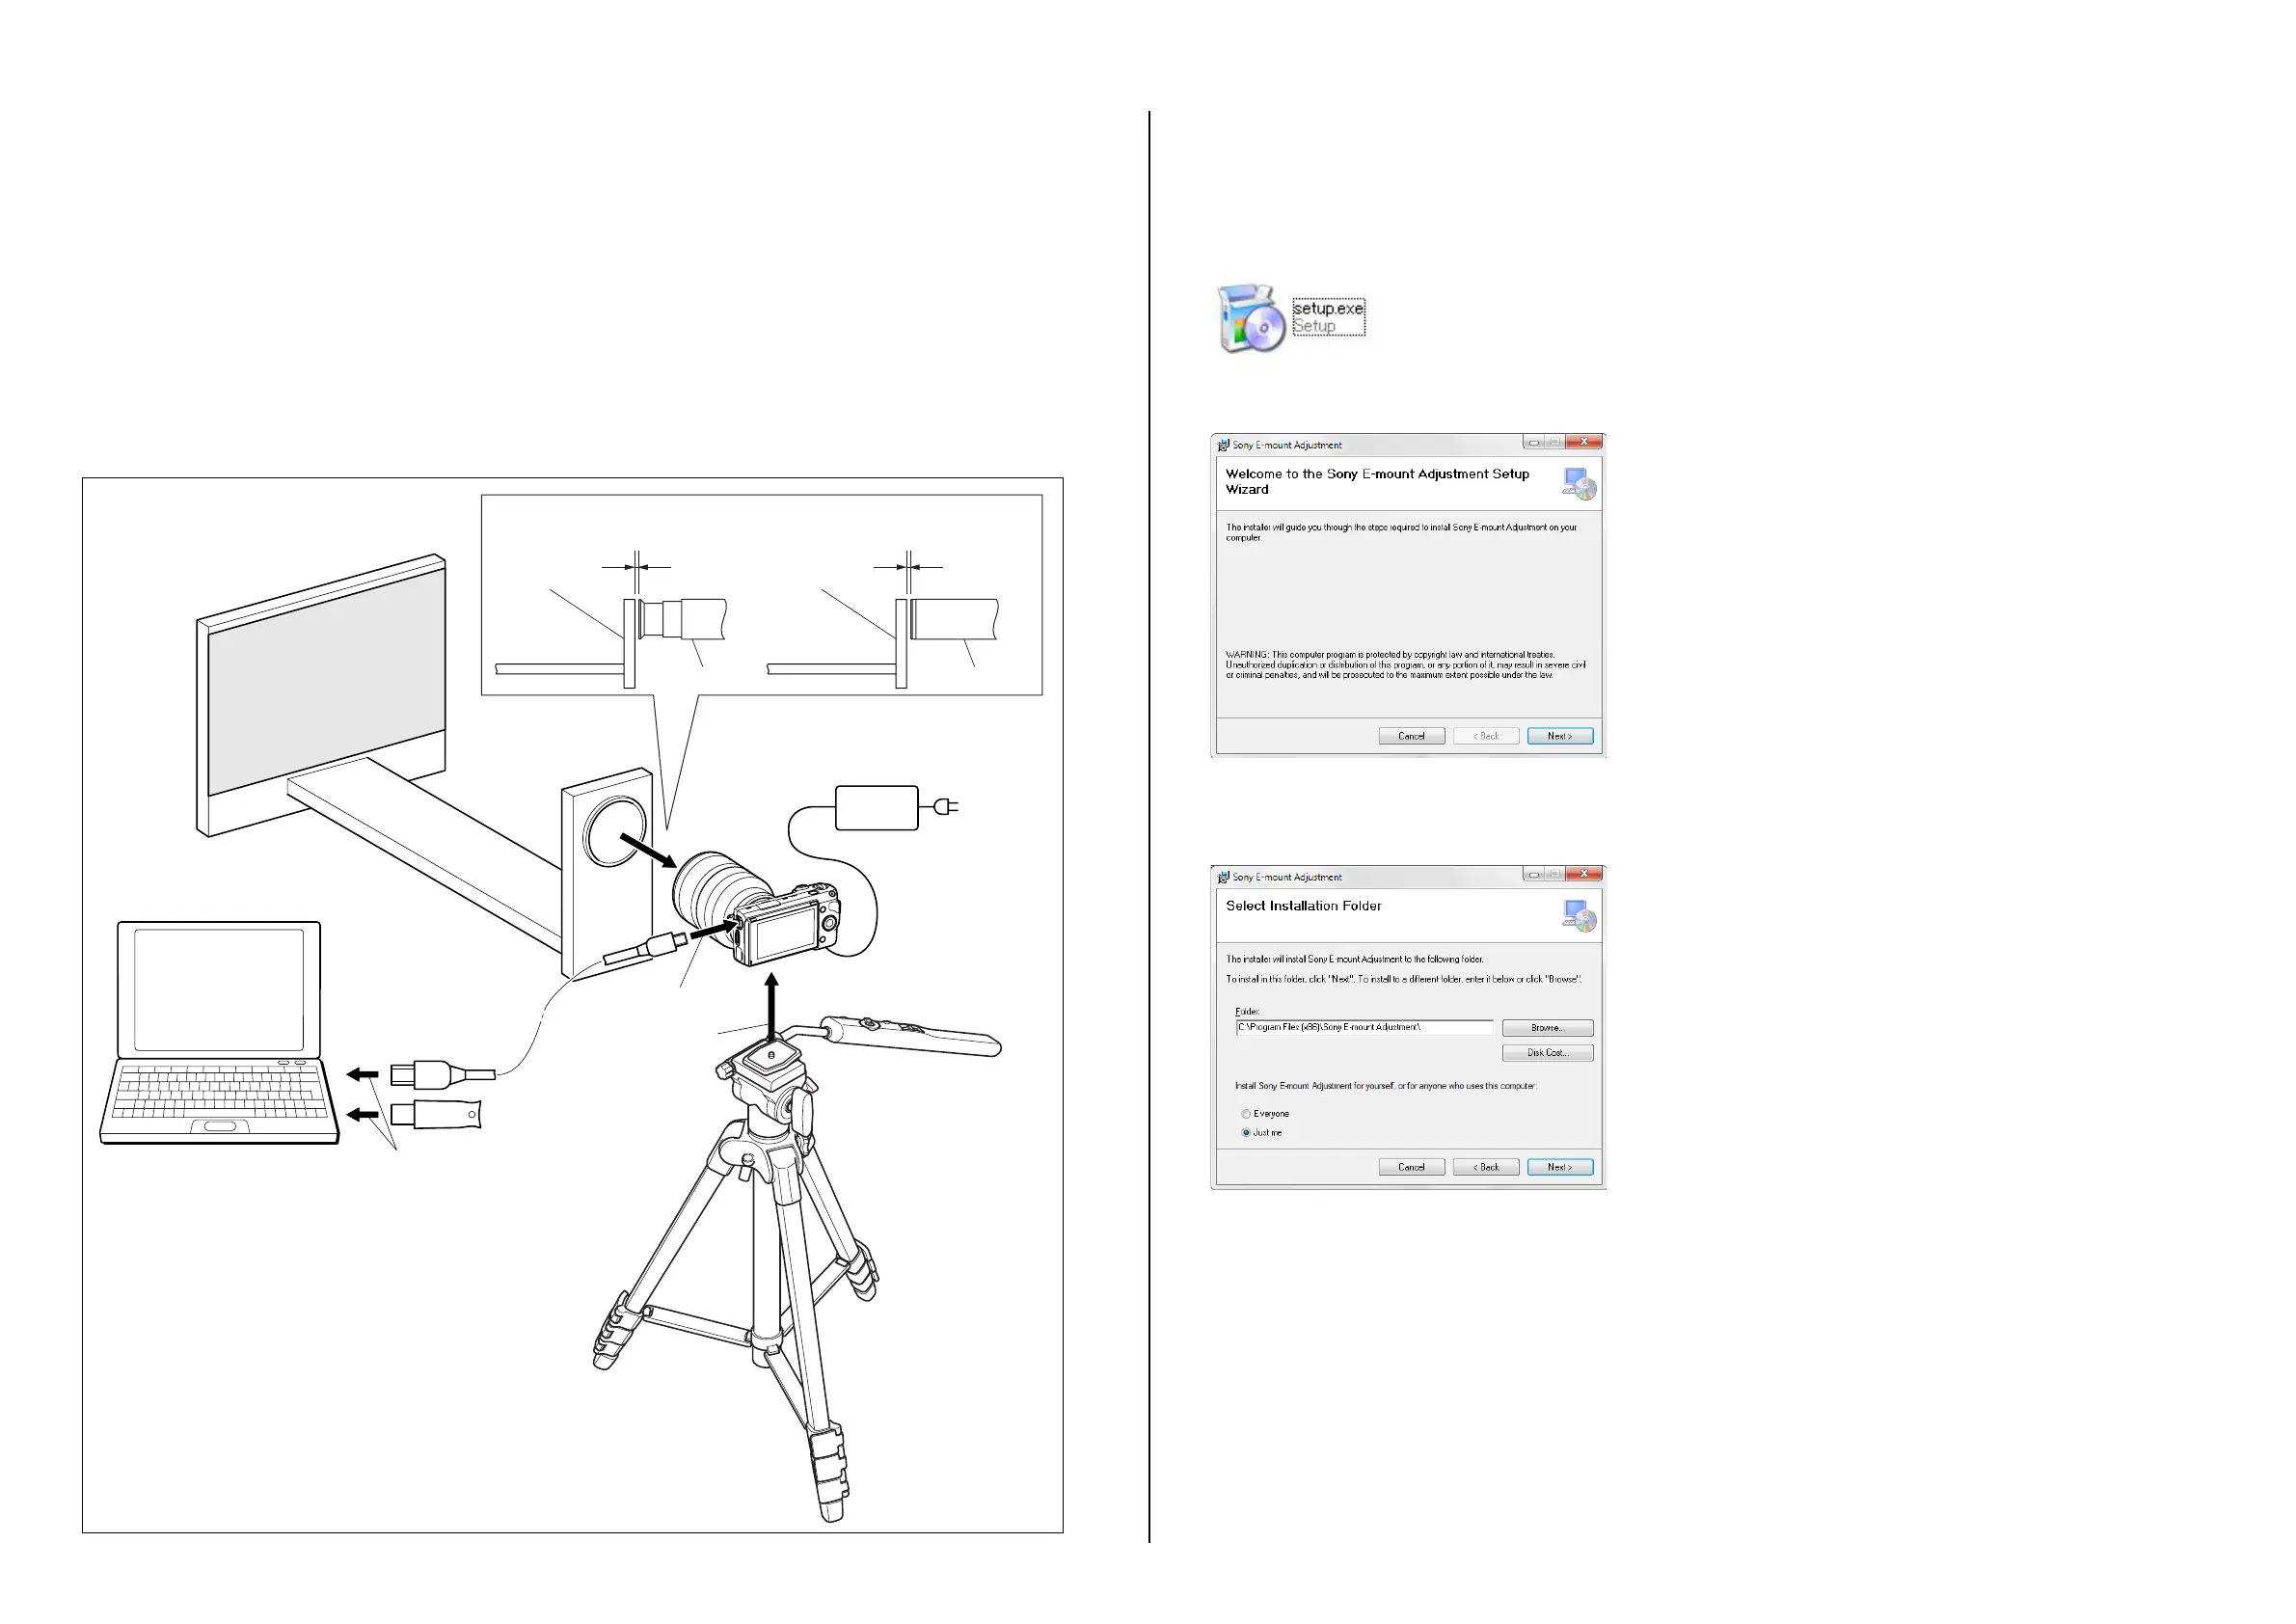
4-5-1. Preparations
Set the equipments and the checking lens as shown below.
Tripod
(optional)
AC
To tripod screw
USB cable
HASP key
To USB connector
Checking
Lens
Camera
To USB connector
Checking Lens Checking Lens
Personal computer
Within 10 mm
・
In the case of fixed focal lens
・
In the case of zoom lens
Within 10 mm
Flange back
adjustment jig
FB chart
10 mm
AC adaptor
Flange back
adjustment jig
Flange back
adjustment jig
Installing Procedure
Note: Make sure to perform the installation only by the management.
Do not change the folder to be installed in.
1. Download the lens adjustment program (E-Mount Lens Adjustment.zip).
2. Double click the setup.exe file.
3. The installer screen appears, then click the [Next] button.
4. The folder select screen appears, then select the installing user and click the [Next] button.
• Everyone: For all users of the PC for installing.
• Just me: Only for the user who logs in the PC now.