EasyManua.ls Logo

Sony TRINITRON GDM-500PS User Manual

Sony TRINITRON GDM-500PS
55 pages
To Next Page IconTo Next Page
Page #1 background imageLoading...
Page #1 background image
CHASSIS
SERVICE MANUAL
SPECIFICATIONS
GDM-500PS/500PST/500PST9
N3
TRINITRON
®
COLOR GRAPHIC DISPLAY
GDM-500PS
US Model
Canadian Model
S. Hemisphere Model
Equator Model
Chassis No. SCC-L04E-A
GDM-500PST/GDM-500PST9
AEP Model
Chassis No. SCC-L04B-A
Picture tube 0.25 – 0.27 mm aperture grille pitch
21 inches measured diagonally
90-degree deflection
Viewable image size Approx. 403.8 × 302.2 mm (w/h)
(16 × 12 inches)
19.8" viewing image
Resolution Horizontal: Max. 1600 dots
Vertical: Max. 1200 lines
Standard image area Approx. 388 × 291 mm (w/h)
(15
3
/8 × 11
1
/2 inches)
or
Approx. 364 × 291 mm (w/h)
(14
3
/8 × 11
1
/2 inches)
Deflection frequency Horizontal: 30 to 107 kHz
Vertical: 48 to 160 Hz
AC input voltage/current
100 to 240 V, 50 – 60 Hz, 2.0 – 1.0 A
Power consumption Max. 160 W
Dimensions 498 × 505 × 474 mm (w/h/d)
(19
5
/8 × 20 × 18
3
/4 inches)
Mass Approx. 31 kg (68 lb 5 oz)
Supplied accessories See page 6
Design and specifications are subject to change without notice.
MICROFILM
REVISED
Question and Answer IconNeed help?

Do you have a question about the Sony TRINITRON GDM-500PS and is the answer not in the manual?
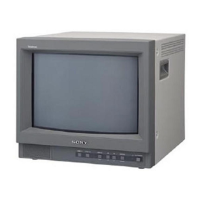
Sony TRINITRON GDM-500PS Specifications

General IconGeneral
Display TypeCRT
Dot Pitch0.25 mm
Aspect Ratio4:3
Input Connectors15-pin D-sub
Input Video SignalRGB
Display Colors16.7 million
Screen Size21 inches
Max Resolution1600 x 1200
Horizontal Refresh Rate30 - 95 kHz
Vertical Refresh Rate50 - 120 Hz
Refresh Rate75 Hz
Weight28 kg

Summary

Monitor Specifications

Safety Check-Out Procedures

Leakage Test

Procedure for testing AC leakage from exposed metal parts to earth ground.

Caution on DAS (ECS) Connector

Warning regarding electrical shock when connecting the DAS (ECS) adjustment connector.

Monitor Customization and Settings

Adjusting Picture Brightness and Contrast

Guide to adjusting brightness and contrast levels using the OSD.

Using the CENTER On-screen Display

Procedure for adjusting the picture's horizontal and vertical centering.

Using the SCREEN On-screen Display

Adjusting convergence, moire cancellation, and landing correction.

Using the OPTION On-screen Display

Manual degauss, OSD position, power saving delay, and control lock settings.

Resetting Monitor Adjustments

Procedures for resetting single items or all adjustments to factory defaults.

Additional Information and Troubleshooting

Troubleshooting Common Symptoms

Guide to diagnosing and resolving common picture and operational issues.

Disassembly Procedures

2-9. Picture Tube Removal

Detailed steps for safely removing the picture tube.

Safety Related Adjustment Checks

HV Regulator Circuit Check

Verifying voltage at pin 2 of CN901 on the D board.

HV Protector Circuit Check

Confirming HV protector circuit function and raster disappearance.

Beam Current Protector Circuit Check

Checking beam current protector circuit operation and voltage drops.

Monitor Adjustments

Landing Fine Adjustment

Detailed adjustment of green signal, degaussing, and landing settings.

Diagrams and Schematics

5-4. Schematic Diagrams and Printed Wiring Boards

Detailed schematics and PCB layouts for different boards.

(1) Schematic Diagram of D Board

Detailed schematic diagram for the D board.

(2) Schematic Diagrams of G, GA, H, J and L or L3 Boards

Detailed schematics for G, GA, H, J, L, and L3 boards.

(3) Schematic Diagram of A or A3 Board

Detailed schematic diagram for the A or A3 board.

Related product manuals