1-10 (E)
VPL-EX100
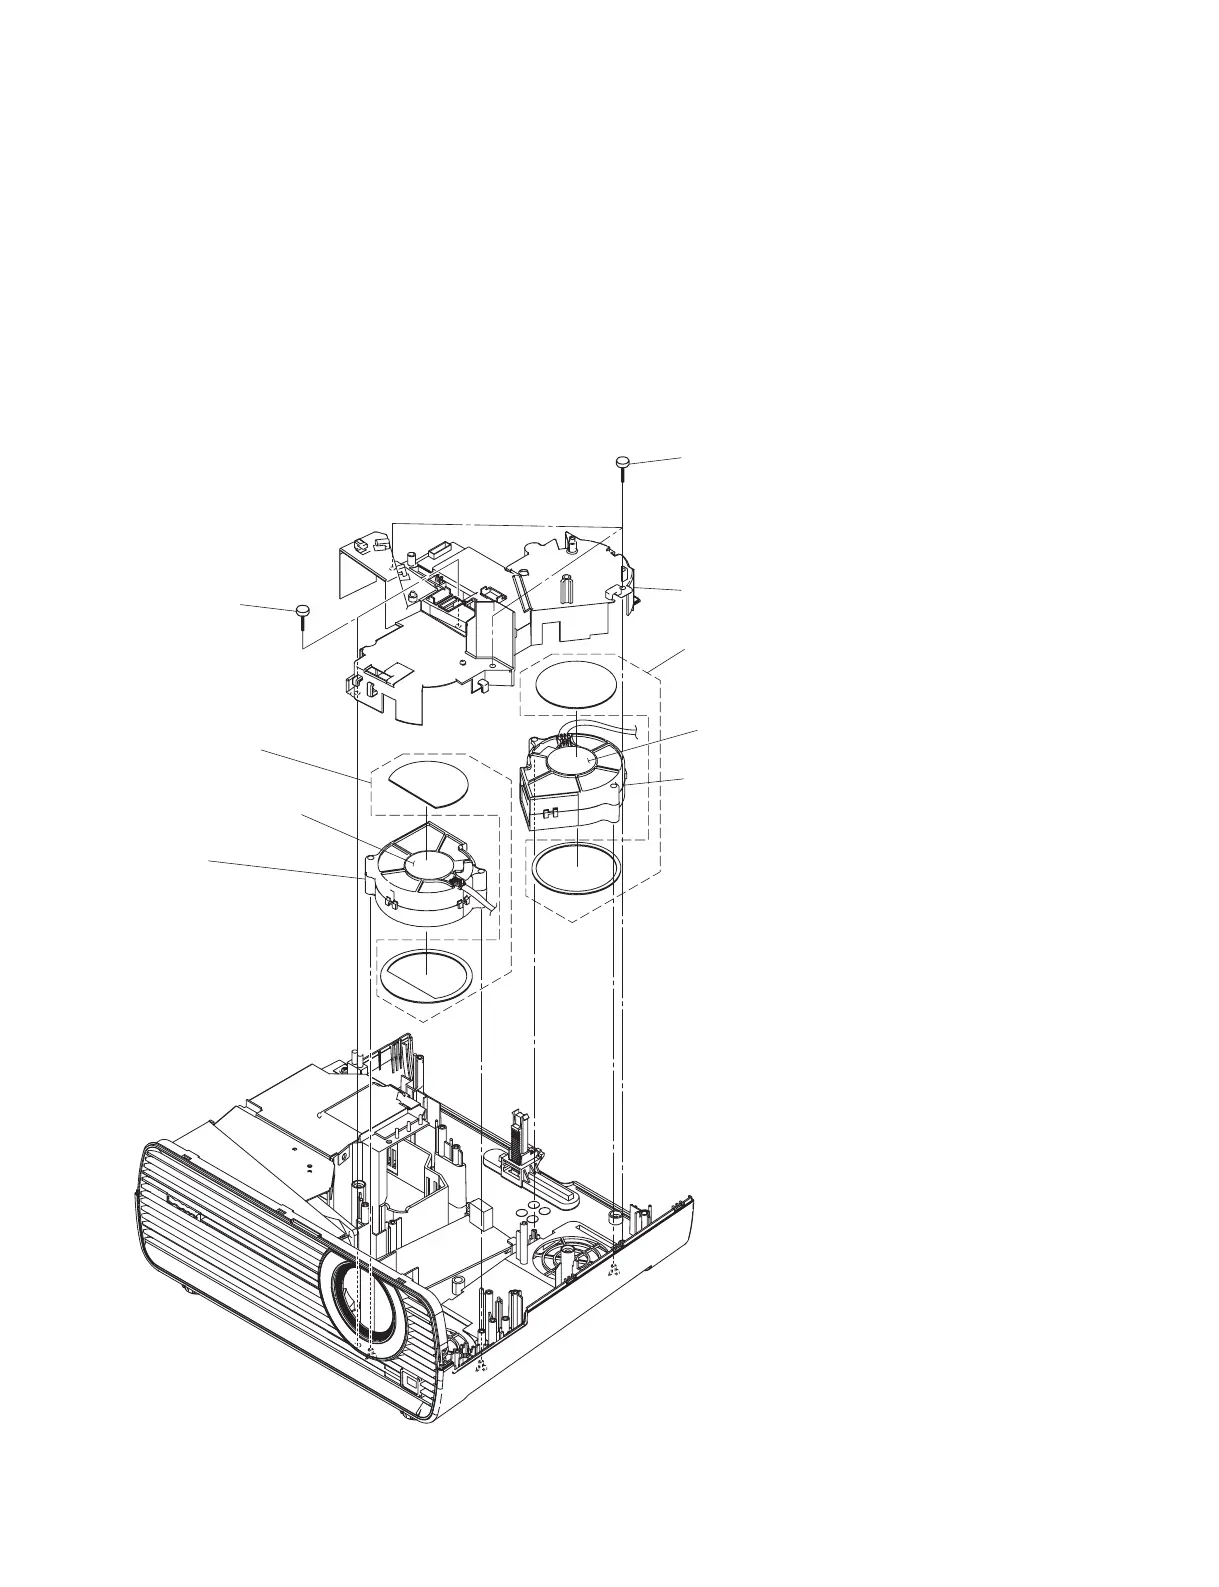
1
Three screws
(BVTP3
x
10)
3
Prism duct
4
DC fan
n
When attaching, place the
label side facing upward.
5
Fan cushion R
6
DC fan
n
When attaching, place the
label side facing upward.
7
Fan cushion F
2
Two screws
(PS4
x
6)
Label side
Label side
1-3-8. DC Fan (Intake)
. Remove the upper case assembly. (Refer to Section 1-3-1.)
. Remove the rear panel. (Refer to Section 1-3-2.)
. Remove the main board. (Refer to Section 1-3-3.)
. Remove the G board. (Refer to Section 1-3-4.)
. Remove the lamp duct. (Refer to steps 1 and 2 in Section 1-3-5.)
. Remove the speaker. (Refer to Section 1-3-6.)
. Remove the optical block. (Refer to Section 1-3-7.)
 Loading...