Help Guide
Wireless Noise Canceling Stereo Headset
WH-CH700N
Connecting to a paired computer (Windows 10)
Before starting the operation, make sure of the following:
Depending on the computer, you need to turn on the built-in Bluetooth adaptor. For whether or not a Bluetooth
adaptor is incorporated, and for how to turn it on, refer to the operating instructions supplied with the computer.
Wake the computer up from sleep mode.
1
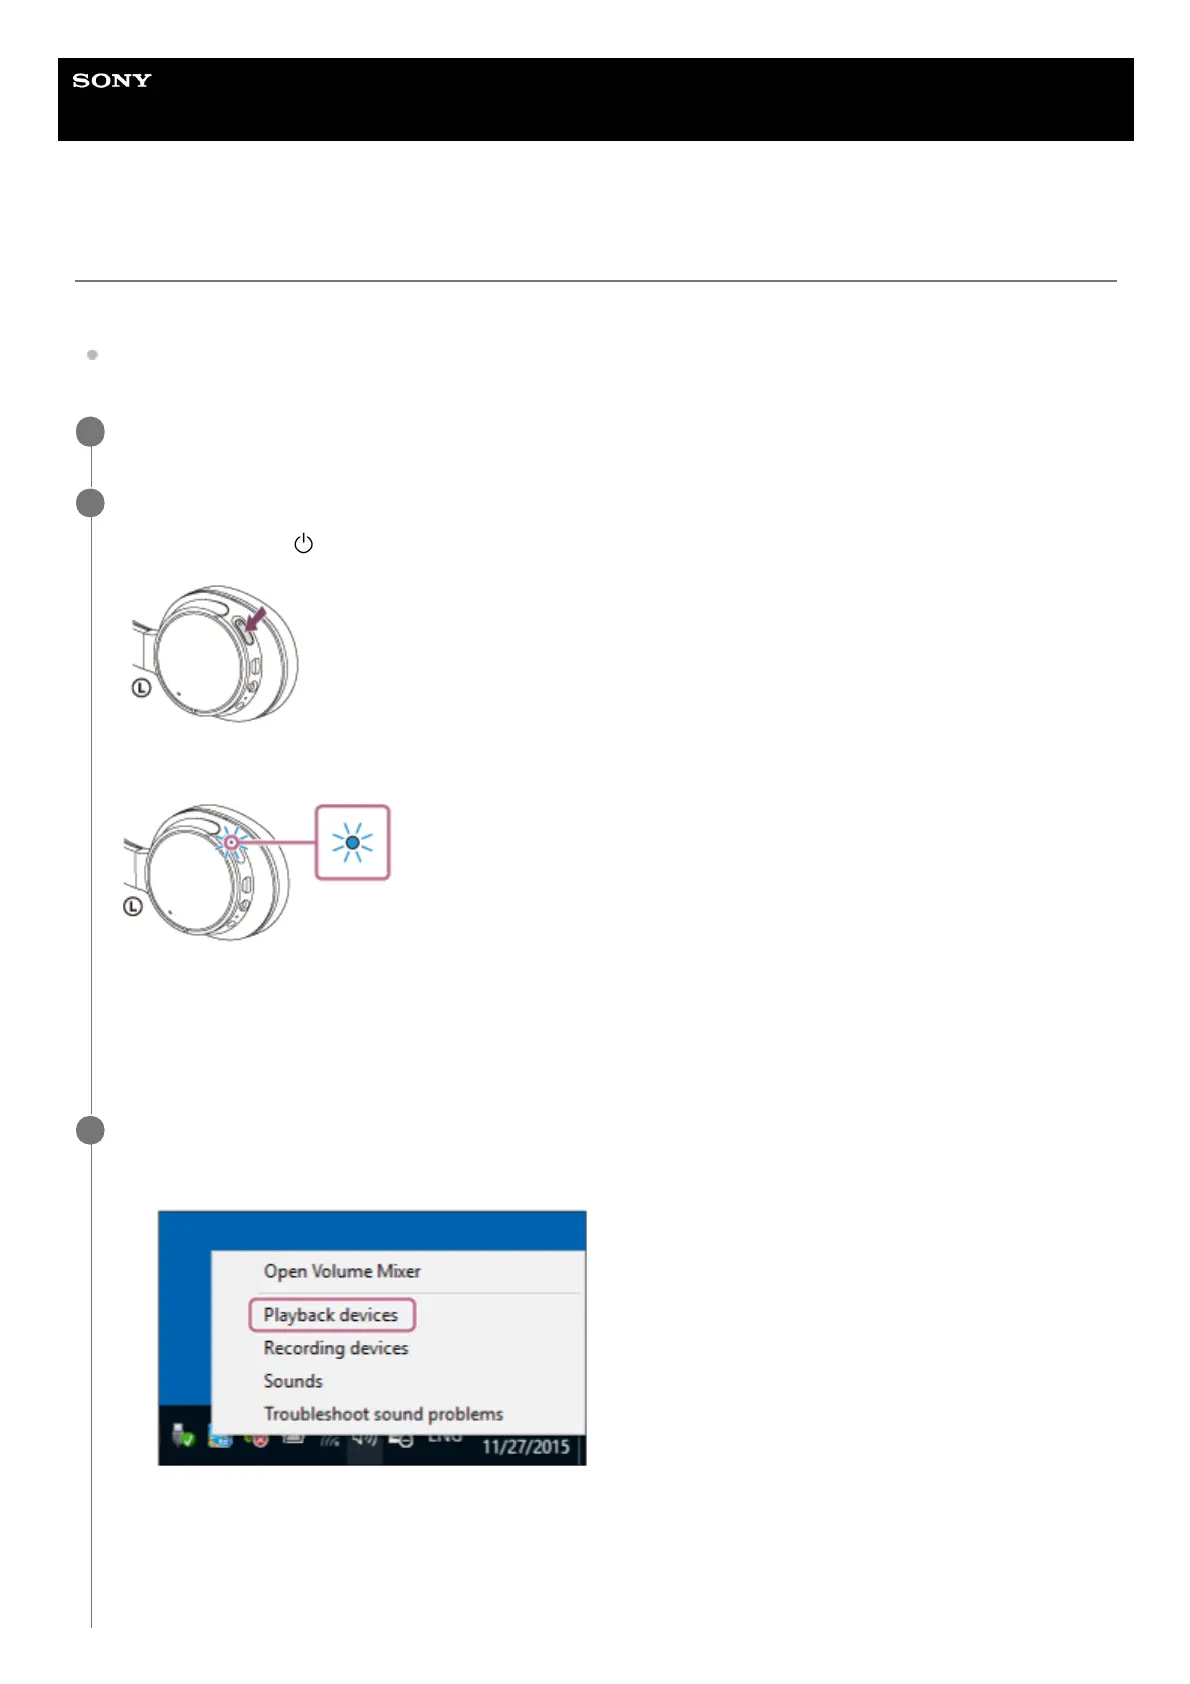
Turn on the headset.
Press and hold the
button for about 2 seconds.
Make sure that the indicator (blue) flashes after you release the button. You will hear a voice guidance “Power on”.
After the headset turns on, if it has automatically connected to the last connected device, you will hear a voice
guidance “BLUETOOTH connected”.
Use the computer to check whether the connection is established. If it is not established, proceed to step 3.
If the computer has connected to the last Bluetooth device connected, disconnect it, then proceed to the next step.
2
Select the headset using the computer.
3
Right-click the volume icon on the windows toolbar, then click [Playback devices].
1.
Right-click [WH-CH700N].
If [WH-CH700N] is not displayed, right-click on the [Sound] screen, then select [Show Disabled Devices].
2.