EasyManua.ls Logo

Sony XE-744 User Manual

Sony XE-744
65 pages
To Next Page IconTo Next Page
Page #1 background imageLoading...
Page #1 background image
SONY
Stereo
Graphic
Egualizer
XE-744
Operating
Instructions
page2'
Before
operating
the
unit,
please
read
this
manual
thoroughly
and
retain
it
for
future
reference.
Mode
d'emploi
page
18
Avant
la
mise
en
service
de
cet
appareil,
prière
de
lire
attentivement
ce
mode
d'emploi
que
l'on
conservera
pour
toute
référence
ultérieure.
Manual
de
instrucciones
pigina
34
Antes
de
utilizar
la
unidad,
lea
este
manual
detenidamente
y
consérvelo
para
futuras
referencias.
ERRAI
egon
MIE
AIALL,
JOA
SERGE,
ER
TF
FOLD
G.F,
For
installation
and
connections,
see
the
supplied
installation/
connections
manual.
Pour
l'installation
et
les
branchements,
veuillez
vous
référer
au
manuel
d'installation/branchements.
Con
respecto
a
la
instalaciôn
y
las
conexiones
consulte
el
manual
de
Instalación/conexiones
suministrado.
MAER
RUE,
NØG
TERRE
TEE,
MAR.
©
1993
by
Sony
Corporation
3-757-068-11
(1)
Question and Answer IconNeed help?

Do you have a question about the Sony XE-744 and is the answer not in the manual?

Sony XE-744 Specifications

General IconGeneral
BrandSony
ModelXE-744
CategoryStereo Equalizer
LanguageEnglish

Summary

Owner's Record

Safety Warning

FCC compliance warning about potential radio interference in residential installations.

Product Features

Spectrum Analyzer Display

Details on the 10-band spectrum analyzer, its patterns, and LCD display.

Graphic Equalizer Functions

Describes the 10-band equalizer, preset curves (POPS, ROCK, etc.), and user memory.

Additional Features

Covers switchable LPF, output level, and adjustable button illumination/brightness.

Important Precautions

Fuse Replacement Guide

Instructions for replacing the fuse, emphasizing correct amperage.

Control Panel Layout

Fader Control Button

Adjusts the balance between front and rear speakers.

Subwoofer Output Control

Manages subwoofer LPF frequency and output level.

Display Window Functionality

Describes the main display area and its indicators.

Display Dimmer Button

Controls the brightness of the display screen.

Button Illumination Select

Allows selection of button illumination color (amber or green).

Level Adjustment Buttons

Used for adjusting various levels and settings.

Spectrum Analyzer Sensitivity

Adjusts the sensitivity for the spectrum analyzer.

Control Panel Layout - Additional Buttons

Equalizer Preset Buttons

Select factory or user-customized equalizer sound curves.

Equalizer Memory Button

Stores custom equalizer sound curve settings.

Reset Button Operation

Resets the unit when controls become unresponsive.

Spectrum Analyzer Display Select

Cycles through different spectrum analyzer visual patterns.

Equalizer Output Select Button

Chooses which speakers receive the equalizer output.

Display Window Indicators

Adjustment Mode Indicator

Shows the current adjustment mode being used.

Subwoofer Level Indicator

Displays subwoofer output level and adjustment status.

Spectrum/Equalizer Display Area

The main area showing spectrum analyzer or equalizer curve data.

Equalizer Output Status

Indicates the selected equalizer output configuration.

Subwoofer LPF Frequency Indicator

Shows the currently set subwoofer LPF frequency.

Equalizer Mode Status

Displays the active equalizer sound-curve mode.

Equalizer Output Selection

Muting the Beep Tone

Procedure to enable or disable audible beep confirmations.

Adjusting Audio with Graphic Equalizer

Select Speaker Output

Choose speakers for equalizer processing using the EQ button.

Enter Sound Curve Set Mode

Use the MEM button to access sound curve adjustment.

Select Frequency to Adjust

Press frequency buttons to select which part of the sound curve to modify.

Graphic Equalizer Adjustment Steps

Adjust Frequency Levels

Use +/- buttons to boost or cut selected frequency levels.

Save Adjusted Sound Curve

Press the MEM button to store the modified sound curve.

Optimizing Sound Adjustment

Frequency Band Adjustment Tips

Advice on setting frequencies to 0 dB for better initial sound tuning.

Storing Custom Equalizer Sound Curves

Prepare Sound Curves for Storage

Adjust sound curves as per previous instructions.

Save Customized Curve to Memory

Press and hold preset buttons 1-5 to store the curve.

Using Preset Equalizer Sound Curves

Select Desired Preset Curve

Press the corresponding button (P, R, J, C, B) for the desired sound curve.

Changing Spectrum Analyzer Display

Cycle Through Display Patterns

Press the DSPL button to switch between various visual patterns.

Spectrum Analyzer Display Customization

Adjust Spectrum Analyzer Sensitivity

Fine-tune the sensitivity range for the spectrum analyzer display.

Subwoofer Output Level Adjustment

Select Subwoofer LPF Frequency

Choose the cutoff frequency for the subwoofer's low-pass filter.

Adjust Subwoofer Output Level

Use +/- buttons to modify the subwoofer's output volume.

Speaker Balance Adjustment (Fader)

Enter Fader Control Mode

Press the FAD button to access front/rear balance settings.

Adjust Front/Rear Speaker Balance

Use +/- buttons to shift sound balance between front and rear speakers.
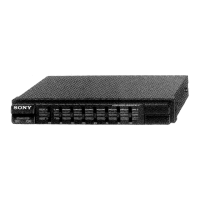
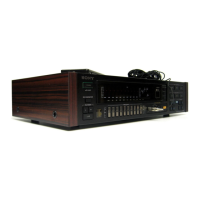
Technical Specifications

Related product manuals