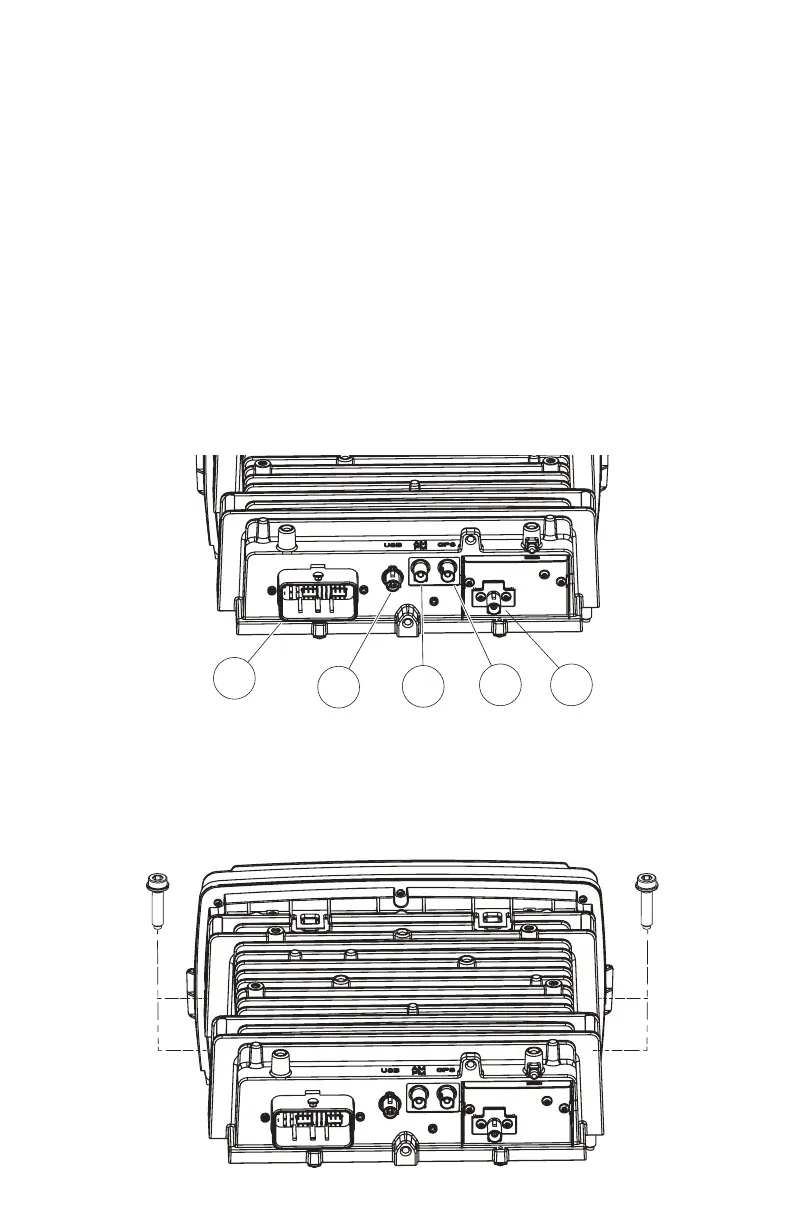
8. Disconnect electrical connections to the head unit.
8.1) Remove the main wire harness connector (1). To remove the main wire harness, depress
the latch lock with a small athead screwdriver and swivel the latch aside. Pull the wire harness
connector to remove from the socket.
8.2) Remove the USB cable connector (2). To remove the USB cable connector, depress the
locking tab with a small athead screwdriver. While depressing the locking tab, pull the USB
cable to release it from the socket.
8.3) Remove the radio antenna cable connector (3). To remove the radio antenna cable
connector, depress the locking tab with a small athead screwdriver. While depressing the
locking tab, pull the antenna cable to release it from the socket.
8.4) Remove the GPS antenna cable connector (4). To remove the GPS antenna cable
connector, depress the locking tab with a small athead screwdriver. While depressing the
locking tab, pull the GPS antenna cable to release it from the socket.
8.5) Remove SiriusXM antenna cable connector, if equipped (5). To remove the Sirius XM
antenna cable connector, depress the locking tab with a small athead screwdriver. While
depressing the locking tab, pull the Sirius XM antenna cable to release it from the socket.
9. Remove four head unit mounting screws using a 3/16” hex driver. Two screws are located at each
side of the head unit chassis. Store these screws in a safe place for re-installation later. Pull the head
unit assembly up and forward to remove.
1
2
3
4 5