14
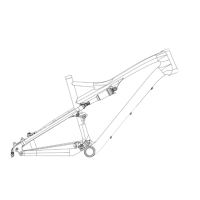
7. INTERNAL ROUTING
The housings must be installed without the fork installed in the frame.
REAR BRAKE:
Starting at the exit port on the inside surface of the non-drive side of the chainstay, route the
housing through the chainstay until it exits the nylon tube inside the frame.
Guide the housing up the down tube until it exits the head tube, then slide a “Churro” foam
tube onto the housing.
Once the Churro is installed, guide the housing back down into the down tube, then guide
the housing out the port on the non-drive side of the head tube.
Finish the brake assembly installation according to the manufacturer’s instructions.
REAR DERAILLEUR (Mechanical):
Starting at the exit port in front of and below the drive side dropout, route the housing
through the chainstay
until it exits the nylon tube inside the frame
.
Guide the housing up the down tube until it exits the head tube, then slide a “Churro” foam
tube onto the housing.
Once the Churro is installed, guide the housing back down into the down tube, then guide
the housing out the larger port on the drive side of the head tube.
Finish the shift assembly installation according to the manufacturer’s instructions.
SHIFT SYSTEM (Shimano Di2 Wired electronic):
Starting at the exit port in front of and below the drive side dropout, route the rear derailleur
(RD) wire through the chainstay until it exits the nylon tube inside the frame.
Route the RD wire out the bottom bracket shell and plug it into a SM-JC41 Junction B box.
Choose where the battery will be placed, then route a battery wire from the battery to the
Junction B box.
Route a wire through the head tube ICR port, down the down tube and out the bottom
bracket, then plug the wire into the Junction B box.
DROPPER POST: The battery can be zip-tied to the cable housing and placed
below the dropper post, inside the seat tube.
STANDARD POST: The battery can be installed inside the seatpost, using the
30.9mm seatpost Di2 battery grommet system.
If the battery does not fit inside the seatpost or seat tube, an alternative is to
place the battery inside the top tube, behind the head tube.
Complete the assembly and installation of the wiring and shift system according to the
manufacturer’s instructions.
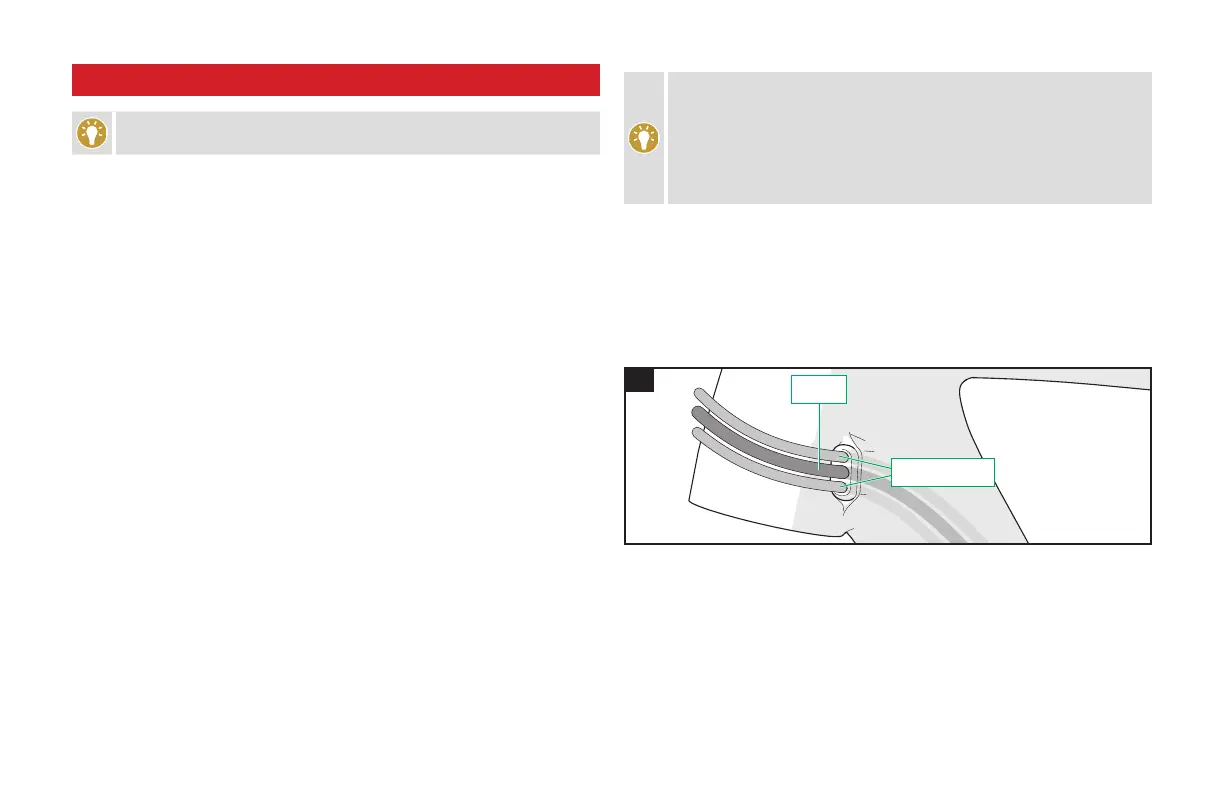
HEAD TUBE ICR PORT:
The Epic EVO comes with two head tube ICR port guides.
Use the 3-hole guide if:
• You’re running a mechanical or wired electronic rear derailleur and a cable actuated dropper post
1
REAR
BRAKE
REAR SHIFT AND/OR
DROPPER POST
Use the 1-hole guide if:
• You’re running SRAM AXS wireless shifting and not running a cable actuated dropper post