Hardware layout UM1669
20/39 DocID025174 Rev 1
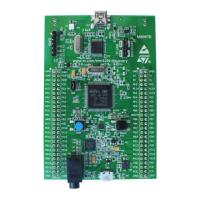
The STM32F401VCT6 MCU controls this motion sensor through the SPI interface.
4.10 JP2 (Idd)
Jumper JP2, labeled Idd, allows the consumption of STM32F401VCT6 to be measured by
removing the jumper and connecting an ammeter.
• Jumper on: STM32F401VCT6 is powered (default).
• Jumper off: an ammeter must be connected to measure the STM32F401VCT6 current,
(if there is no ammeter, the STM32F401VCT6 is not powered).
4.11 OSC clock
4.11.1 OSC clock supply
If PH0 and PH1 are only used as GPIOs instead of as a clock, then SB14 and SB16 are
closed and R24, R25 and R66 are removed.
MCO from ST-LINK (from MCO of the STM32F103)
This frequency cannot be changed, it is fixed at 8 MHz and connected to PH0-OSC_IN of
the STM32F401VCT6. The configuration needed is:
– SB14, SB16 OPEN
– R25 removed
– R66 soldered
Oscillator onboard (from X2 crystal)
For typical frequencies and its capacitors and resistors, please refer to the
STM32F401VCT6 Datasheet. The configuration needed is:
– SB14, SB16 OPEN
– R25 soldered
– R66 removed
Oscillator from external PH0 (from external oscillator through pin 7 of the P2 connector)
The configuration needed is:
– SB14 closed
– SB16 closed
– R25 and R66 removed
4.11.2 OSC 32 KHz clock supply
If PC14 and PC15 are only used as GPIOs instead of as a clock, then SB17 and SB18 are
closed, and R21 and R22 are removed.
Oscillator onboard (from X1 Crystal (not provided))
The configuration needed is:
– SB17, SB18 OPEN
– C20, C28, R21 and R22 soldered