BASH_02_1.FM
6 Inspection and maintenance
44
6.8.8 Setting hoist limit switch
The cover of the limit switch must be removed to set the contacts. This exposes live
contact connections. There is thus a danger of contact with live parts!
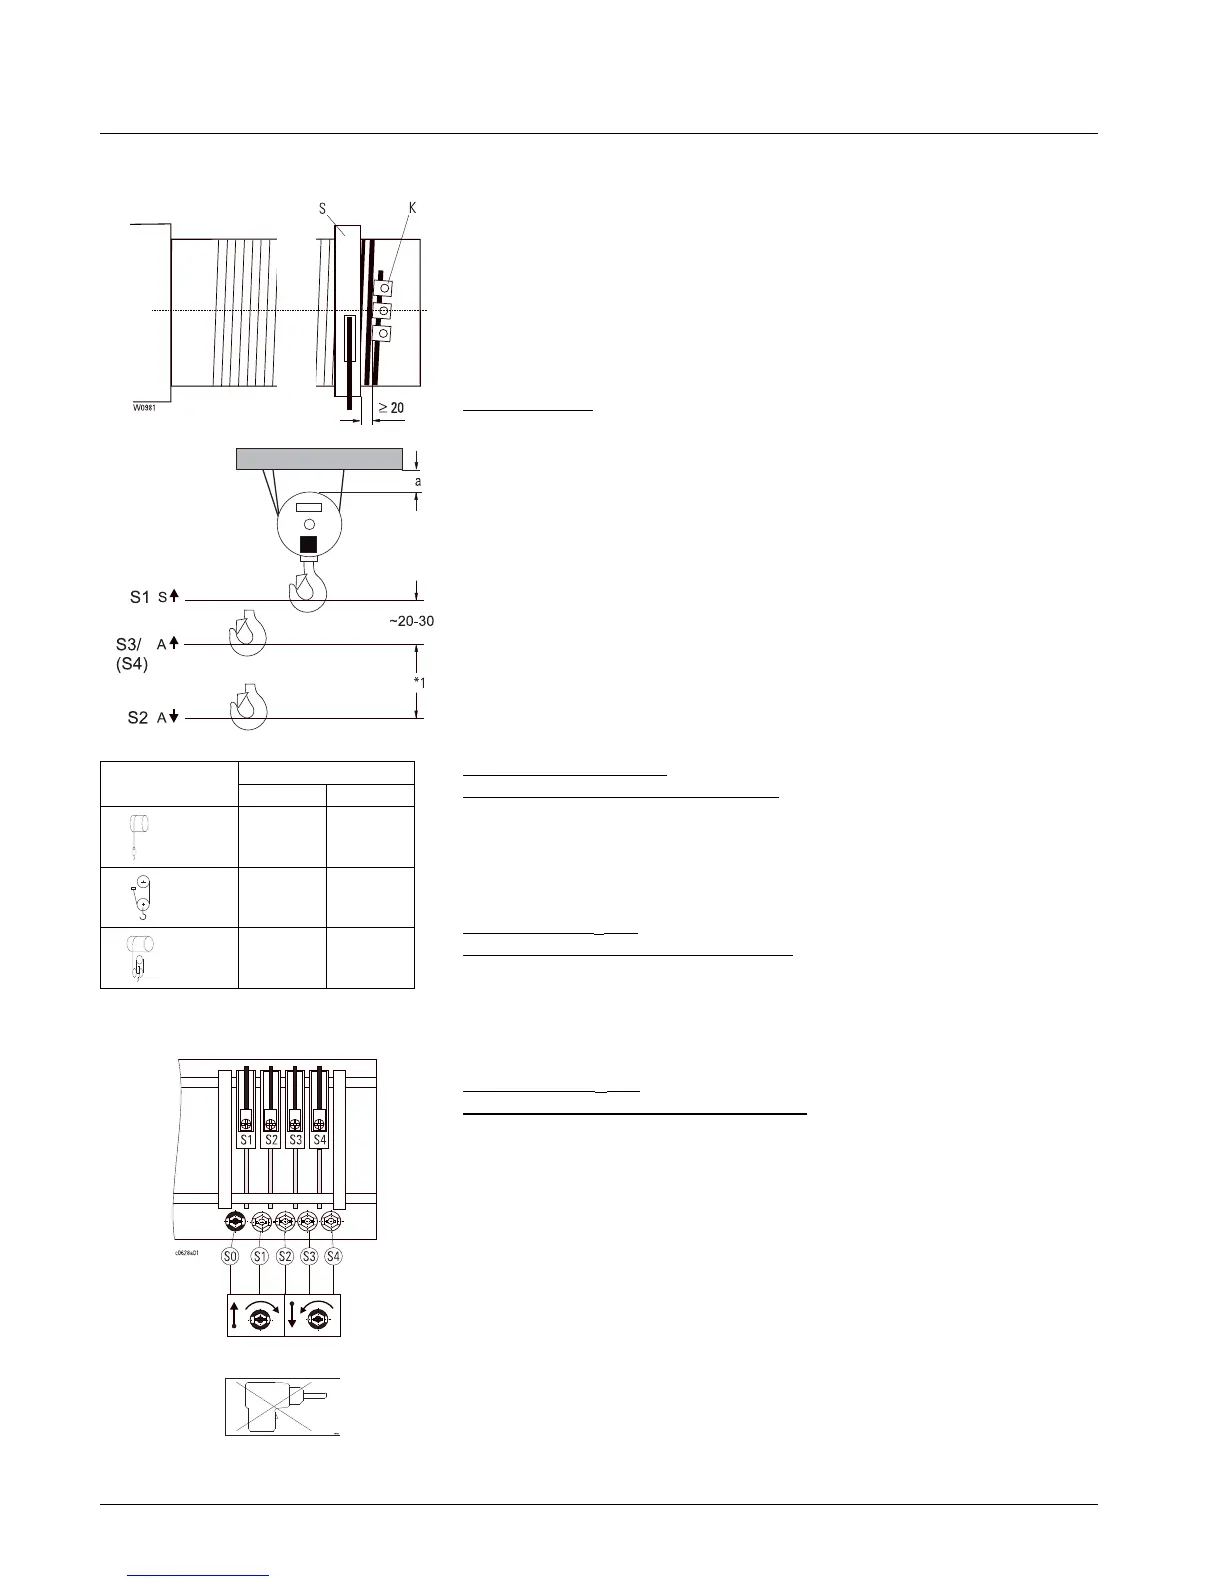
The limit switch can be adjusted at the setscrews (S1)-(S3) or (S1)-(S4):
Turning to the left: switching point is moved "downwards",
Turning to the right: switching point is moved "upwards".
Adjusting en bloc
All the cam discs can be moved together with the aid of the black setscrew (S0). The
settings of the individual contacts relative to one another remain unchanged.
Set the limit switch using a socket spanner (04 430 50 99 0) and without using exces-
sive force. Do not use a power screwdriver or similar.
• Adjust the switching points in the following sequence:
Emergency limit switch:
1. A
↑ (S3/S4))
2. S
↑ (S1)
2. A↓ (S2)
Switching point A
↑ (S3/S4)
"Emergency limit switch top hook position"
• Lift bottom hook block 2/1 to a+10 mm or to a+5 mm for 4/1 (sketch, table).
If necessary turn setscrew (S3/S4 and S1) to the right beforehand.
• Turn setscrew (S3 or S4) to the left until contact S3 or S4 switches audibly.
• Check cut-off point in main and creep hoist
Switching point S
↑ (S1)
"Safety limit switch above top hook position"
• Lift bottom hook block until emergency hoist limit switch is reached, if necessary
turn setscrew (S1) to the right beforehand.
• Turn setscrew (S1) to the left until contact S1 switches audibly.
• Turn setscrew (S1) back to the right by approx. ½ turn.
Switching point A
↓ (S2)
"Emergency limit switch bottom hook position"
(Minimum clearance between rope guide (S) and clamping claws (K) for rope
anchorage = 20 mm, see sketch)
Set bottom hook position so that the bottom hook block does not touch the ground
(would cause slack rope).
• Lower bottom hook block to desired hook position, if necessary turn setscrew (S2)
to the left beforehand.
• Turn setscrew (S2) to the right until contact S2 switches audibly.
• Check cut-off point in main and creep hoist.
a [mm]
50 Hz 60 Hz
1/1
2/2-1
130 150
2/1
4/2-1
70 80
4/1 40 50
10.08
*1 Effective hook path


 To Next Page