Button
A.
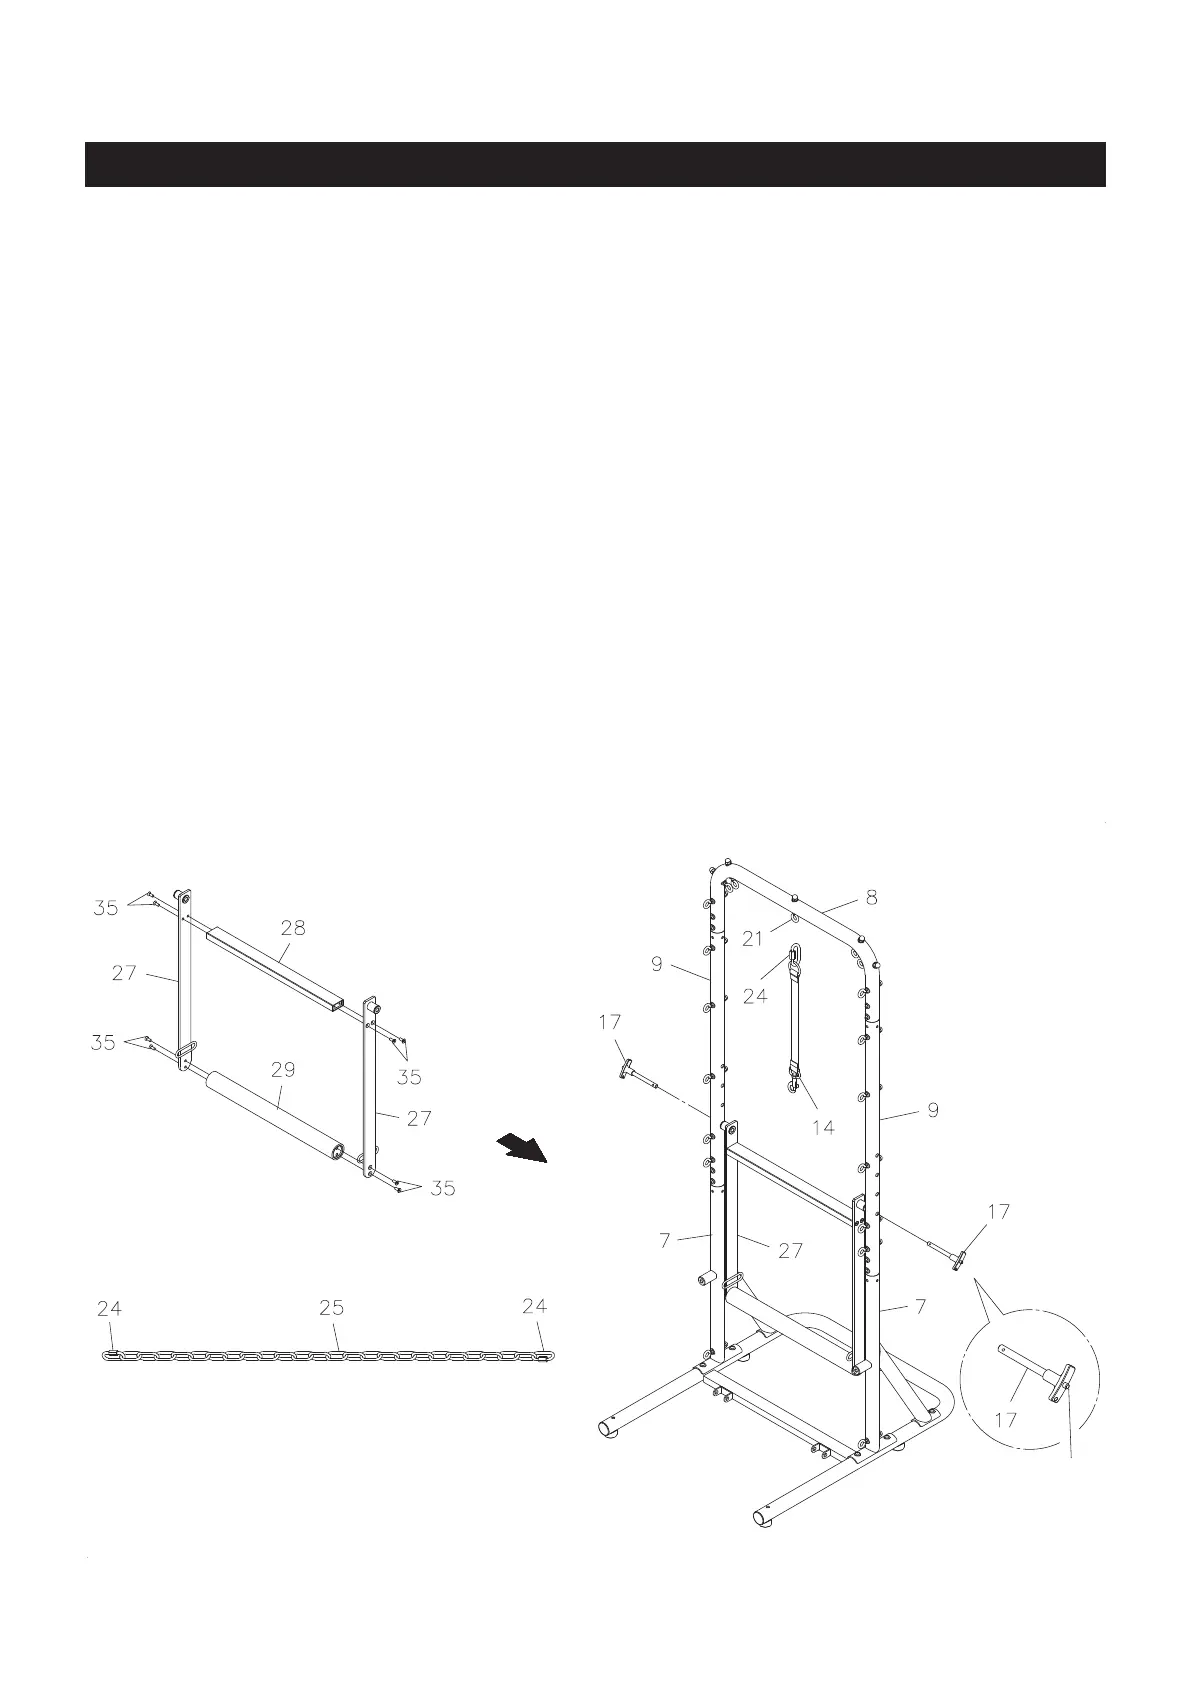
STEP 4
NOTE:
ASSEMBLY INSTRUCTIONS
10
Refer to illustration A. Bolt the PUSH-THRU BARS(27), CROSSING BAR(28), and HANDLEBAR(29)
together with FLAT SOCKET HEAD BOLTS(M6x1x20mm)(35). Attach the PUSH-THRU BAR ASSEMBLY
(27) to one of the adjustment holes in the UPRIGHTS(9) with the LOCKING PINS(17). Always make sure
SAFETY CHAIN(25) is connected with the LINKS(24) when the PUSH-THRU BAR(27) is in use.
STEP 5
NOTE: Always use SECURING STRAP(14) to keep the PUSH-THRU BAR(27) in a secure position when
not in use.
Attach the SECURING STRAP(14) onto the center EYEHOOK(21) with the LINK(24) on the top of the
TOP CROSS BAR(8).
1. There are four adjustment holes in each UPRIGHT(9) that allow you to attach the PUSH-THRU
BAR(27)
2. Refer to the inset drawing. Push in the button on the “T” end of the LOCKING PIN(17) to release
the Steel Ball on the other end of the pin. Then you can insert the LOCKING PIN(17) into the
adjustment hole. Push the button to remove the pin.