EasyManua.ls Logo

Star Tsp 100 - User Manual

Star Tsp 100
3 pages
Print Icon
To Next Page IconTo Next Page
Loading...
Star Tsp100/143 Ethernet (Android)
This guide is for Android till systems only.
Setting up the printer
What’s in the box?
In the box find the following items:
Star TSP Printer
Power Supply
IEC Cable (kettle lead)
Ethernet cable
Paper roll insert guide (to use 58mm rolls)
Holder plate (for use with mounting plate purchased separately)
Roll of 80mm paper, rubber feet (for mounting vertically)
Front Back
Plugging in the printer
1. Plug the IEC cable (kettle lead) into the power supply and plug into a wall/plug socket
2. Plug the end of the power supply into the back of the Star TSP printer, in the port on the
far right (pictured below)
3. Plug the cash drawer’s cable into the black ‘DK’ port, next to the power port on the back
of the Star TSP printer (the cash drawer will click when fully pushed into place)
4. Plug the ethernet cable into the ethernet port, , this port is on the far left
5. Plug the other end of the ethernet cable into your router
Note: Leave the printer turned Off, you will be prompted during the install steps when to turn it
on
Finding the printer’s IP Address
After the Printer has been set up and turned on, there should be a solid blue light on the printer.
If the light is flashing this indicates that the printer does not have a connection to the router. You
will need to check the connections of the ethernet cable at both ends or restart your router.
Your printer makes finding the IP Address nice and easy, follow the steps below to identify what
the printer’s IP Address is:
Question and Answer IconNeed help?

Do you have a question about the Star Tsp 100 and is the answer not in the manual?

Summary

Setting up the printer

Whats in the box?

Lists the items included with the Star TSP printer package.

Plugging in the printer

Step-by-step instructions for connecting the printer's power and network cables.

Finding the printers IP Address

Procedure to identify the printer's IP address via a network configuration printout.

Adding the printer to your Android till system

Epos Now till app - Receipt printing

Guide to configuring the printer for receipt printing within the Epos Now Android application.

Order printing configuration

Back Office Order Printer Setup

Steps to assign categories to specific order printers in the Back Office system.

Epos Now till app - Order printing

Instructions for setting up the printer for order printing within the Epos Now Android application.

Overview

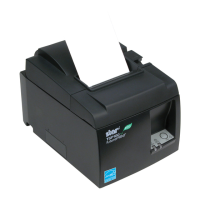
The provided manual describes the setup and configuration of a Star TSP100/143 Ethernet printer for use with Android till systems, specifically focusing on receipt and order printing functionalities within the Epos Now till app.

Function Description

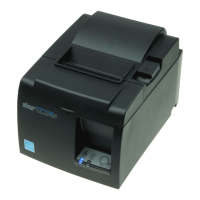
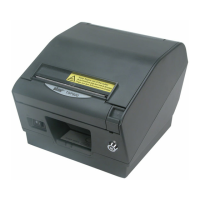
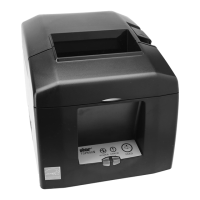
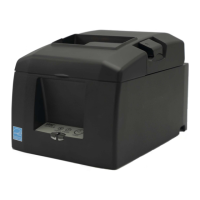
The Star TSP100/143 Ethernet printer is designed to facilitate receipt and order printing in retail and hospitality environments using Android-based point-of-sale (POS) systems. It connects to the network via an Ethernet cable, allowing it to receive print commands from the Epos Now till app. The printer is capable of printing both customer receipts and internal order tickets, such as those for kitchens, bars, or front-of-house operations. A key feature is its ability to integrate with a cash drawer, which can be triggered to open automatically upon certain transactions, like a "No Sale" or a completed payment. The printer supports standard 80mm paper rolls and can also accommodate 58mm rolls with the use of an included insert guide. It is designed for ease of setup and operation within a networked environment, providing a reliable printing solution for businesses.

Usage Features

The printer's usage is primarily managed through the Epos Now till app on an Android device.

Initial Setup and Connection:

  • Physical Connection: The printer requires a power supply connected via an IEC cable (kettle lead) to a wall socket. The power supply then connects to the printer's power port. An Ethernet cable connects the printer to the network router. For cash drawer integration, a dedicated cable connects the cash drawer to the printer's "DK" port.
  • Power On/Off: The printer has a power switch. During initial setup for IP address identification, specific instructions involve holding the "Feed" button while switching the printer on.
  • Indicator Lights: A solid blue light on the printer indicates a successful connection to the router. A flashing blue light signals a connection issue, prompting users to check cables or restart the router.
  • IP Address Identification: The printer offers a convenient way to identify its IP address. By holding the "Feed" button while powering on, the printer will perform a self-test and print a network configuration report, which includes its IP address. This IP address is crucial for configuring the printer within the till app.

Receipt Printing Configuration (Epos Now Till App):

  • Accessing Settings: Within the Epos Now till app, users navigate to "Front Till" > "3 lines" (top left corner) > "Settings" > "App Settings" > "Setup Printer."
  • Manufacturer Selection: The printer's manufacturer must be set to "Star TSP100 (Ethernet)" from a dropdown menu.
  • IP Address Entry: Once the system detects the printer, the previously identified IP address must be entered into the app.
  • Saving Changes: After entering the IP address, users confirm with "OK" and then use the "back arrow x 2" to save the changes.
  • Testing Receipt Printing: To test, users can perform a "No Sale" transaction (which should trigger the cash drawer) or process a test product payment. A successful test involves a printed receipt and the cash drawer opening.

Order Printing Configuration (Back Office and Till App):

  • Back Office Category Setup: Before configuring order printing in the till app, categories in the Epos Now Back Office need to be assigned to specific order printers (e.g., kitchen, bar, front). This involves navigating to "Back Office" > "Categories," selecting a category, and using the "Order Printer / Display" tab to choose the desired printer from a dropdown menu. Changes are saved by selecting "Update." This process is repeated for all relevant categories.
  • Till App Order Printing Setup:
    • Accessing Settings: Similar to receipt printing, users go to "Front Till" > "3 lines" > "Settings" > "App Settings."
    • Offline Order Printing: The "Offline Order Printing" toggle must be switched on (it will appear blue).
    • Adding Printer: A "+" button (next to the toggle) is used to add an order printer.
    • Printer Naming: Users assign a descriptive name to the printer (e.g., "bar," "kitchen," "front") corresponding to the Back Office setup.
    • Manufacturer Selection: Again, "Star TSP100 (Ethernet)" is selected as the manufacturer.
    • IP Address Entry: The printer's IP address is entered.
    • Customization: Users can adjust font size, the number of copies, and choose whether the printer should beep when printing.
    • Saving Changes: "OK" is selected, followed by "back arrow x 2" to save.
  • Testing Order Printing: To test, users add an item to the transaction panel, then select "Order Layaway" followed by "Order Anyway." The Star printer should then print the order.

Maintenance Features

The manual provides limited explicit maintenance features, but implicitly suggests some best practices for ensuring continued operation:

  • Connection Verification: Regularly checking the Ethernet cable connections at both the printer and the router is crucial, especially if the blue indicator light is flashing, indicating a network connection issue.
  • Router Restart: In cases of persistent connection problems, restarting the router is suggested as a troubleshooting step.
  • Paper Management: The printer uses paper rolls (80mm or 58mm with guide). Users should ensure a sufficient supply of paper and replace rolls as needed to prevent interruptions in printing. The manual implies that the printer is designed for easy paper roll loading, though specific instructions for this are not detailed.
  • Firmware/Software Updates: While not explicitly detailed in the provided text, typically, such devices may require occasional firmware updates for optimal performance and compatibility. However, the manual focuses on the initial setup and configuration within the Epos Now app.
  • Physical Care: Keeping the printer in a clean environment and free from obstructions would contribute to its longevity. The mention of "rubber feet (for mounting vertically)" suggests options for placement that might help with stability and airflow, indirectly contributing to maintenance by preventing damage from falls or overheating.

The manual emphasizes a user-friendly approach to setup and configuration, making it accessible even for those with limited technical expertise, by guiding them through each step within the Epos Now till app and providing clear indicators for troubleshooting common issues like network connectivity.

Star Tsp 100 Specifications

General IconGeneral
Auto CutterYes
Printing MethodDirect Thermal
Print Speed250 mm/sec
Resolution203 dpi
InterfaceUSB, Ethernet

Related product manuals