How to install GT Mini 3330
Note: The touchscreen controller must connect directly to the codec; do not
connect the touchscreen controller via a switch to the codec.
Note: If you are using the StarLeaf Conference Phone 2220, refer to Installing the
Conference Phone 2220 (p23).
2. Using an Ethernet cable, connect the Network port on the rear of the codec to an
Ethernet switch in your network. The Ethernet port is a 10/100/1000 Mbit/s auto-sensing
port and is set to ‘auto’ by default.
Note: In all cases, the speed and duplex settings at either end of the connection must
be identical. Using non-matching settings causes severe packet loss.
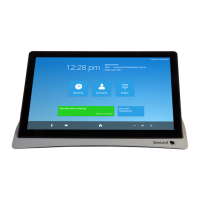
To configure the network speed and duplex settings of the codec’s Network port: on
the touchscreen controller that you have connected to the codec, go to settings >
networking > network port speed.
3.
Connect one telepresence screen to Video Out A. If you have a second telepresence
screen, connect it to Video Out B. (Note: on older systems, if you have only one screen,
connect it to the port labeled: HDMI 2.)
4. Connect the camera. One of:
l
PTZ camera: connect the camera to Camera Control and to Camera In and then
connect power to the camera
l
Webcam: connect the camera to the lower of the two USB ports
5.
Connect the microphone to Microphone 1. (Note that you can, instead, use a
microphone connected to Audio In. If you do so, refer to Using the line-in connector
and to Audio settings for Group Telepresence (p18)).
6. Using the supplied AC/DC adaptor and power cable, connect power to the codec.
The power LED on the side of the codec lights.
StarLeaf GT Mini, 01 February 2018 Page 10 of 31