749.1 User Guide 4 Ver 1.0
The L. S. Starrett Company 6/8/2023
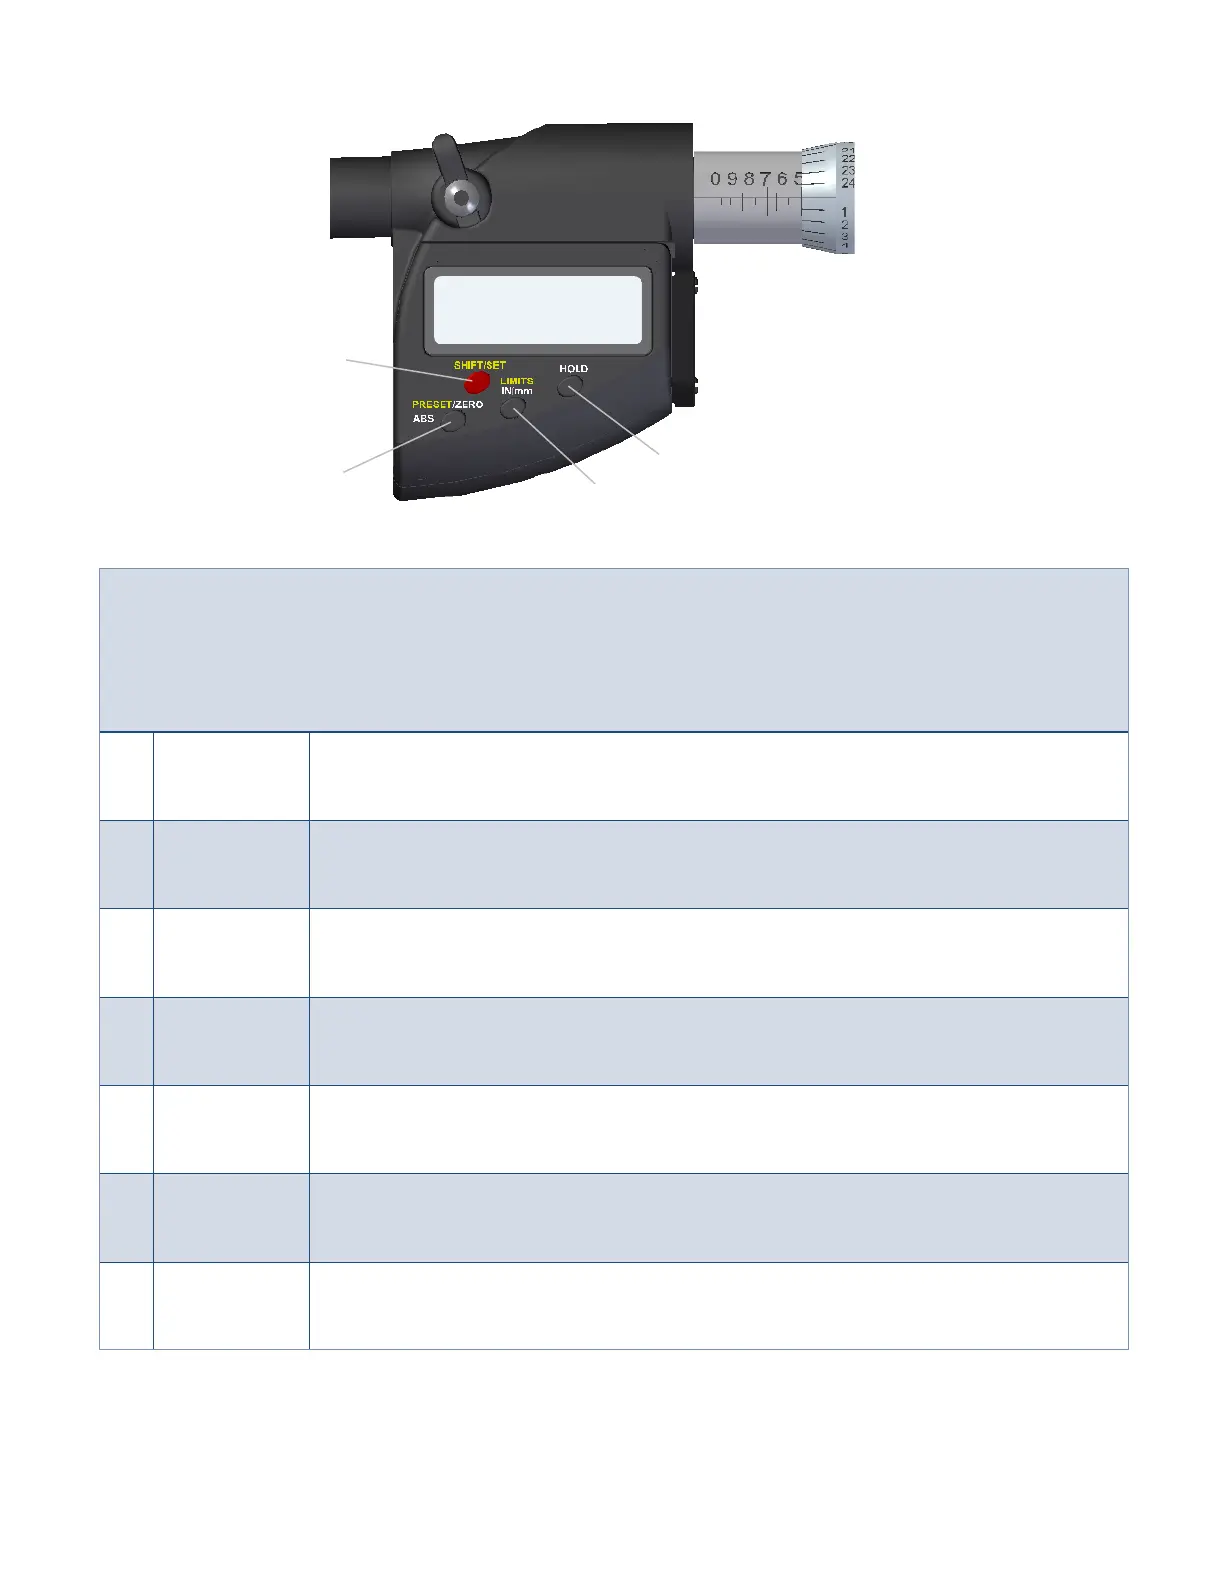
1.3 Button Descriptions and Functions
The functions printed in yellow; LIMITS and PRESET, are used in conjunction with the SHIFT/SET button also printed in
yellow. To enable these functions press the SHIFT/SET button first. The SET (S) icon will appear in the top left corner
of the display, and then press the button for the required function. To Power on the tool move the thimble or press
any button. The tool will turn off automatically after 20 minutes if not being used.
1 SHIFT/SET
Dual function button used to enable the, Preset and the Limits function. When enabled the
SET (S) icon will be displayed on the top left corner of the display.
2 PRESET
Press the SHIFT/SET button and then press the PRESET button to enable the PRESET
function. Refer to the section “Setting PRESET” on pg.6.
3 ZERO
Press and release the ZERO button and the display will zero. The spindle must not be moved
until the Zero Sequence has elapsed. See “Zero Sequence” on pg.3.
4 ABS
Press and hold the button for 2 seconds enables ABS mode. Press and hold for 2 more
seconds to exit the ABS mode.
5 LIMITS
Press the SHIFT/SET button then press the LIMITS button to enable the function. Refer to
the section, “Setting the Limits” on pg.7.
6 IN/mm Toggles the display between English or Metric units.
7 Hold
Press and hold the button for a second will freeze the display and the word “HOLD” will
appear. A second press and the display will update to the current position reading.
1
5/6
7
Fig.3
2/3/4